Customer Signup and Verification In The Store
You can create a verification process for customers when they sign up. Follow these steps to learn how to do it:
Step 1: Log in to the Yelo admin dashboard, where your monthly sales, revenue, and orders can be viewed.
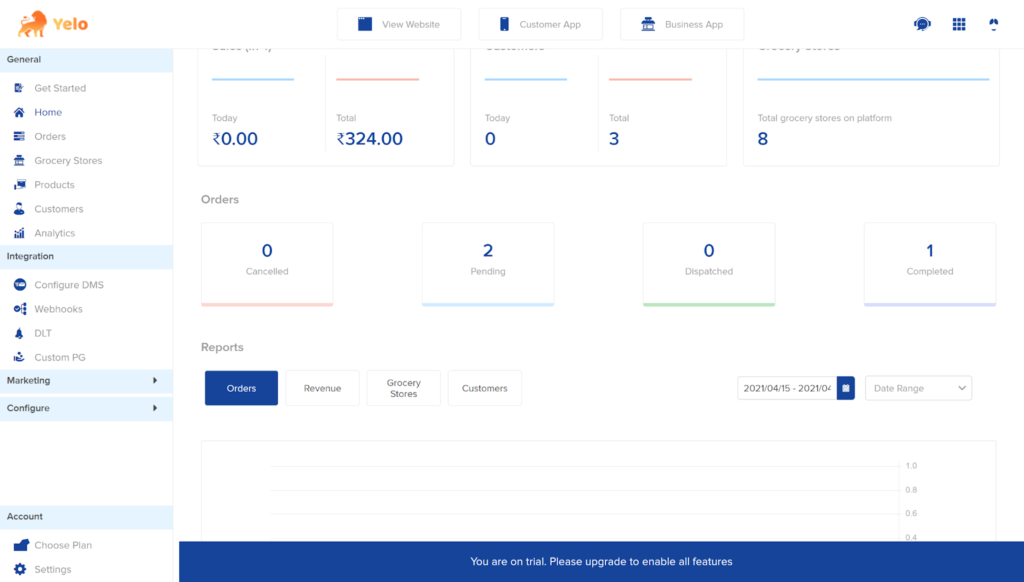
Step 2: On the left side of the dashboard, click on ‘Configure’ and then ‘User Settings’. Select ‘Customer’.
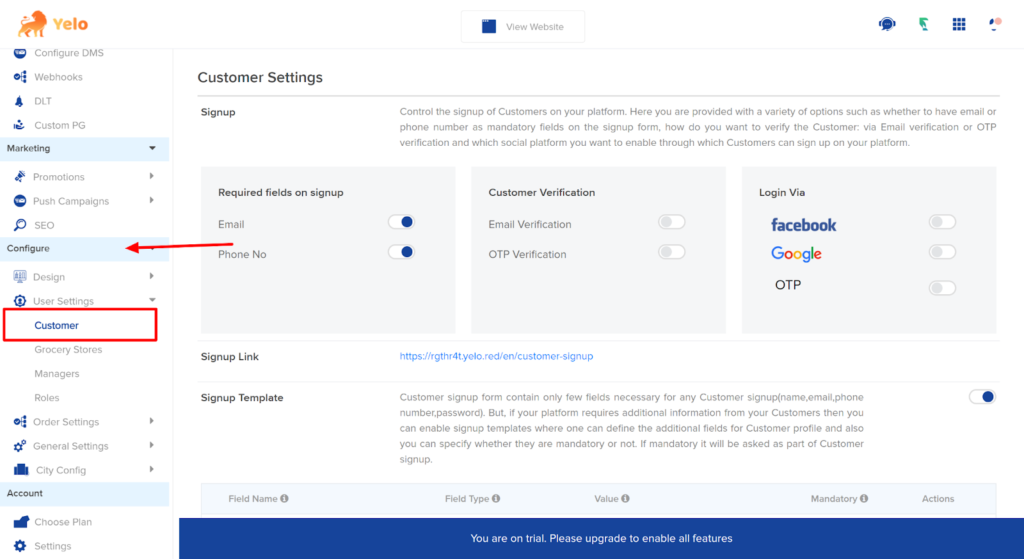
Step 3: Here, enable the Email Verification tab and OTP verification toggle.
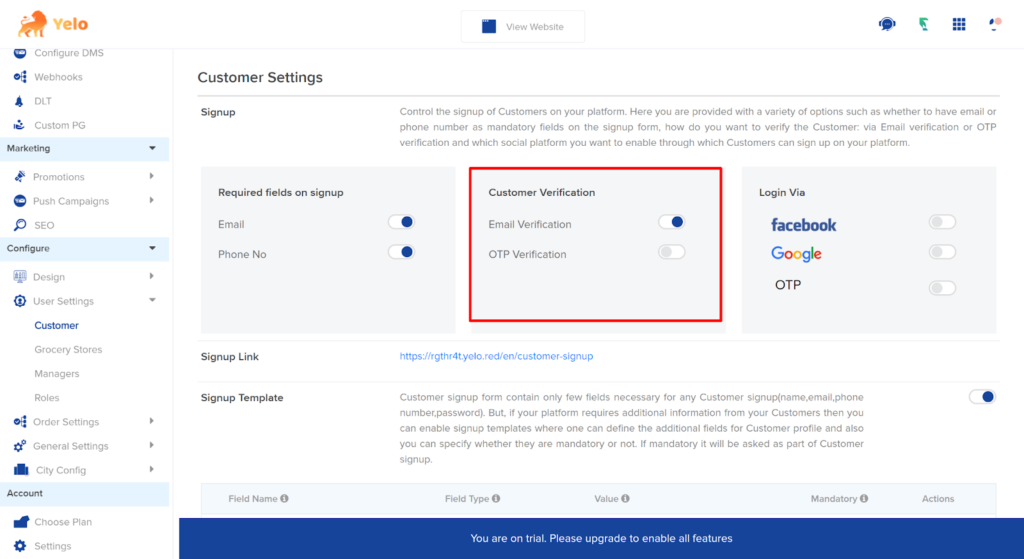
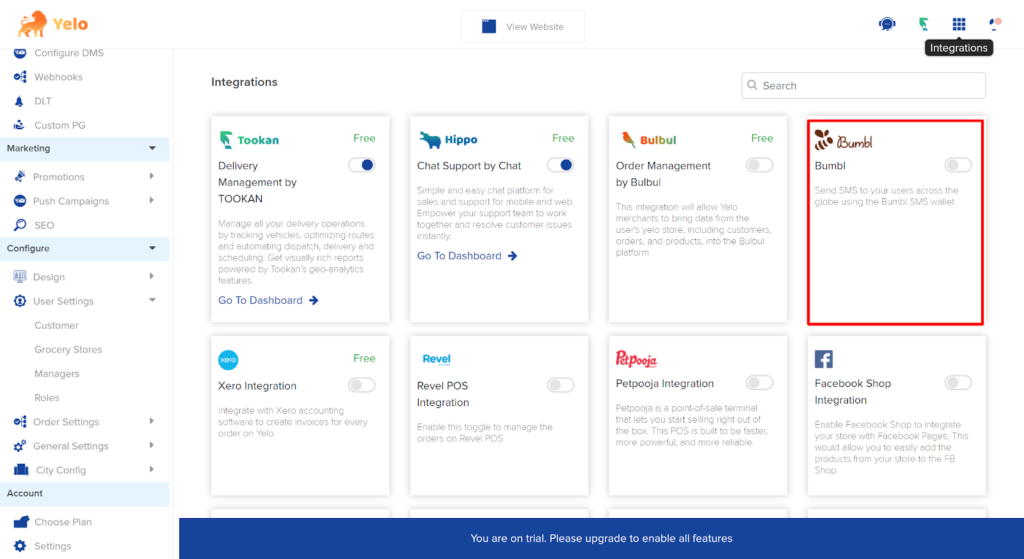
Step 4: To enable OTP verification, you are required to activate the SMS gateway extension through Bumbl.
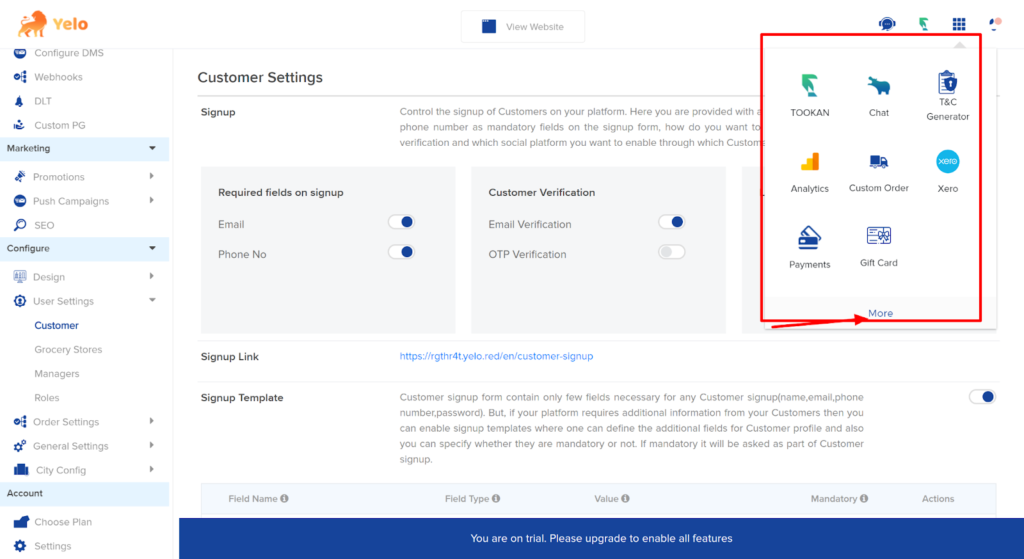
Step 5: Find the Bumbl extension by clicking ‘more’ and activating the extension.
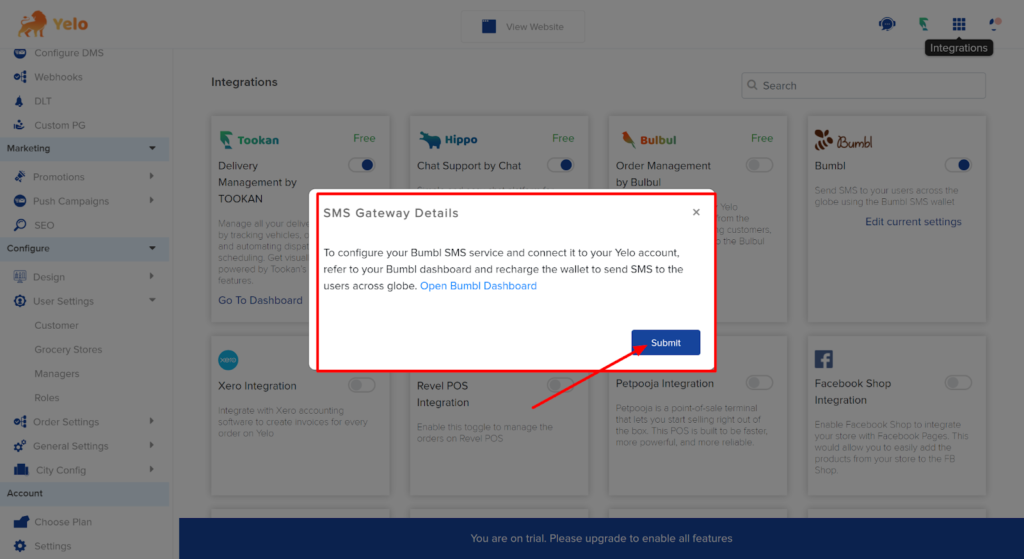
Step 6: Click on ‘Submit’ and your extension will be enabled.
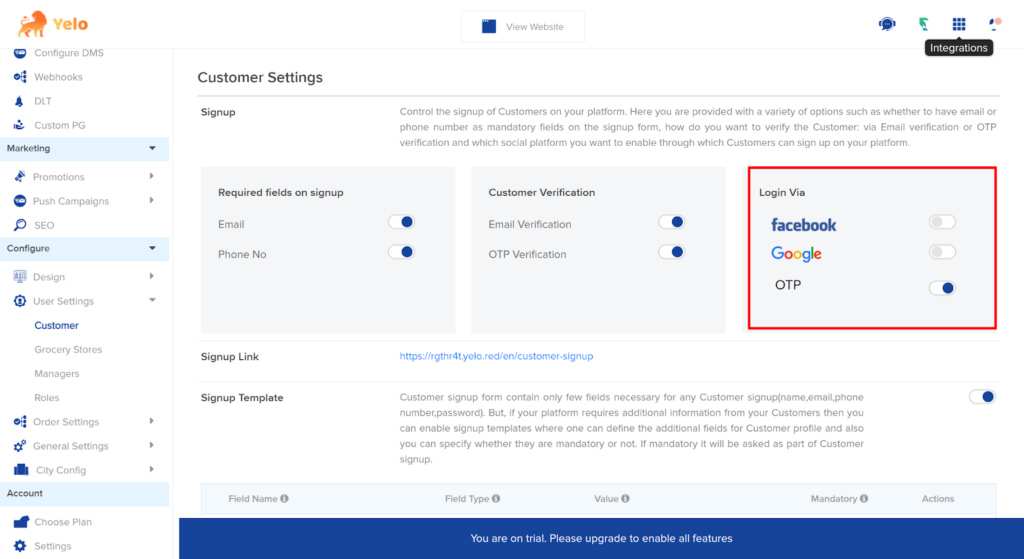
Step 7: Now, you can activate the OTP verification tab. You can create the option to log in for customers via Facebook, Google, or OTP.
Step 8: Next, you can create a Signup template for your customers. Toggle the Signup template button so that it’s on.
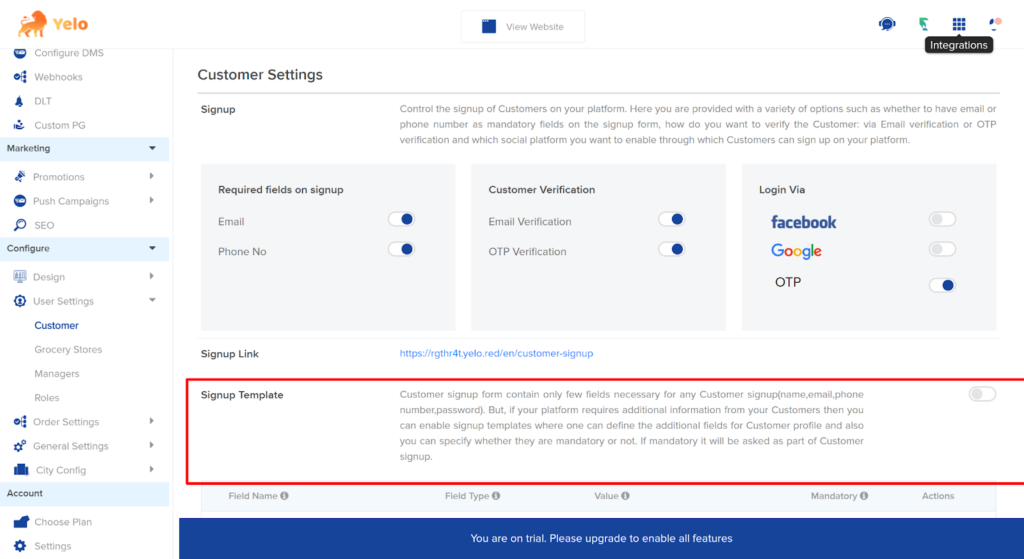
Step 9: After putting it on, scroll down to add fields to the signup template.
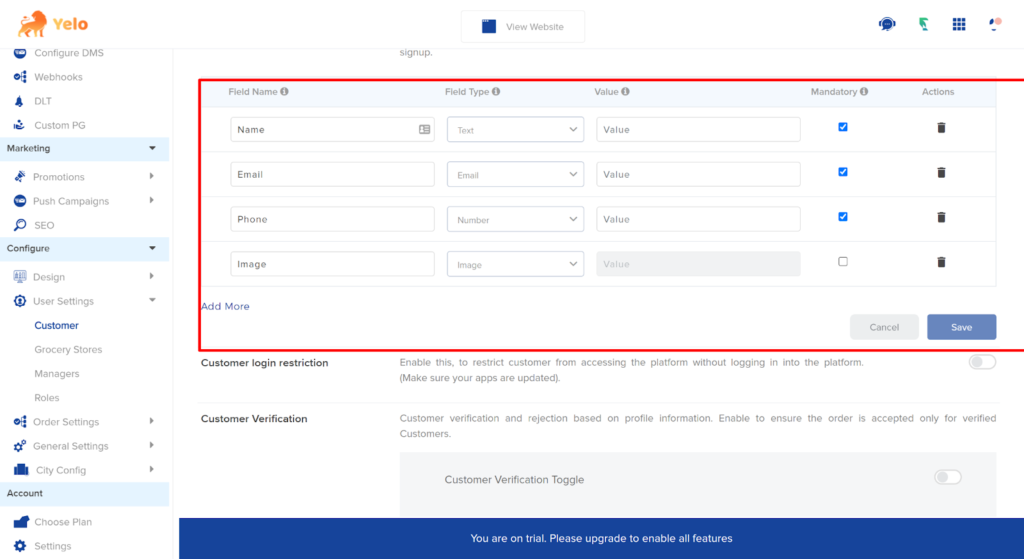
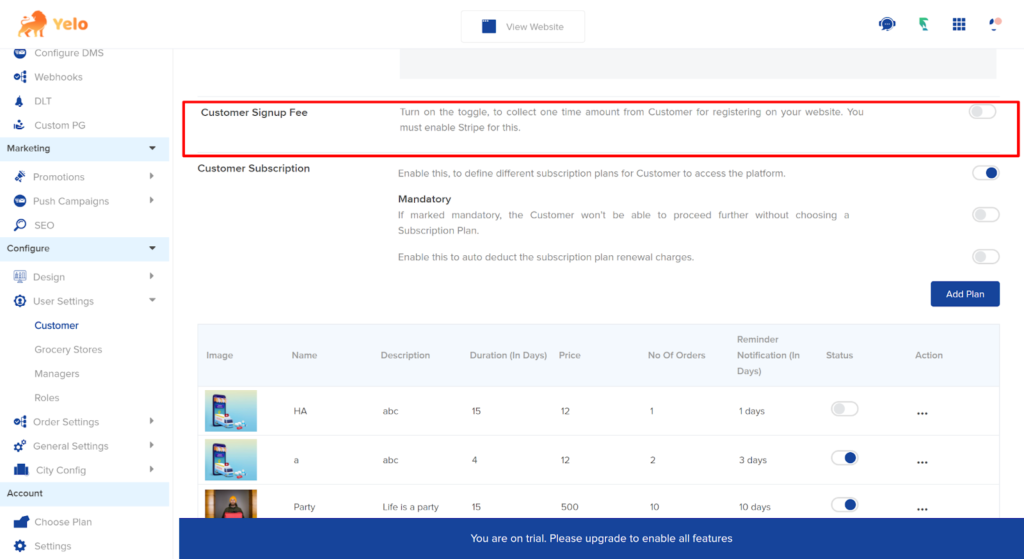
Step 10: Next, you can add the Customer Signup Fee by activating the button. Make sure to enable the stripe button.
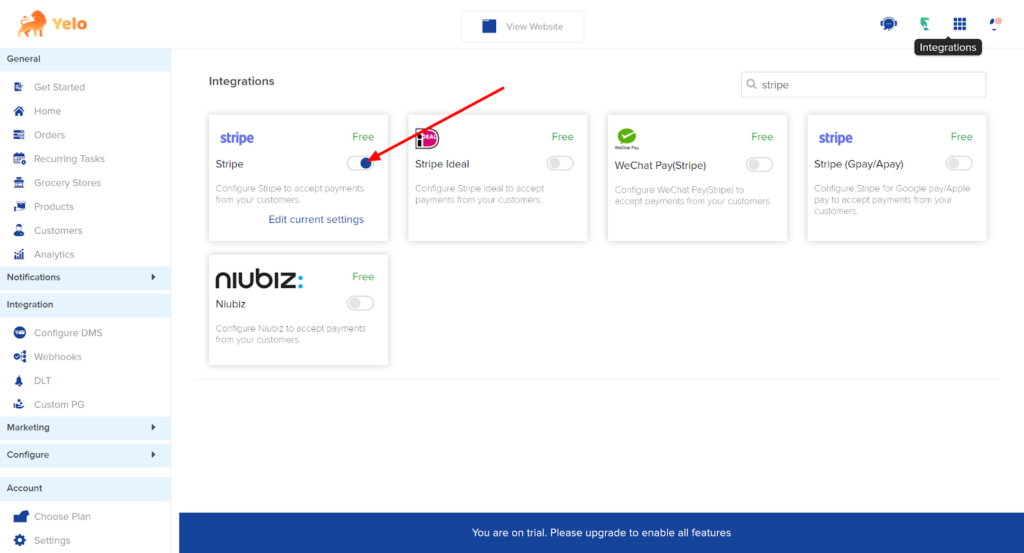
To enable the stripe option, click on ‘Integrations’ and search for ‘Stripe’.
Step 11: Toggle the Stripe button so that it’s on and return to Customer Settings.
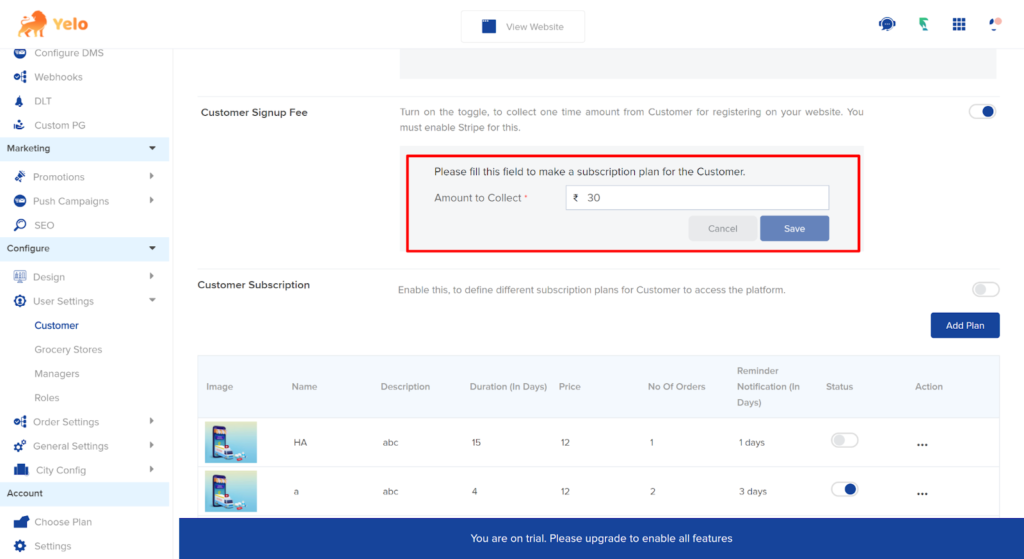
You can choose to create a customer signup fee for one time.
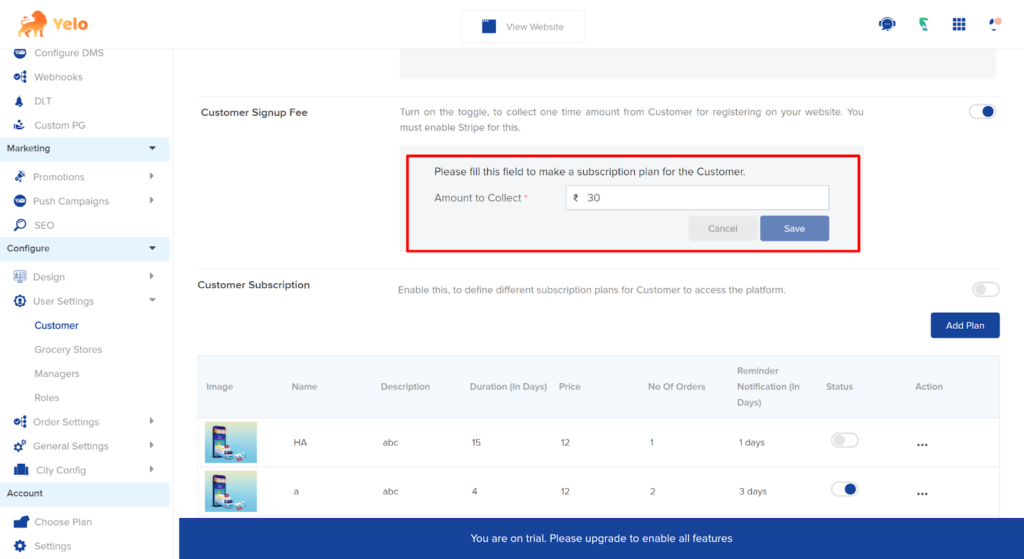
You can also create different subscription plans for customers rather than a one time fee. Enable the customer subscription option in case you want to do this.
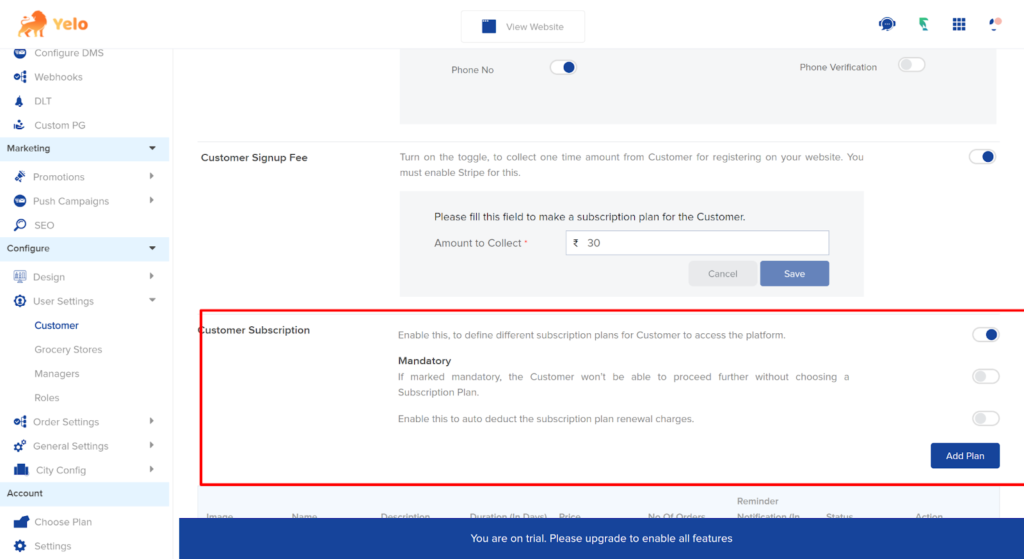
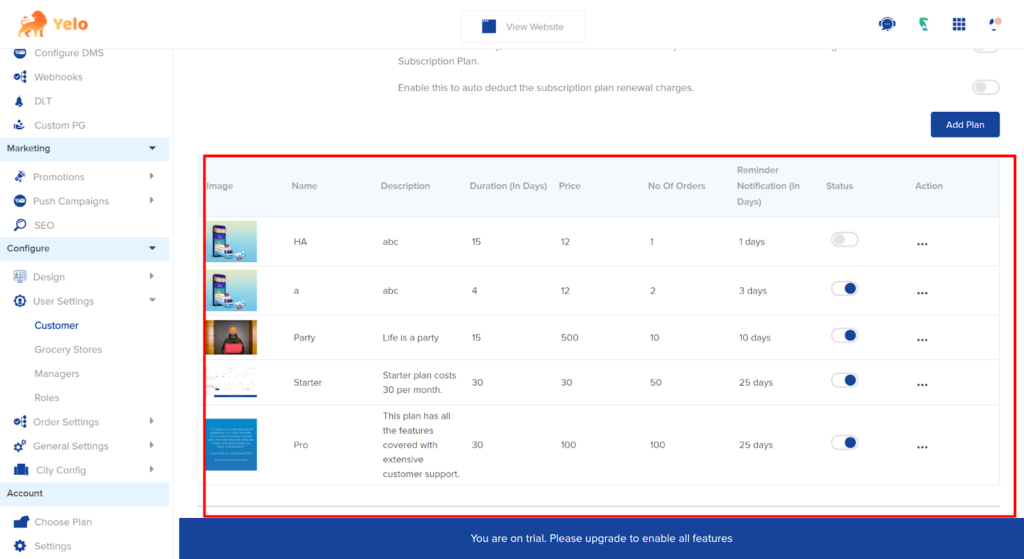
Step 12: Click on Add Plan to start adding the subscription plans.
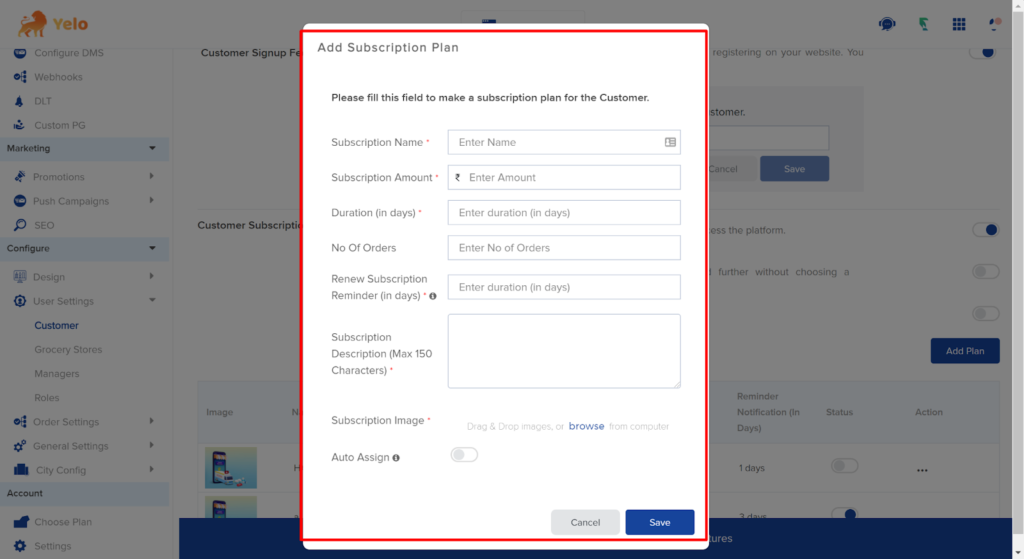
Step 13: Fill in the required and click on ‘Save’.
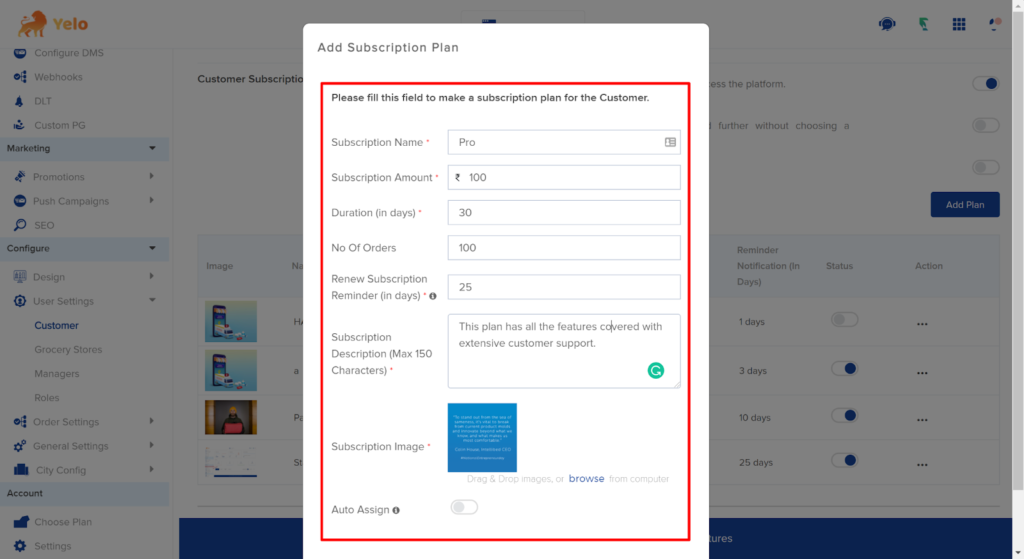
All of your subscription plans will appear here.

Leave A Comment?