
User Guide for Bluetooth Printer Functionality on Android App
1. Configuring Printer Settings via Admin Panel
Before starting with the Bluetooth printer setup on your Android device, you need to configure the printer settings through the admin panel of your application.
Access the Admin Panel:
Open the admin panel of your application.
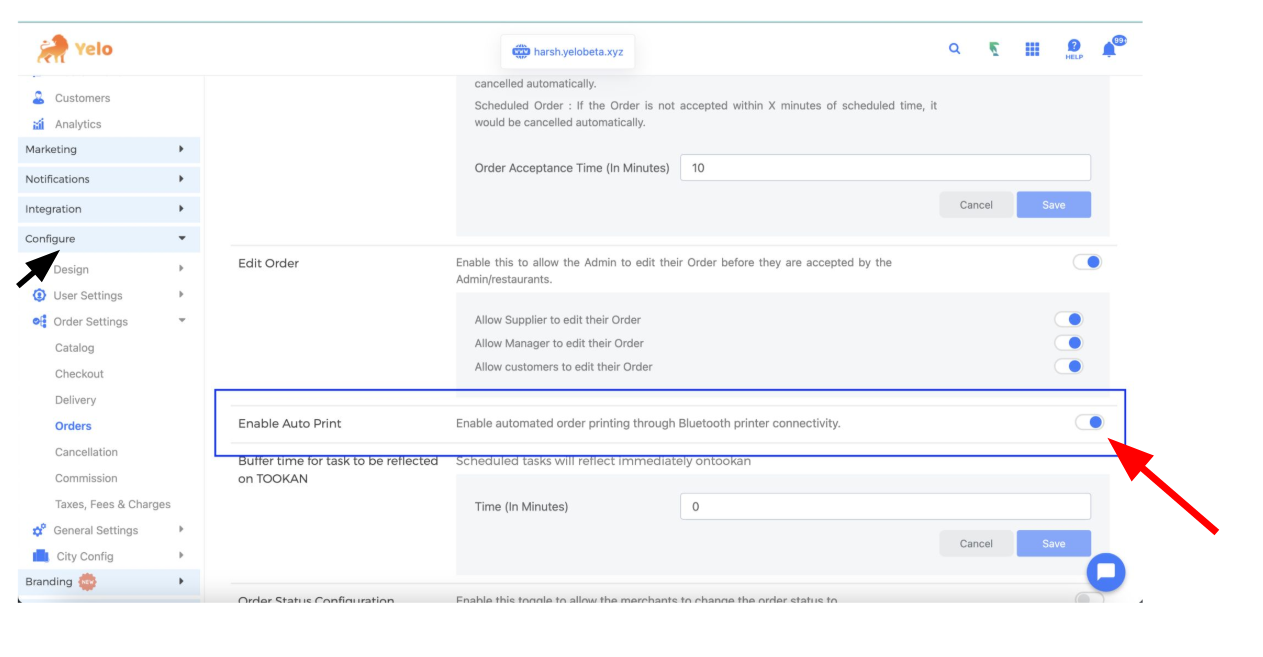
Navigate to Configure > Order Settings > Orders.
Enable the Auto Print option to streamline the printing process.
2. Pairing a Bluetooth Device
- Turn on Bluetooth on Your Android Device:
- Swipe down from the top of the screen to open the quick settings panel.
- Tap the Bluetooth icon to enable it. You can also go to Settings > Connected devices > Connection preferences > Bluetooth, and turn Bluetooth on.
- Put the Bluetooth Printer in Pairing Mode:
- Refer to your printer’s manual for specific instructions “on How to enable pairing mode”. This usually involves holding down a specific button until a light starts flashing, indicating the printer is ready to pair.
- Pair the Printer with Your Android Device:
- On your Android device, go to Settings > Connected devices > Bluetooth.
- Tap on Pair new device.
- Select your printer from the list of available devices.
- If prompted, enter the pairing code provided by your printer’s manual, then
tap Pair.

3. Enable Auto Print in the Merchant App
- Open the Merchant App:
- Launch the merchant app on your Android device. Ensure you are logged in with the appropriate account.
- Enable the Auto Print Feature:
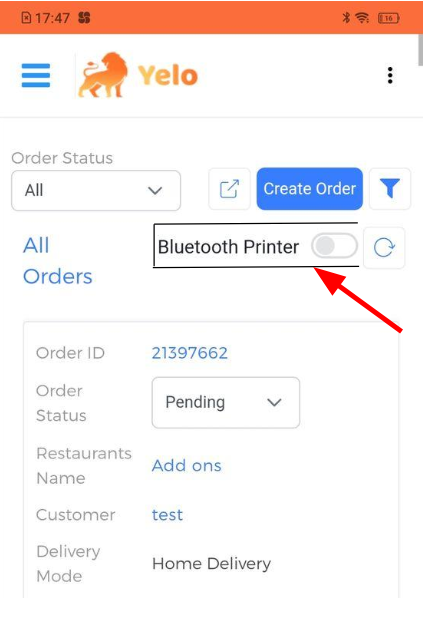
- Navigate to the order listing screen within the app.
- Locate the toggle switch labelled “Bluetooth Printer” at the top right corner of the order listing screen.
- Enable the toggle by tapping it.
- Confirm Printer Connection:
- The app should automatically detect the paired Bluetooth printer.
- If a confirmation or setup screen appears, follow the on-screen instructions to select the paired Bluetooth printer as the default printer.
Setup Done, Now you are good to go for Bluetooth printing.
Functionality Guide
- Printing Order Details from the Order Detail Page
- To navigate to the order details page, click on the order ID you want to print.
- The order details page of the respective order will appear.
- At the top right corner, you will find the print icon.
- Click the print icon, and the printer will start printing the order details.
Refer to the video Reference video 1

- Printing When Receiving New Orders
- When a new order is received on the order listing page, you have the option to accept or reject the order.
- Once you click the accept button, the printer will start printing the order automatically.
** Note: You will not be able to get the prints if the accept/reject functionality is disabled for new orders.

By following these steps, you should be able to successfully set up and use your Bluetooth printer with the merchant app on your Android device.
Additional Tips
- Keep Devices Close: For optimal performance, keep your Android device and Bluetooth printer close to each other to maintain a stable connection.
- Check the Bluetooth connection after you kill and reopen the app.
- Ensure the toggle on the order listing page is ON to get prints smoothly.
- Refer to Reference Video 2.
Reference Videos
1) Video with Pairing a Bluetooth Device, Enable Auto Print in the Merchant App, Printing Order Details from the Order Detail Page.
https://drive.google.com/file/d/1jhdfRjajeVGRFy5jekprA_Ble56pQhxn/view?usp=sharing
2) Video while killing the application and restarting the application again.
https://drive.google.com/file/d/1jnQUCcHa5TSYQiYwVPLZbaiFB7rtFaQ6/view?usp=sharing
Important Note:
- The Bluetooth printer will not work alongside the Sunmi printer.
- The build with Bluetooth printing functionality is not compatible with the Sunmi printer and vice versa.
Leave A Comment?