
Live Campaigns enable you to create personalized engagement with customer segments based on a customer lifecycle and buying behavior. The goal of a live campaign is to create a personalized customer experience with help of triggers and omnichannel engagements.
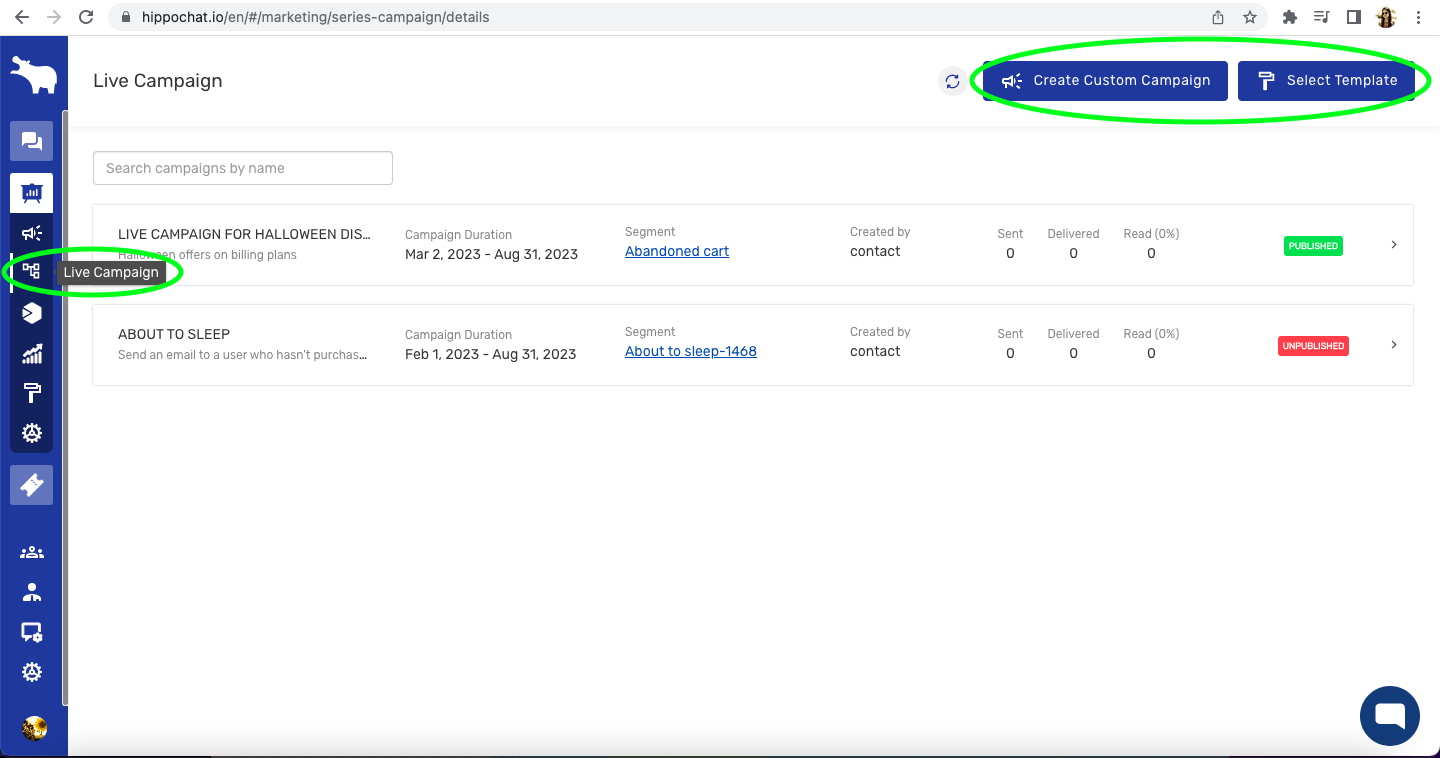
With HIPPO Engagement Automation, you can create various live campaigns for your customers from segments like first signup, and feedback to something like no ordering, cart abandonment, etc. You can set triggers and actions by customers that will run the campaign for that customer. To access this feature go to the “Live Campaign” menu on the HIPPO dashboard. From the menu screen, you can:
- View all the live campaigns created so far
- Select a campaign to view/edit details and statistics
- Search for a campaign by name
- Refresh campaign list
- Create a new campaign
Let’s understand how to create and set up a live campaign.
You can create both Custom campaigns or a campaign from the list of Templates. Templates are predesigned campaigns.
For creating a Custom Campaign:
- Go to the “Live Campaign” menu on the HIPPO dashboard.
- On the top right corner of this screen, click on the “Create Custom Campaign” option.
- Enter the campaign name, enter the campaign description, and set a campaign publish and unpublish date and time in the future.
- Select a segment that will act as a trigger for the campaign to run.
- After selecting a trigger, you must add an action to the trigger.
- Preview and save the action data.
- Click on the “Save Builder” option on the top right-hand side corner of this screen to save the live campaign.
Kindly refer to the screenshot below:

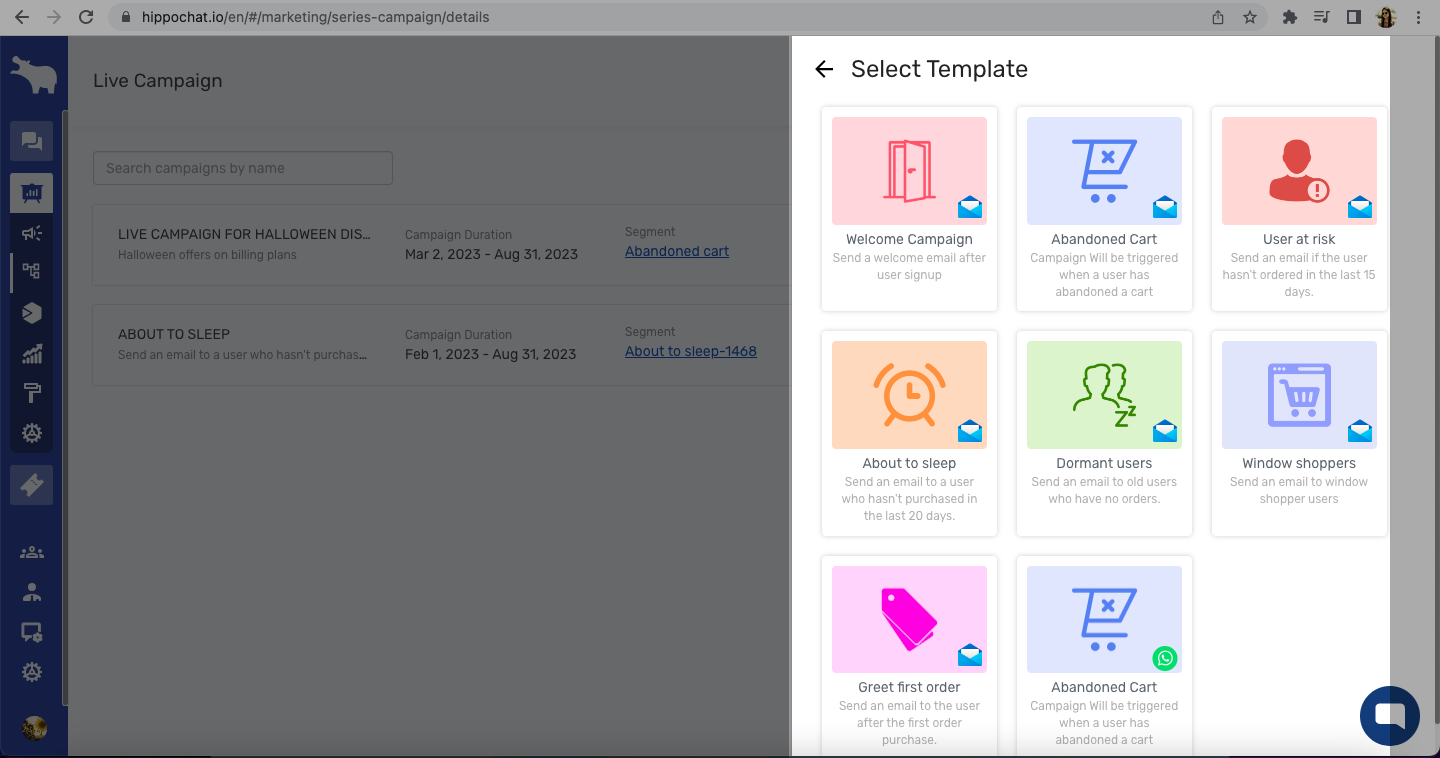
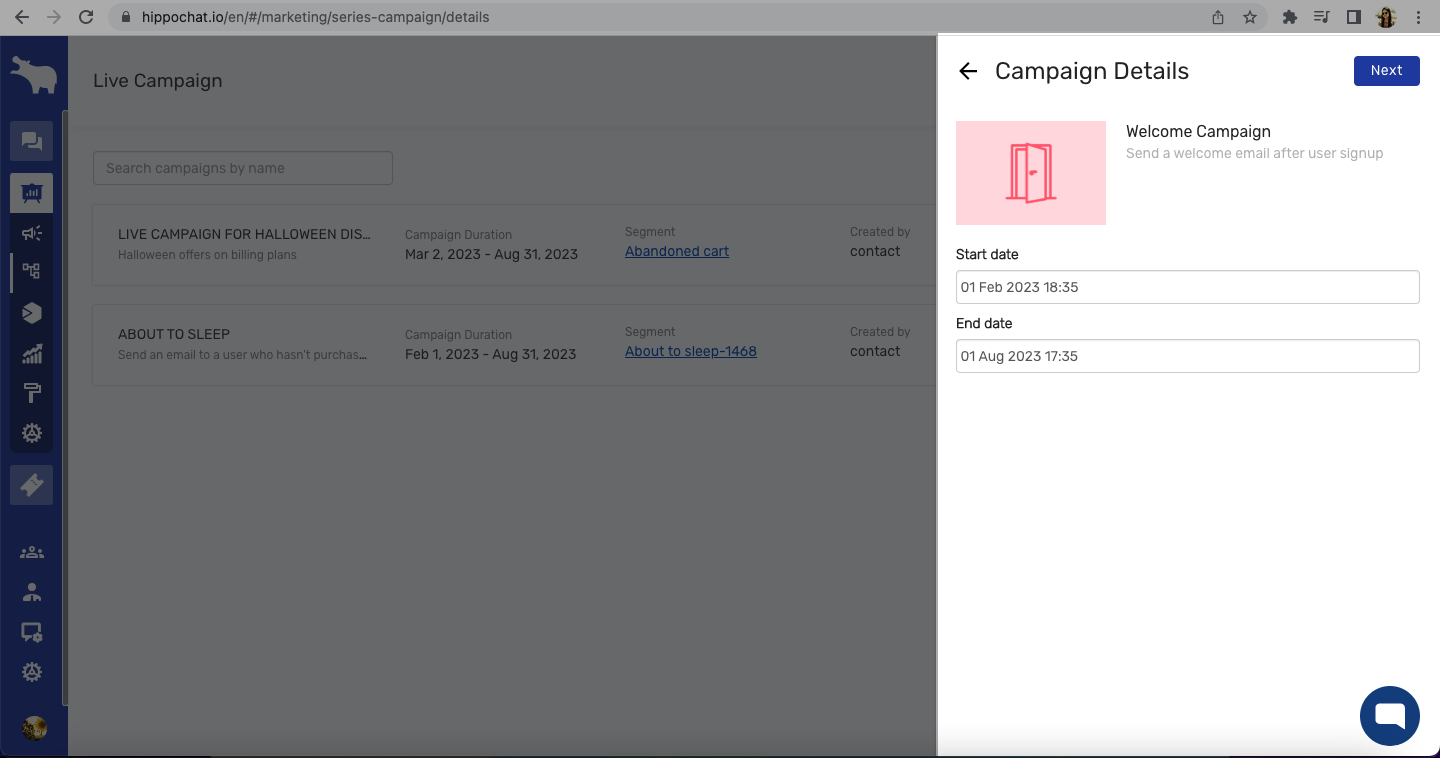
For creating a campaign from Template:
- Go to the “Live Campaign” menu on the HIPPO dashboard.
- Click on the option of “Select Template” right next to the “Create Custom Campaign” option on this screen. If you are creating a live campaign for the first time, this option will be visible right at the center of the “Live Campaign” menu screen.
- Select a template
- Set the Start date and End date to create the campaign
- You can review and publish the campaign and edit it later once the campaign is created
Kindly refer to the screenshots below:
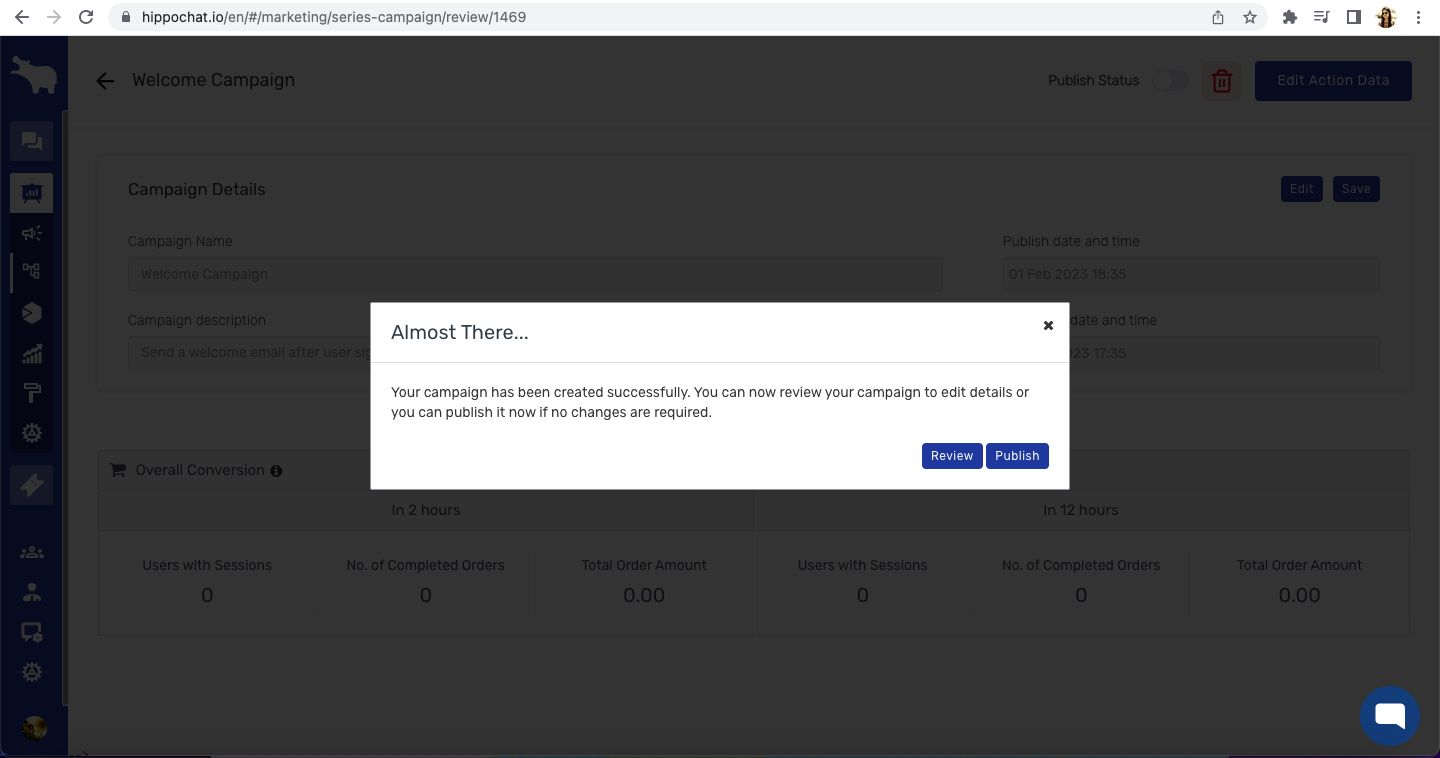
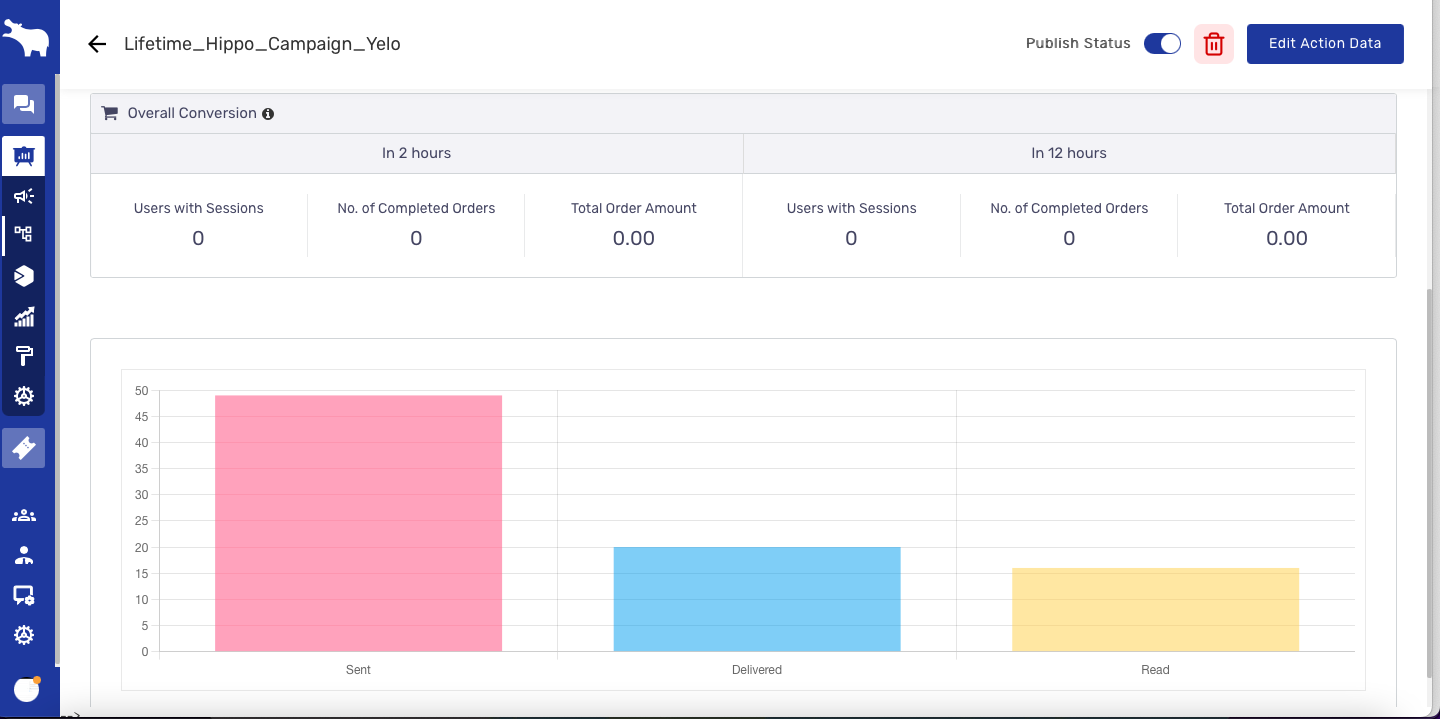
Your live campaign is created. The created campaign can be viewed on the “Live campaign” menu screen. Upon selecting a campaign you can view the campaign details, published status, and campaign statistics. You can edit campaign details and action data. You can also delete a campaign from here.
Watch this video to learn more
Leave A Comment?