
Make it easier for your experts to keep a track of their appointments by helping them sync their google calendar to the panther dashboard calendar
To enable Google Calendar feature, you will need to create a Google Calendar Project and configure your marketplace to use this Project.
The following steps are required to set up access to users’ calendars:
1: Login to the Google developer console: https://console.developers.google.com
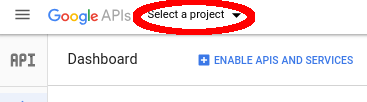
2: Click on Select Project \ Create project
3: Select New Project, enter a project name and press Create
4. Then click on the project you just created.
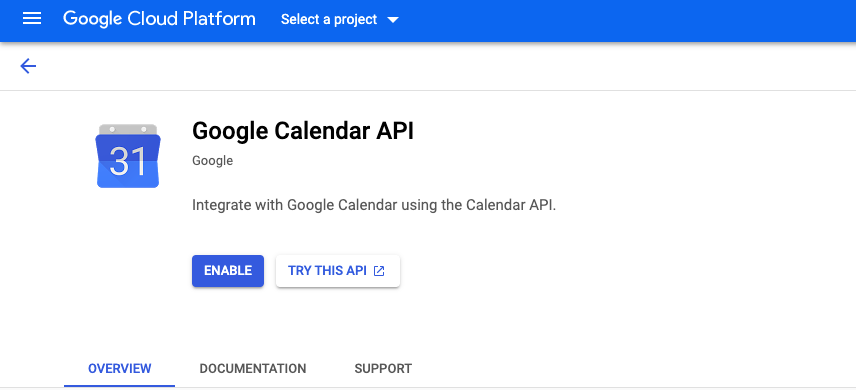
Enable the Google Calendar API
1: Click on the developer console library: https://console.developers.google.com/apis/library?project=totalview-calendar-sync
2: Search the Google Calendar API
3: Select the Google Calendar API
4. Select Enable
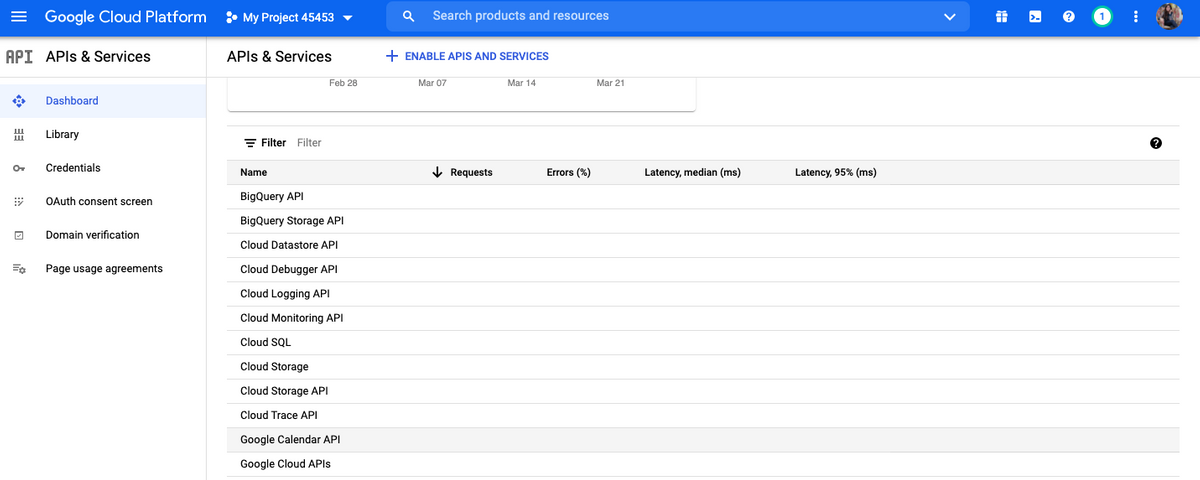
5. The dashboard will now display the Google Calendar API in the Enabled APIs list and can be viewed by going to side menu> APIs & Services> Dashboard
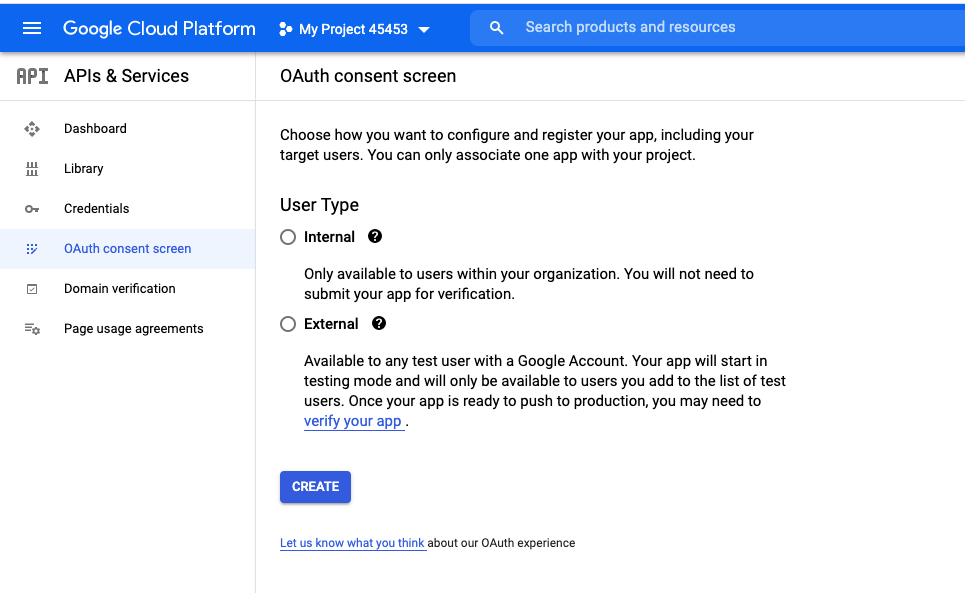
6. Once the Calendar API is enabled. Go to OAuth consent screen.
7. Once reaching the Oauth Consent Screen, choose the User Type as External & click on Create.
(i) Internal : Select this option if you are a Developer, as it’s only available to users of your organisation. You will not need to submit your app for verification.
(ii) External : Select this option, If you are not a Developer. It would be available to the users outside the organisation. App verification would be required.
8. Now add the required information as per the details of the project for the OAuth consent screen. Once done, scroll to the bottom of the screen and click on save and continue, which will further take you to the SCOPES tab.
9. Once you are in the scopes tab, click on Add or remove scopes and choose the Google Calendar API & Scope (…/auth/calendar) from the list of Scopes available. Once selected, scroll down and update the API.
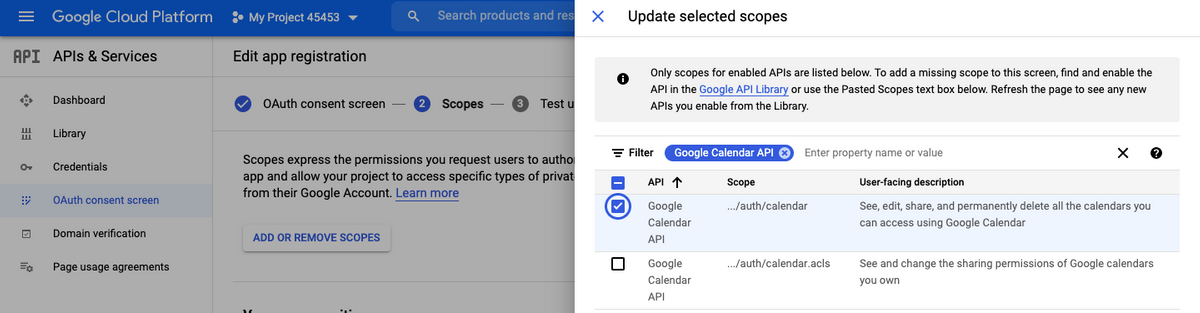
10. Once the API is updated, click on save and continue

11.No details are required to be filled in Test Users section. Click Save & Continue
12. After reaching the Summary section. Click on Back to Dashboard.
13. Back to Dashboard will take you back to the Oauth Consent Screen. Click on Publish App Status and then Prepare for Verification on Oauth Consent Screen.
14. You will now be redirected to the API dashboard again. Verify the details of App Information and Click Save & Continue.
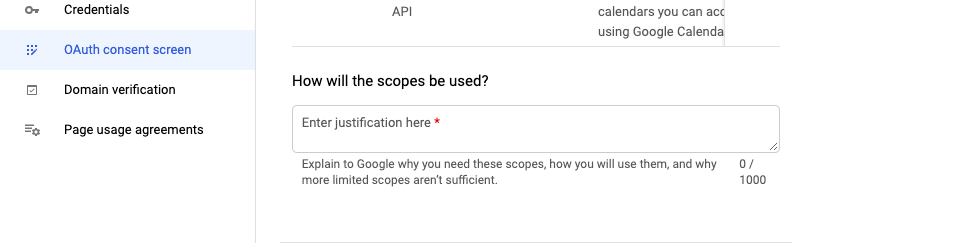
15. Now you will be redirected to the Scopes section. As the scope was already selected previously, now a justification is required to be shared with the Google Team, justifying the reason to use Google Calendar on the Panther marketplace.
16. Please add the below justification in the section “How the scope will be used?”
(My app will use https://www.googleapis.com/auth/calendar to show a user’s calendar data on the scheduling screen of my app to help users manage their schedule directly through my app.
When the user connects his google calendar the availability is fetched from his/her free and blocked time slots, so that the customer can create a booking on the free time slot only.)
17. A justification video would be required demonstrating how you & your users will use the app explaining the path of the google calendar to be used by the users. Your video must include all OAuth clients that you assigned to this project.
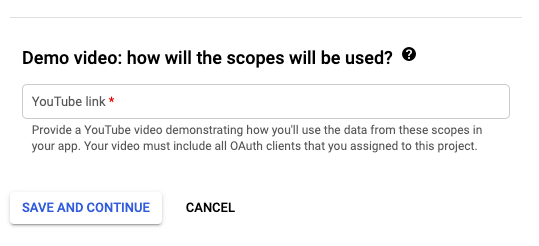
18. After adding the justification of the scopes & YouTube video, submit the details for final review.
Leave A Comment?