
A very important part of setting up the platform is configuring the Payment Gateway.
Panther as a platform supports multi currency and hence users can transact in multiple currencies.
Setting up Payment Gateway
1. To configure payment gateway , go to Admin dashboard> Configure> Payment Gateway
2. Once you are in the payment gateway section, select the currency or currencies ( in case of multi currency platform) you want in the marketplace from the dropdown

3. Once the currencies are selected, enable the payment gateways supporting the currencies, by enabling the toggle besides them and configuring their settings.

4. While trying to configure the payment gateway, you will be prompted to add the API keys as well as select the currencies again which you want the payment gateway to accept.
Please Note: Only once you select the currency from the payment gateway settings, users will be able to use the payment gateway to make payments in selected currency.
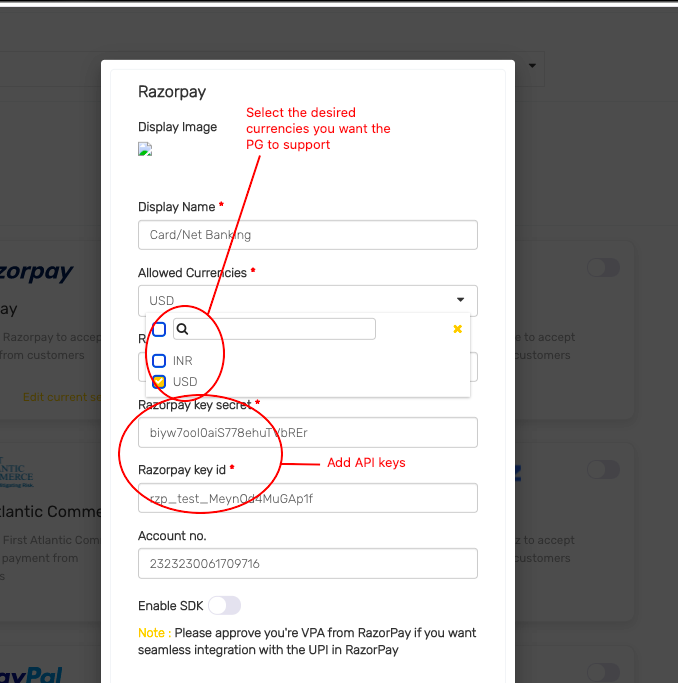
For instance- We select INR as a currency from the currencies section. To receive payments in INR you would be required to configure a payment gateway that accepts INR
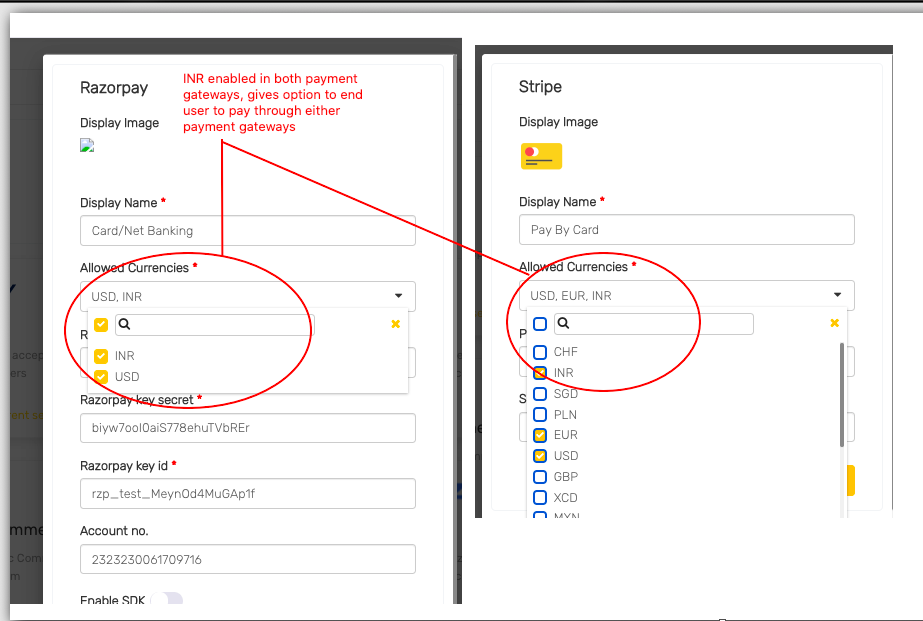
Admin also has the choice to configure multiple payment gateways , supporting the same currency.
Like INR as a currency can be accepted through RAZORPAY AND STRIPE and gives an option on the user end to select from the payment gateways available to make the payment.
Leave A Comment?