
1. Design
From this section, you can add a slogan and a description that will be shown to all the users that visit your site for the first time. You should invest some time into making this section of your marketplace look attractive, since it’s the first thing your new users will see.
Cover photo
The cover photo is shown in the homepage for non-logged-in users. Image size should be 1920×450 pixels. If you use a photo with any other size, it will be resized automatically and taller images will be cut in the middle (top and bottom will be cropped). To enjoy the best results, you should use the recommended size.
The small cover photo
In addition to the big cover photo you need to upload a small cover photo, 1920x96px. The small cover photo is shown to users who have signed in to your marketplace.
Note that even when you have uploaded an image correctly, it will show as “No file chosen”.
Change the colour of the Slogan and Description
You can do it by setting a hex colour value for each one of them. This site can help you select and copy the colour value.
2. User Fields
Sometimes you need more information about your users for internal purposes or you might want to show more information in the user’s profile. It is possible by adding custom User Fields. You can ask for this information upon registration or simply make it available in the profile settings for users to fill whenever they want. You can also decide if you want to make this information public or keep it private for internal uses.
New fields can be added in the form of Text, Number, Dropdown, Checbox group, Date, File upload, Video
3. Configure the top bar
You can configure the top bar and add links. Easily link your blog or forum to your marketplace by adding a link to them to the top navigation bar from admin panel -> top bar. You can also change the text of the “Post a new listing” button to reflect the type of listings you have in your marketplace.
4. Add Listing Categories
You can use the categories to create a hierarchical structure to your marketplace. Currently we allow two levels of categories: top level categories and subcategories. You can add new categories from admin panel -> listing categories.
5. Listing fields & filters
Listing fields are displayed on the page of a listing. There are a few predetermined listing fields from when you create your marketplace, some of these you can edit. In addition to these you can add more. To create a new listing field choose a field type from the “Add new field” dropdown or edit an existing one by clicking the pencil icon, configure it and save.
6. Order Types
You can configure your marketplace to support many different use cases, including product selling, rentals, or service booking. You could even have all these types in the same marketplace. This is done through order types. You can choose with which categories each order type is connected. Order types are named “listing types” on the user side of the marketplace.
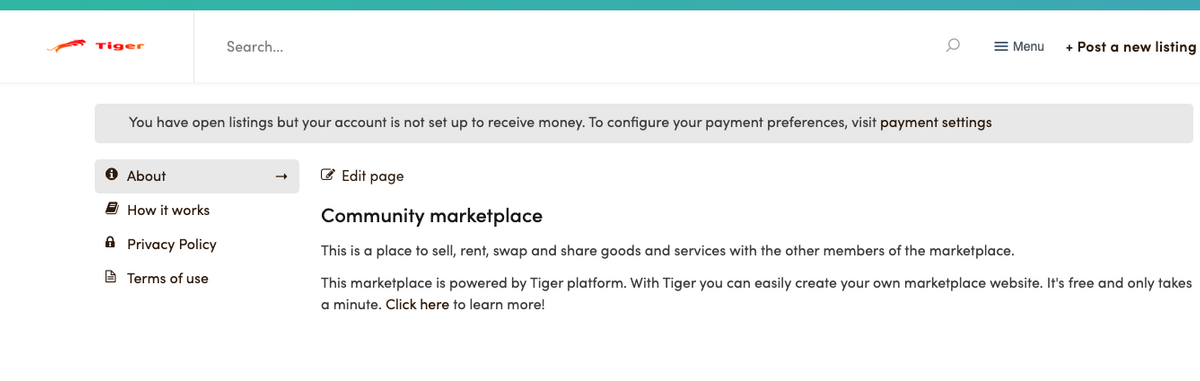
7. Content Pages
Your marketplace has four content pages: “About”, “How it works”, “Terms of Use” and “Privacy policy”. By default these pages are filled with standard templates. You should replace these templates with your own content. You can find the pages by selecting “About” from the top bar. You can edit each page directly in-place (there’s an “edit” link on top of each page).
8. Domain
To make your marketplace completely “white label” and remove all Tiger branding, you can start using your own custom domain and set up a custom email address for sending the automatic notification emails.
9. Social Media
Enable your users to signup through through their facebook, google or linked in account by adding their respective keys in this section.
Learn how to enable social media logins from Configurations section of the helpdesk
10. Instruction Texts
This is an info text that can be shown to users in the signup page. There you can give the users instructions for signing up, information like where to get an invite, etc. By default there are no instructions.
Leave A Comment?