
How to create a custom language
This article will help you learn how you can add and set Custom Language for your dashboard.
- Log in to the Yelo Admin dashboard, on the very bottom left corner you will find the Account section. Click on settings.
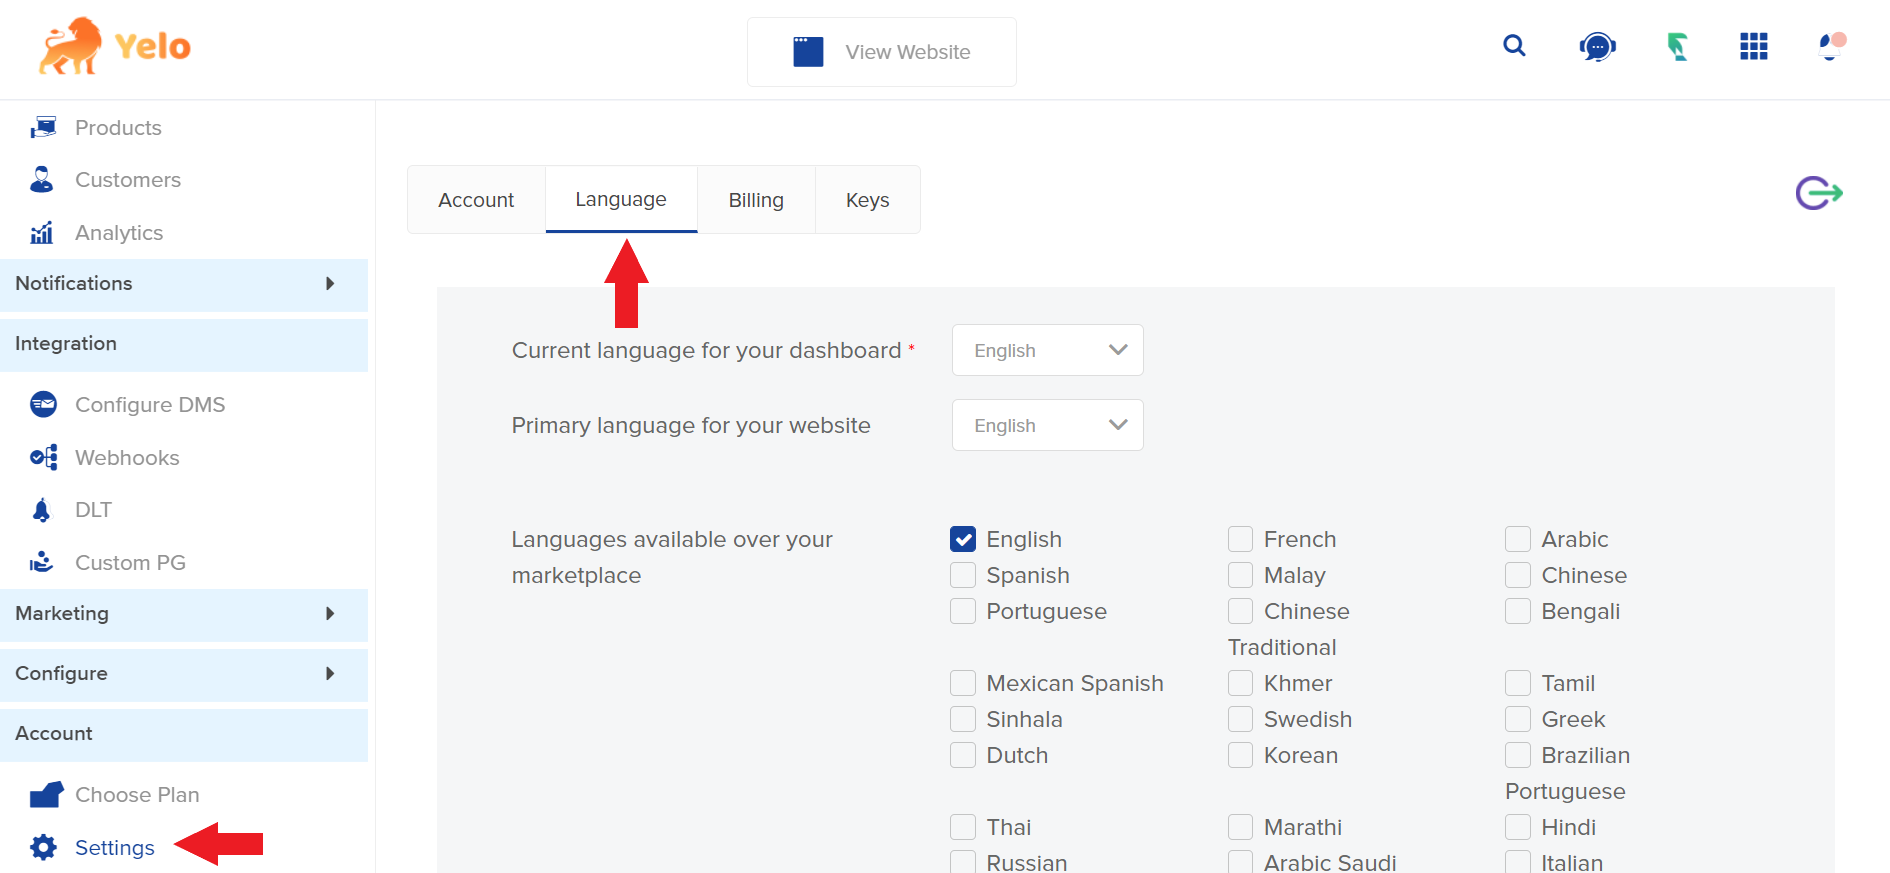
- Under settings, Move to the language section and scroll down to find this setting: “Add a custom language for your web app“
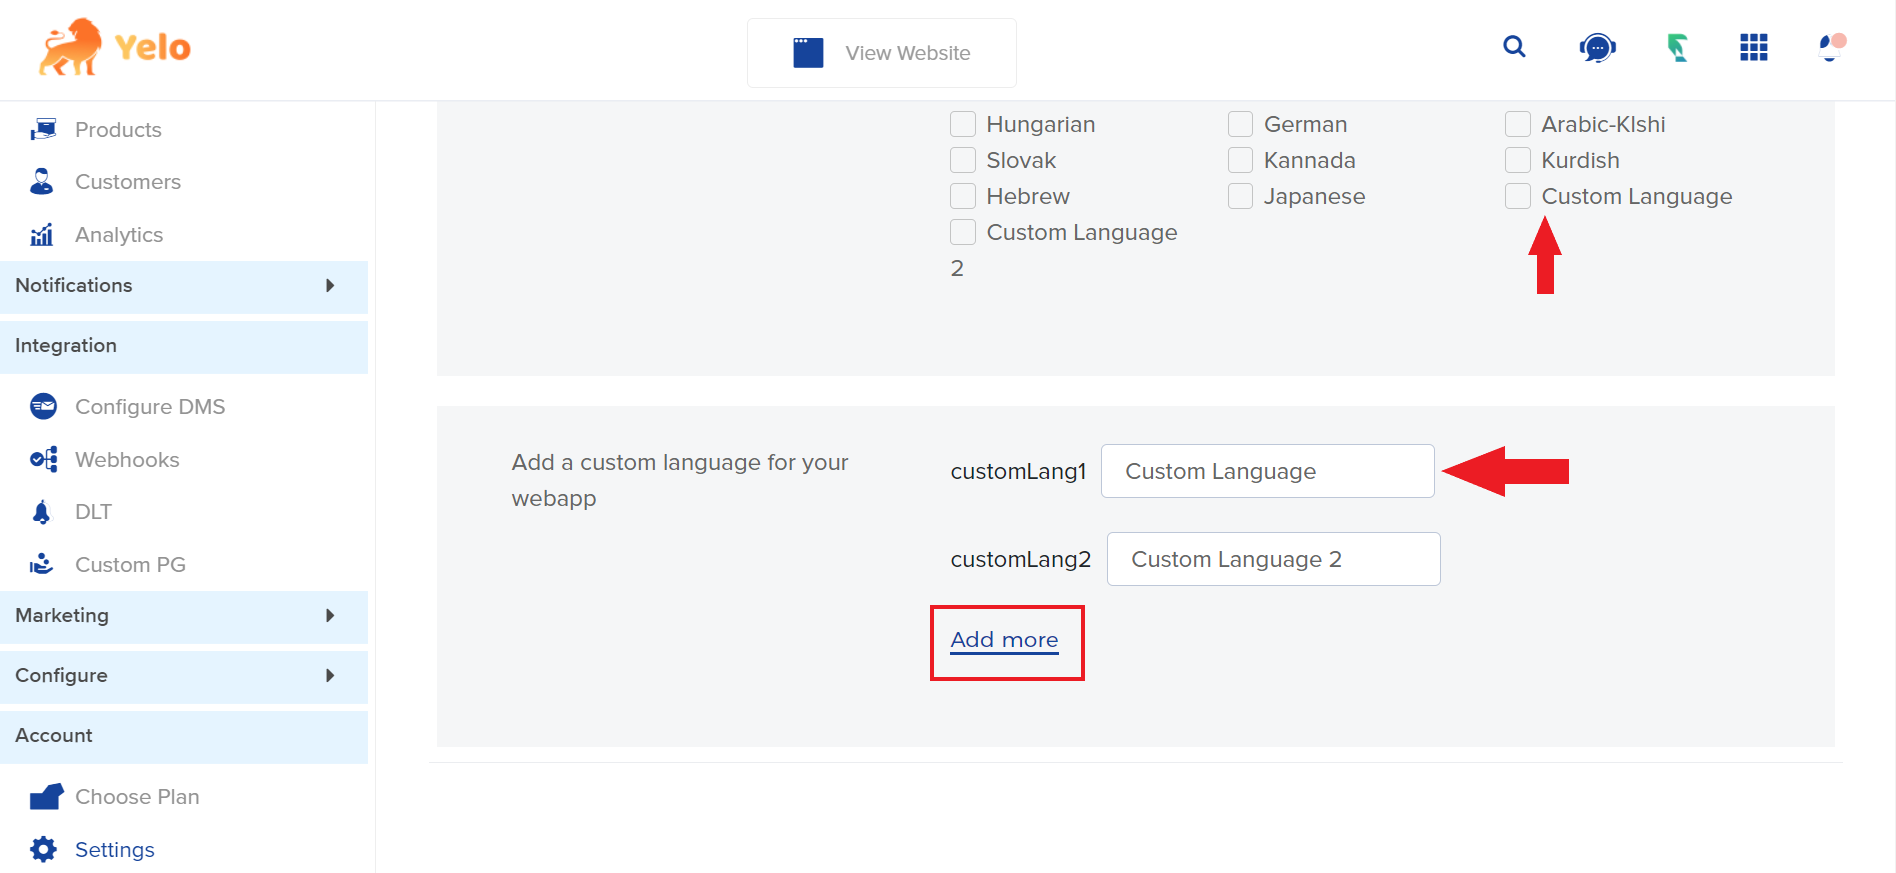
- Click on Add More option, this will give you a blank field with the name ‘CustomLang1’, similarly if you click on Add more you can add more languages. The field will store the name given to your language.
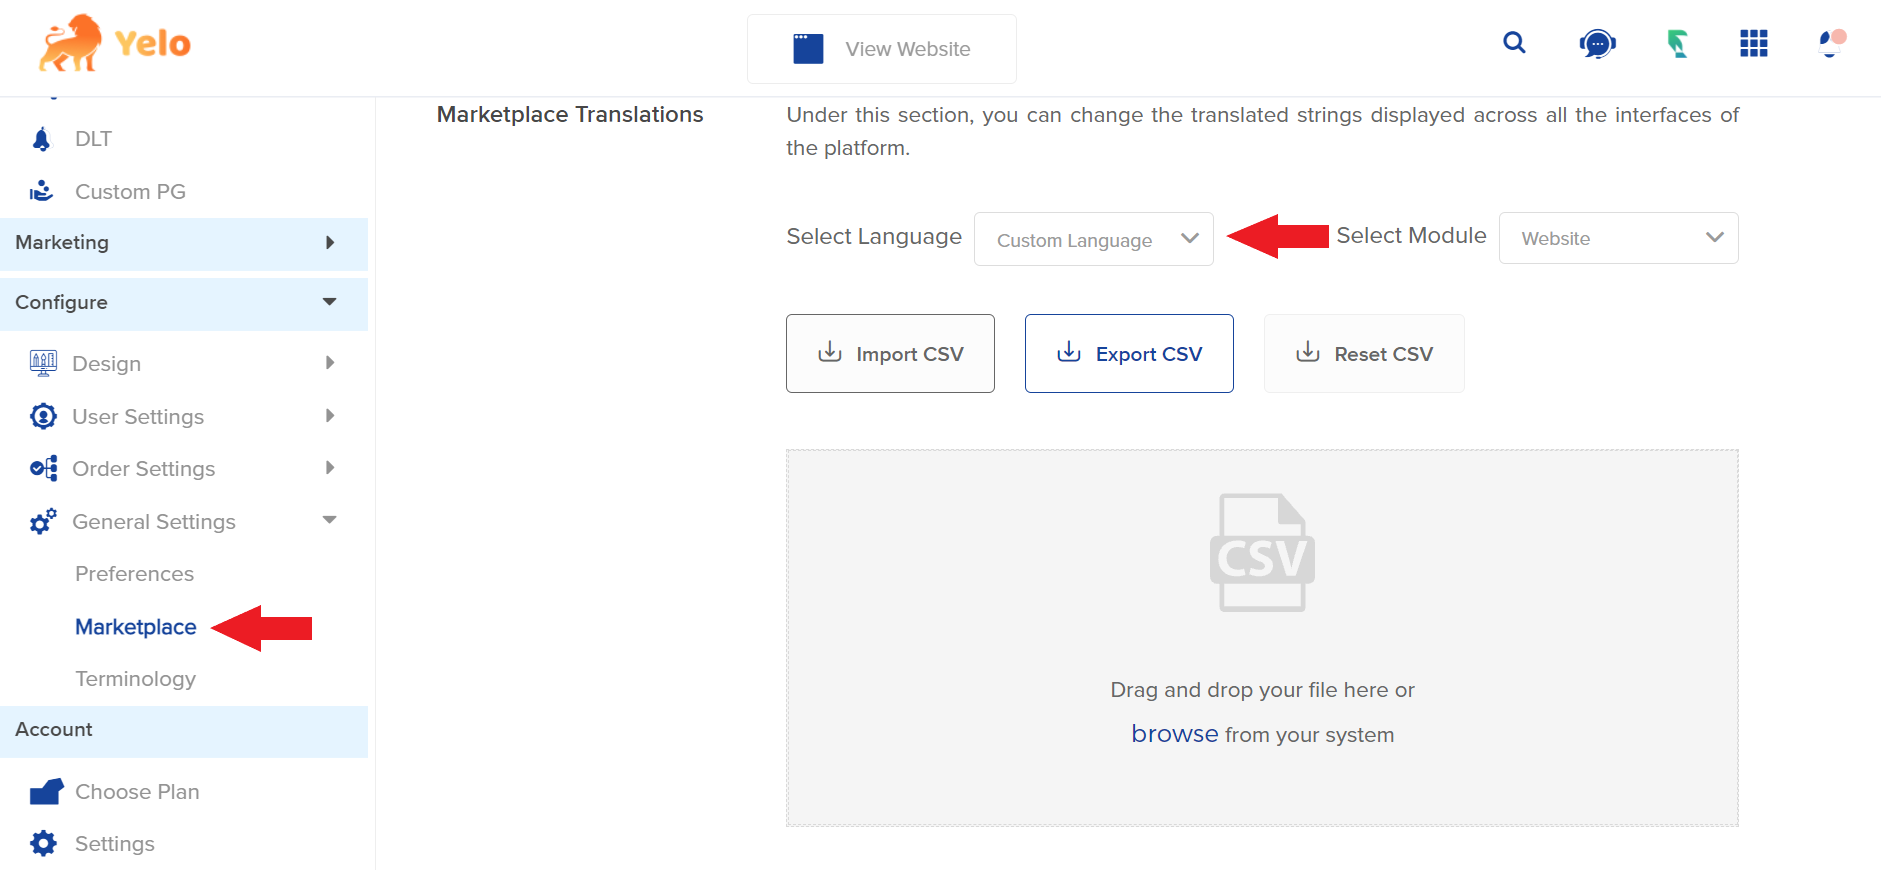
- Once that has been done, go to the Configure section >> General Settings >> Marketplace. Here select the language you have just created and click Export.
- Once exported, you will receive a file which has the keywords/terminologies of your website in the Second Column and their Source Key in the First. Here you can change the keywords according to your requirement in the second column and then save the file as a csv.
Note:- Please make sure not to change any value in the first column or the first row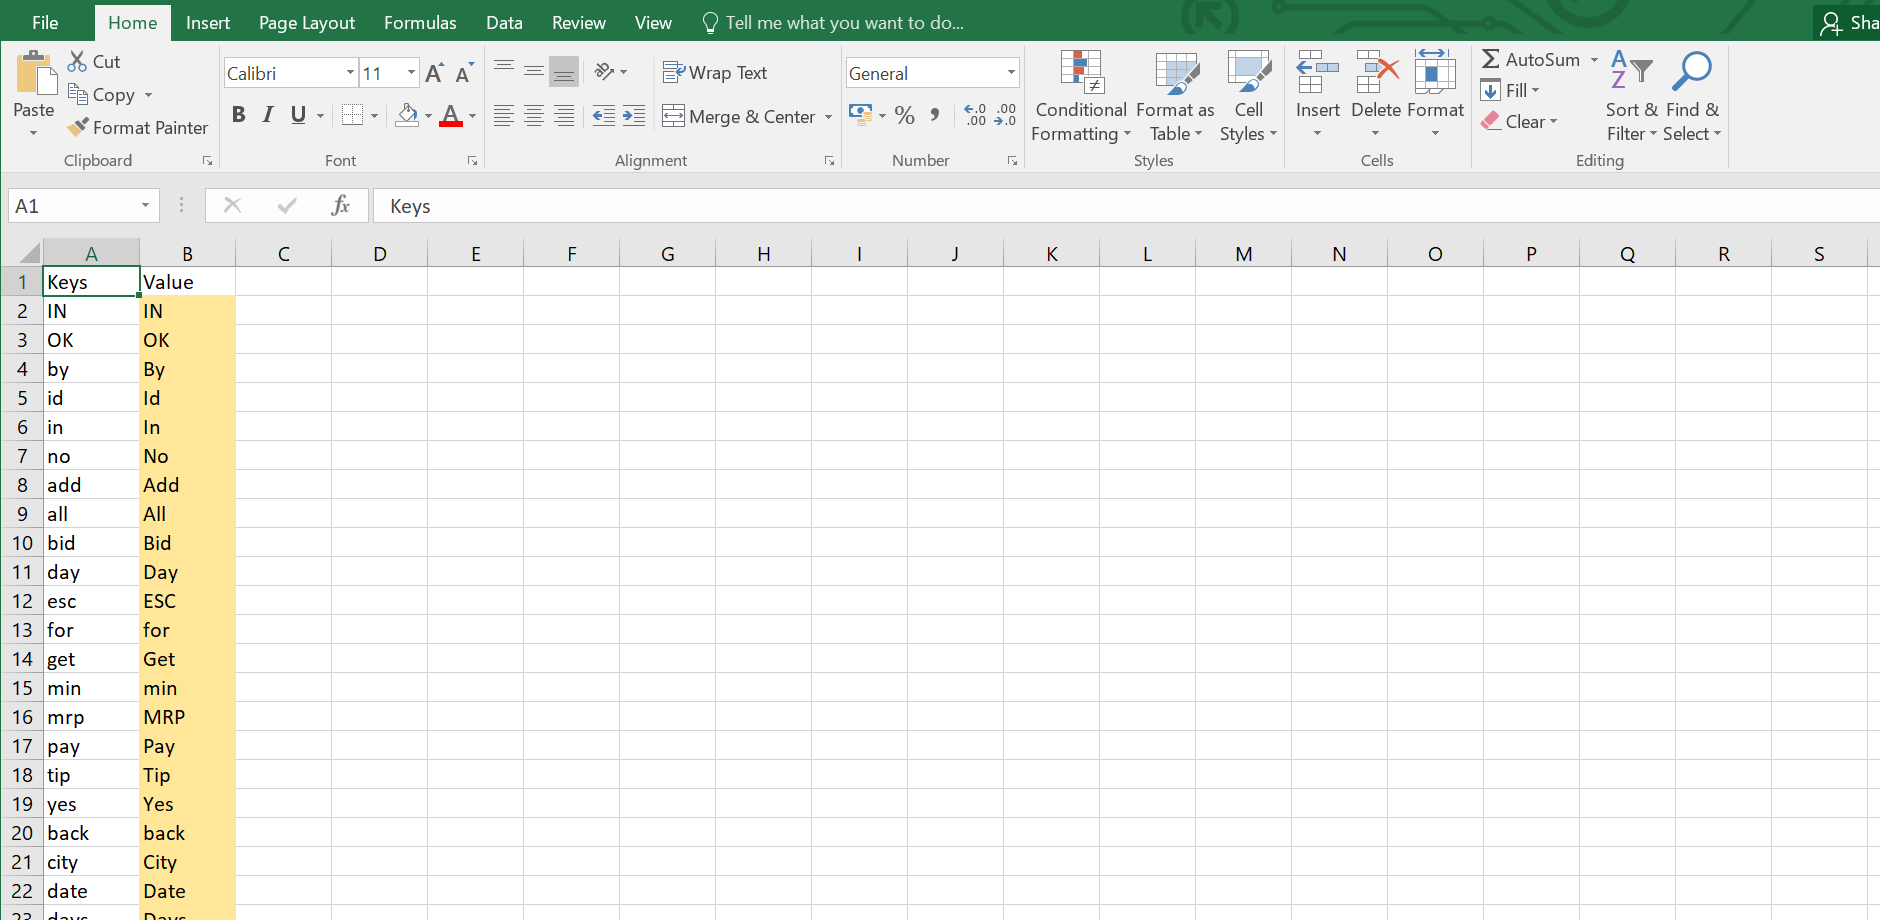
- Now, you can upload this file onto the same marketing section which we showed in point 4.
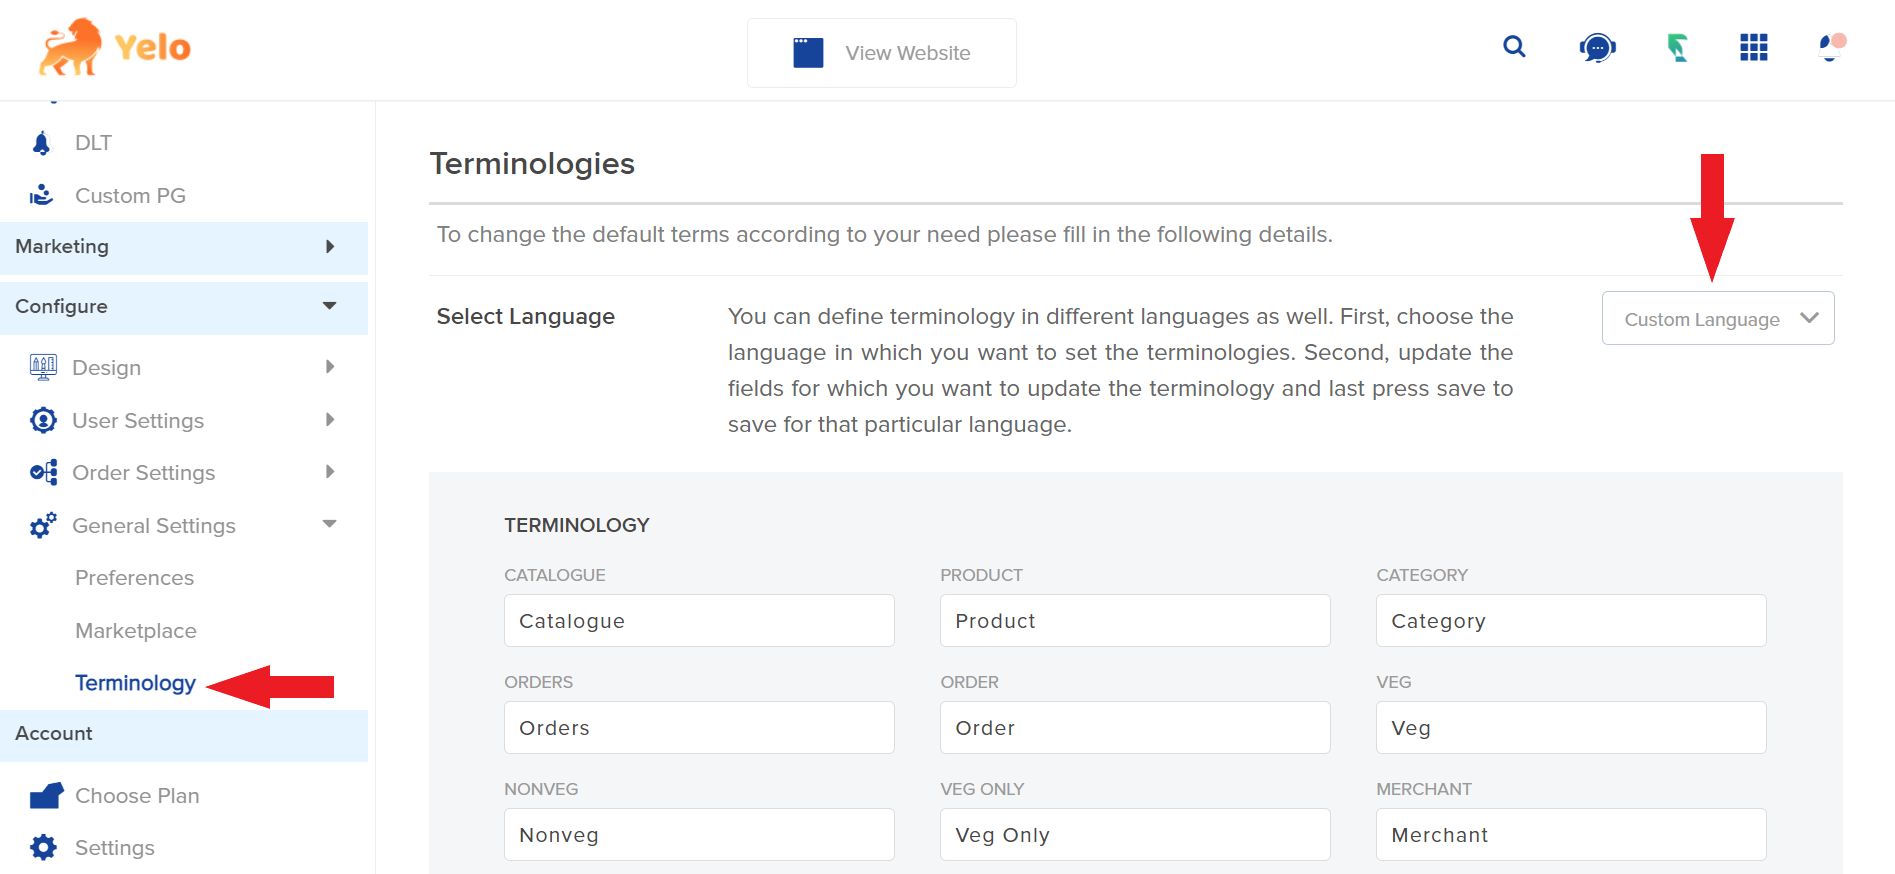
- Also, you may go to the Terminologies section in Configure >> General Settings. And select the dropdown for your selected language and rename a few keywords here.
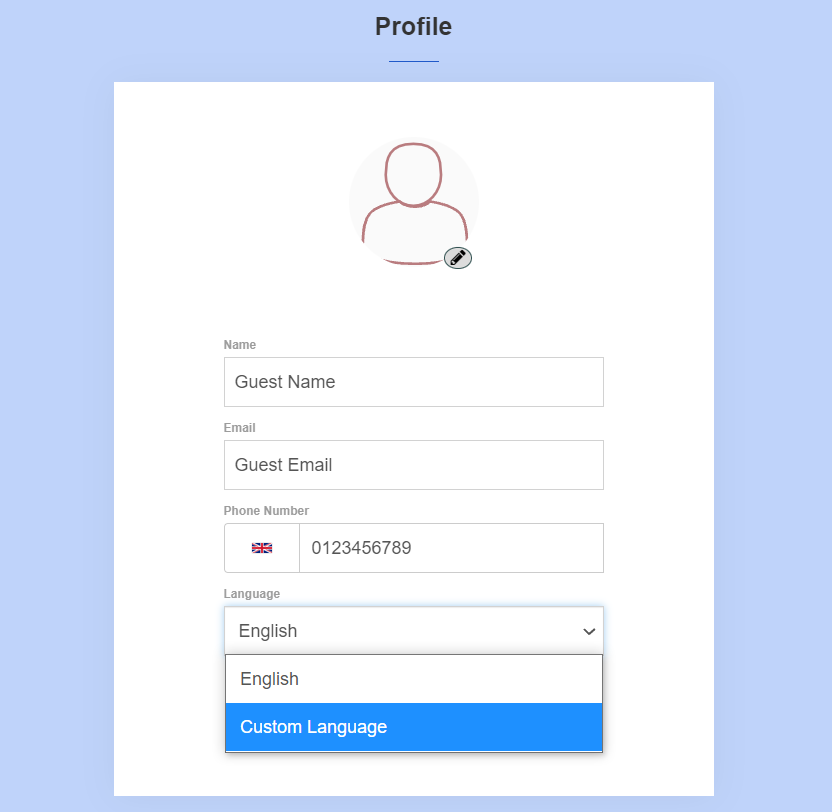
- Once this setup is done, the customer can go to their profile and choose the language you have created.
Leave A Comment?