
How to use Single Select and Multiselect Options
Single select and multi-select options are a great way to get upsells for your order. For example, If you own a pizza shop, you can charge your customers for extra cheese, special seasonings, or any other addition.
Here’s how to create single-select and multi-select options at the checkout cart of your marketplace:
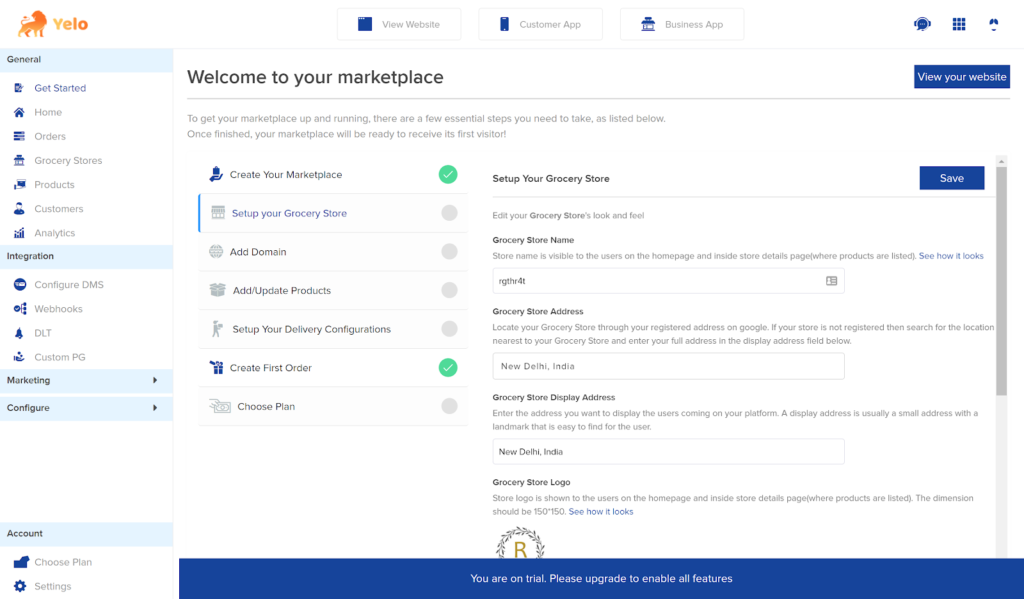
- Log in to the Yelo Admin Dashboard, which looks like this.
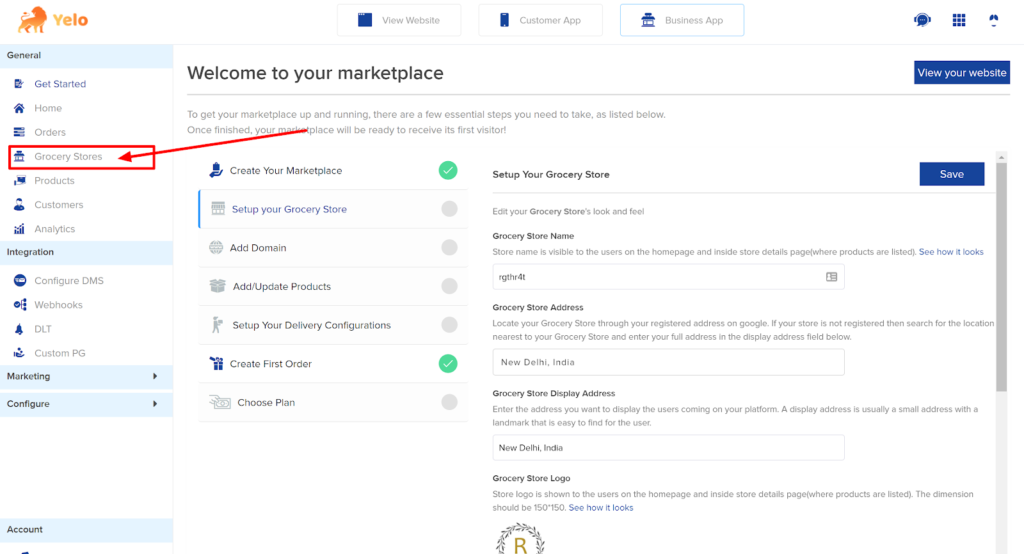
- On the Dashboard’s left-hand side, click On ‘Merchants, or Grocery store’ and you will be redirected to the merchant page. Here, we have shown the example of a Grocery marketplace. Click on Grocery stores, and you will have a list of all the grocery stores in the marketplace.
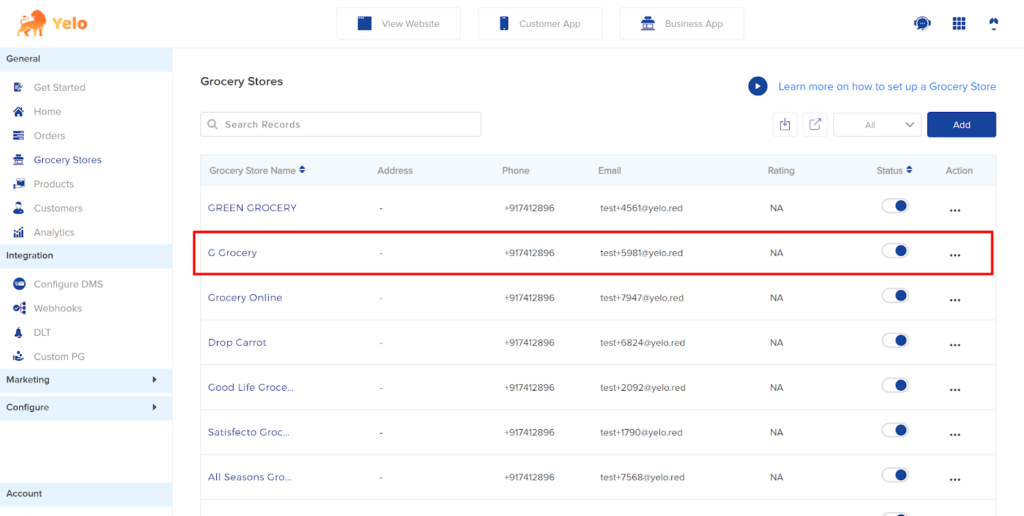
- Choose the Grocery store for which you want to add the single-select and multi-select options.
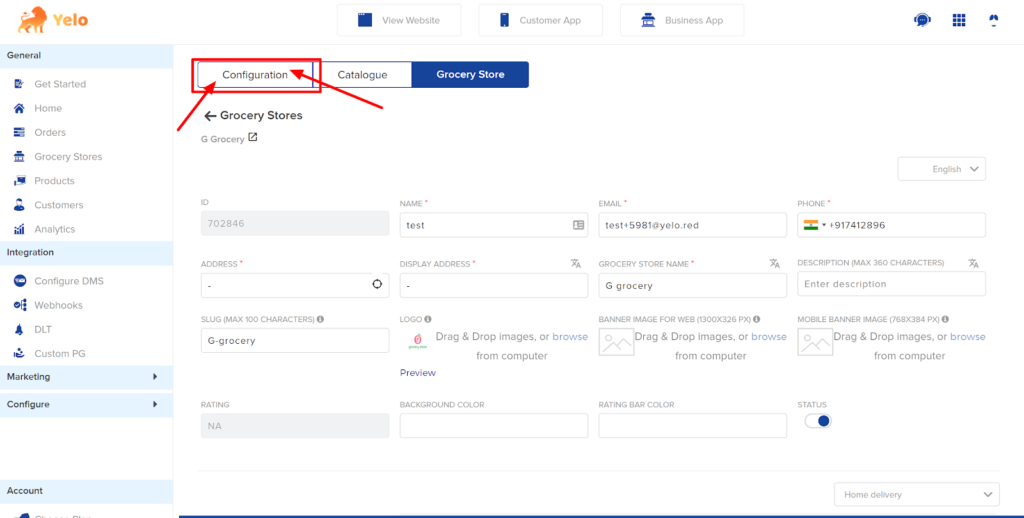
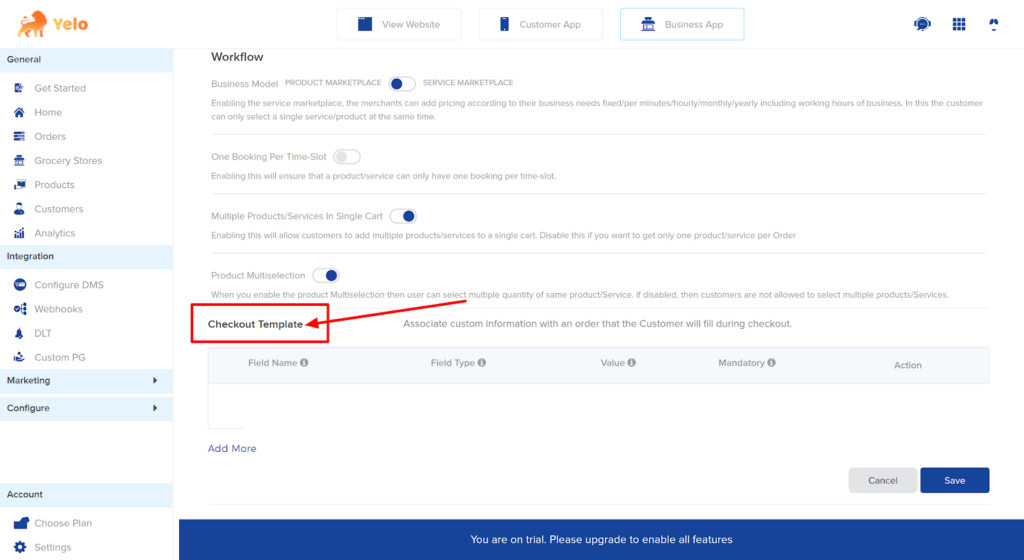
- On the Merchant details page, click on the ‘Configuration’ tab.
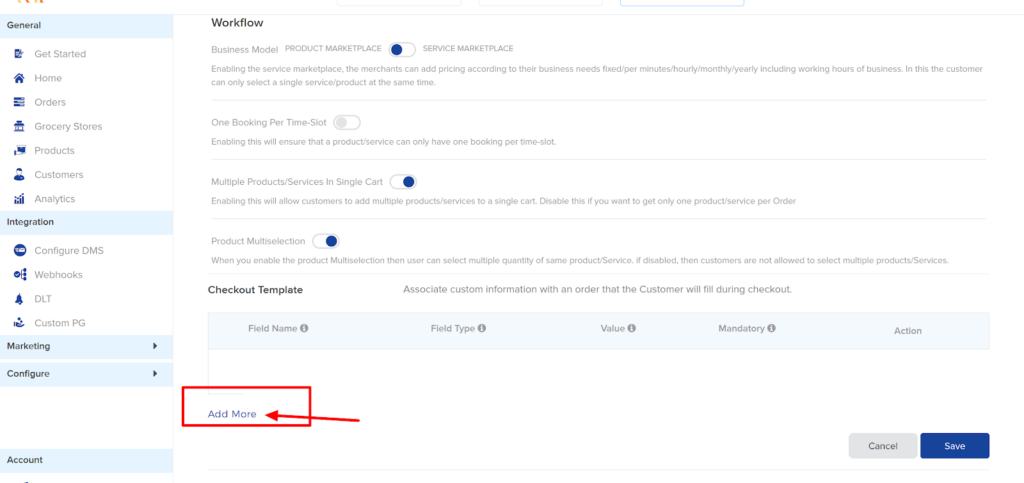
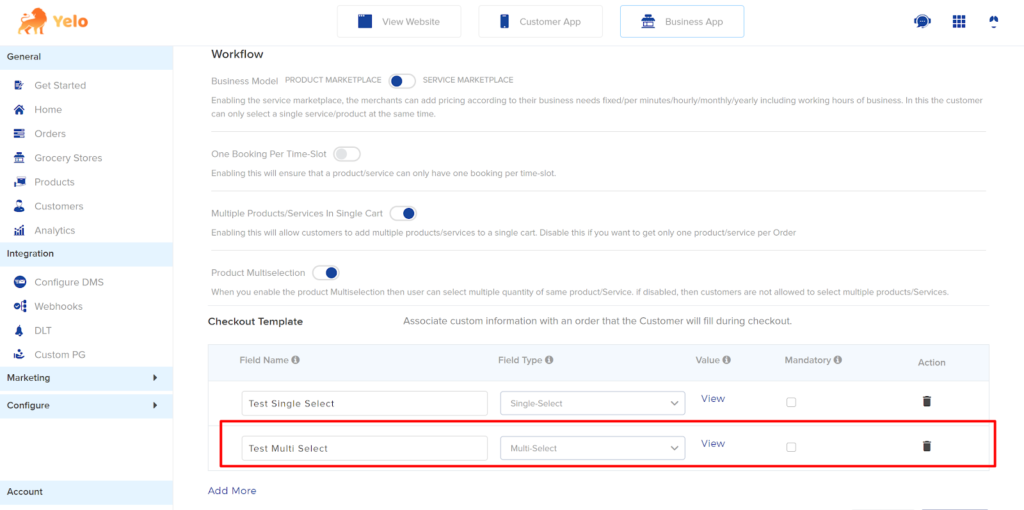
- Scroll down the page and choose the ‘Checkout Template’ option. Here, you can add single or multi-select options.
- Click on Add More and enter the field name.
- Here, we have entered the Field name as ‘Test Single Select.’ Choose the field type as the single select.
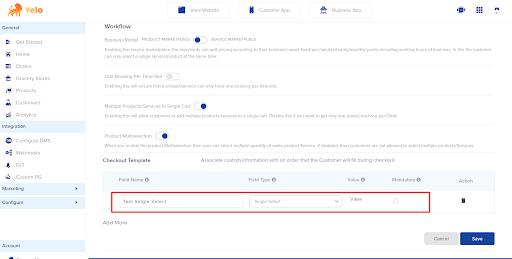
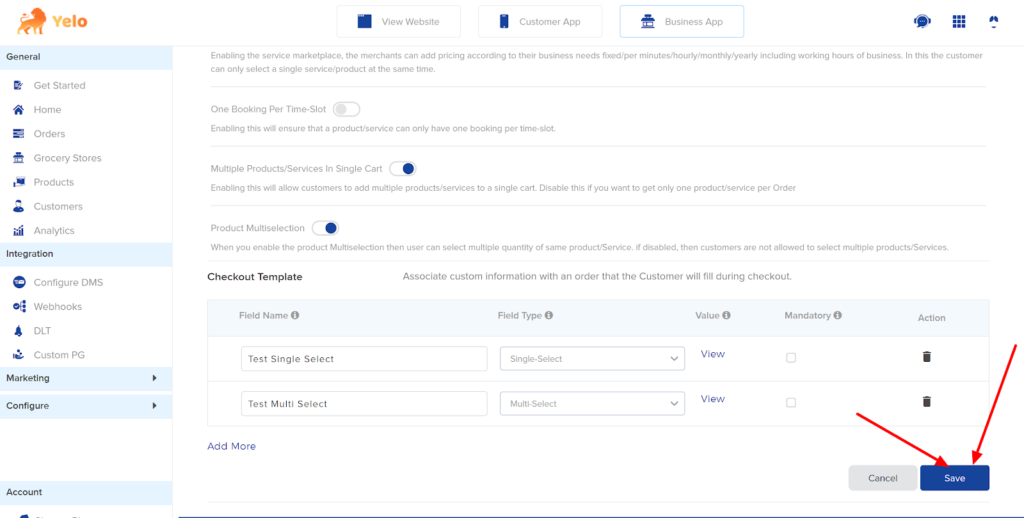
- Next, click on View and Add the options that you want to sell along with your orders. Add the price for each option.
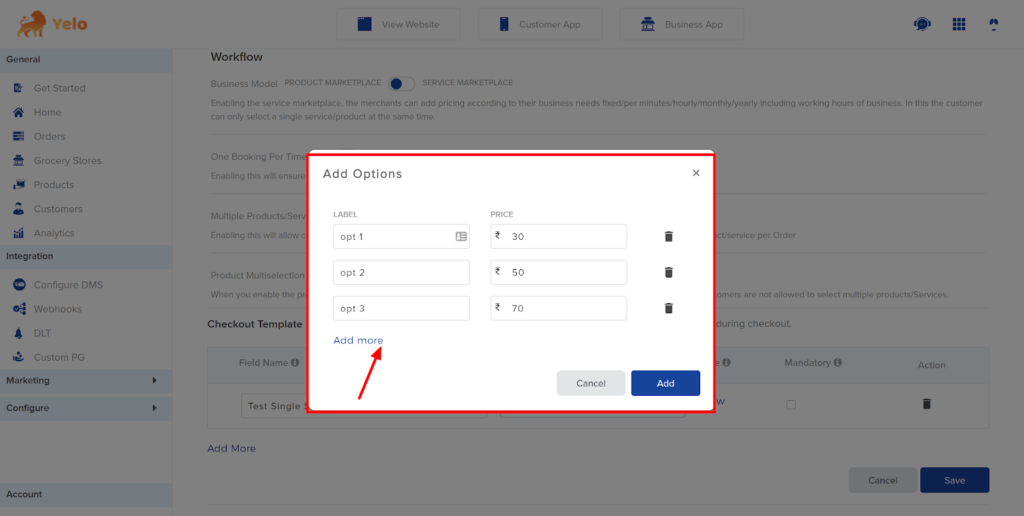
- Click on Add.
- Similarly, you can add the next field as Multi-Select and add the multiple options here.
- Click on Save.
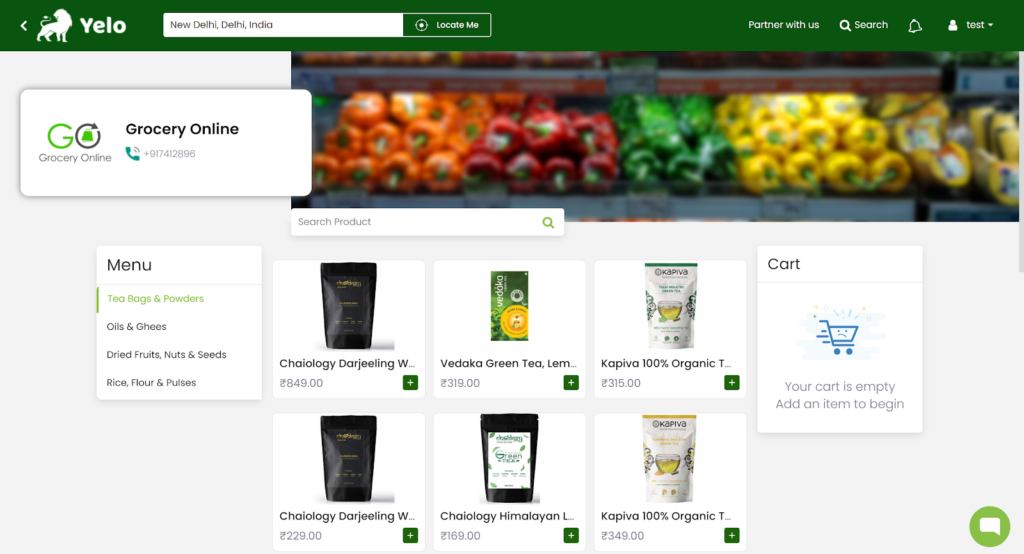
- Head to the Grocery Marketplace and select the grocery store that you have configured.
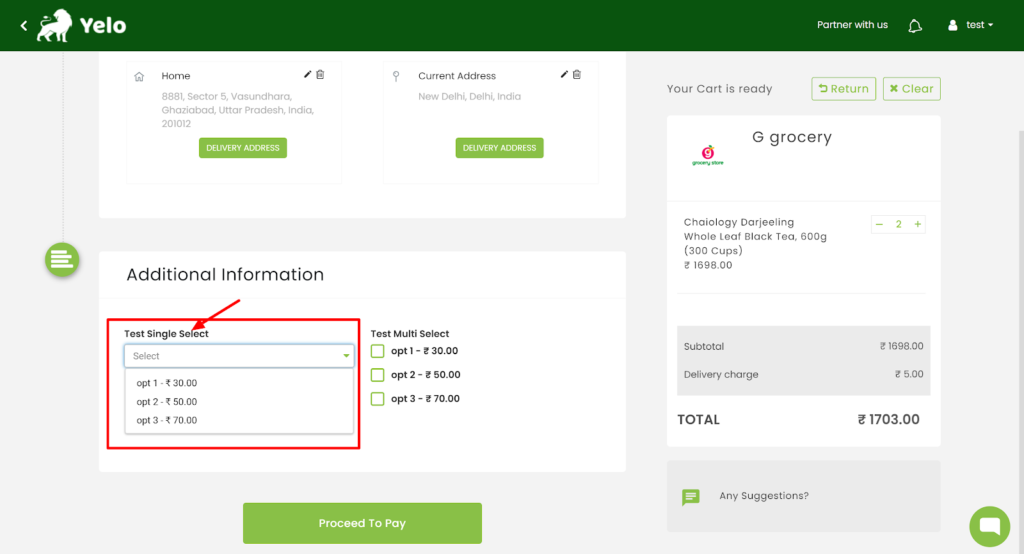
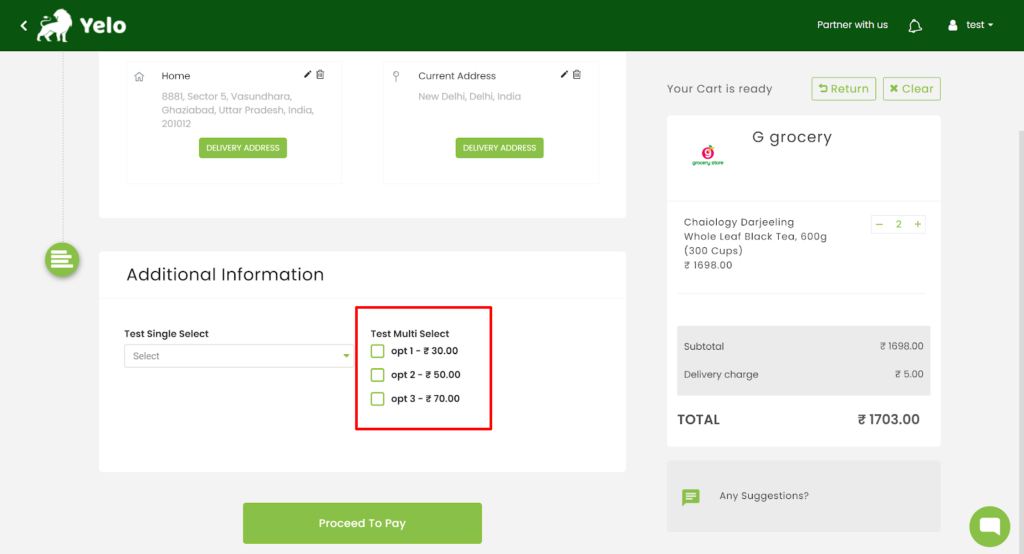
- Once your customer adds the product to the checkout cart and proceeds with the payment, they can select the options.
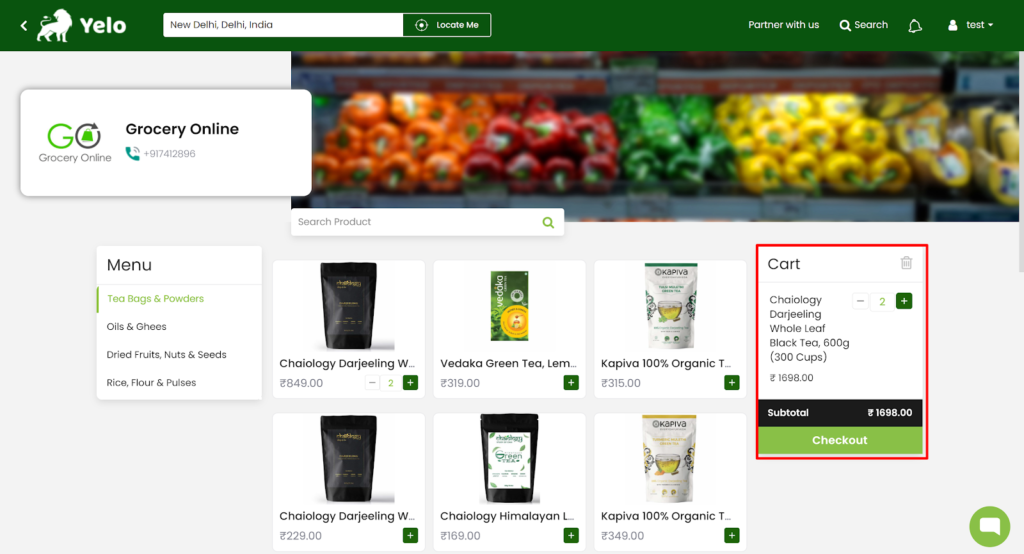
- In the Additional Information box, customers can choose Single select if they want to add only one option or choose the Multi-select option if they’re going to add more than one option.
- Once it is done, the customers can proceed with the payment.
Leave A Comment?