Manually Adding Catalogues To The Store
Are you looking to add catalogues to your store? It’s a simple process when you use Yelo. Let’s take a look at a step-by-step guide on how to do it.
- On your dashboard, go to General -> Products.
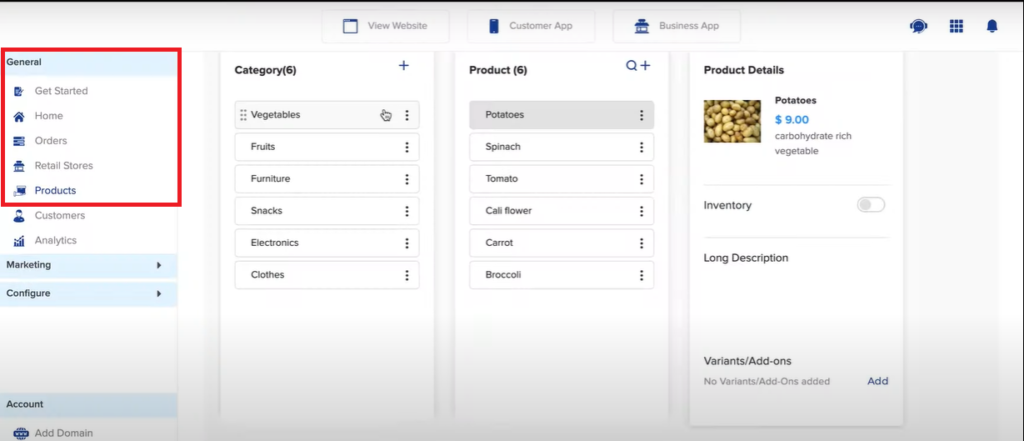
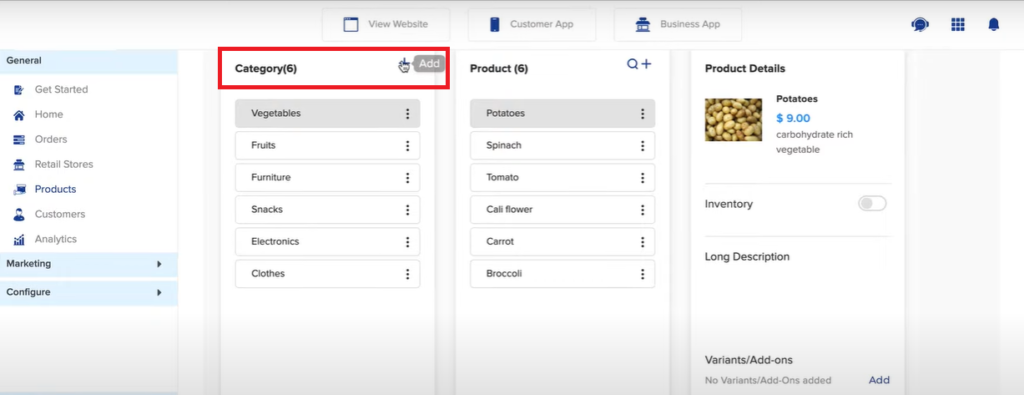
- Click on the ‘+’, which is next to ‘Category’.
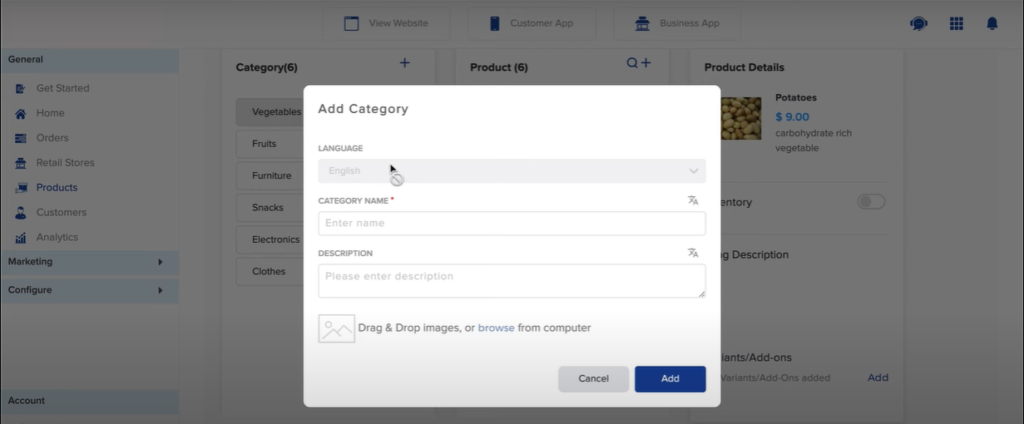
- You will see a dialogue box like the one depicted in the image below. Here, you can fill in the required details. Once you’re done, click on ‘Add’.
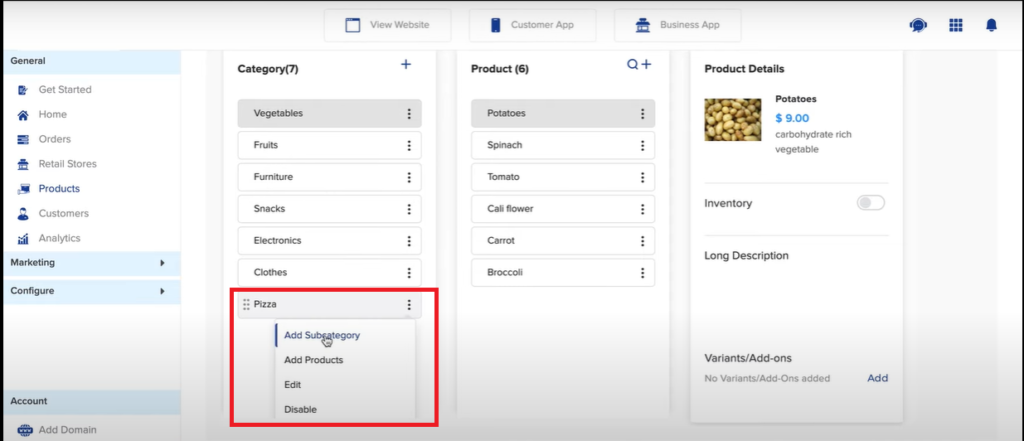
- The category has now been added successfully. Now, you can create subcategories under the main category. All you need to do is click on the three dots next to the category name and choose ‘Add Subcategory’.
- A dialogue box will appear. Fill in the necessary details and then click on ‘Add’.
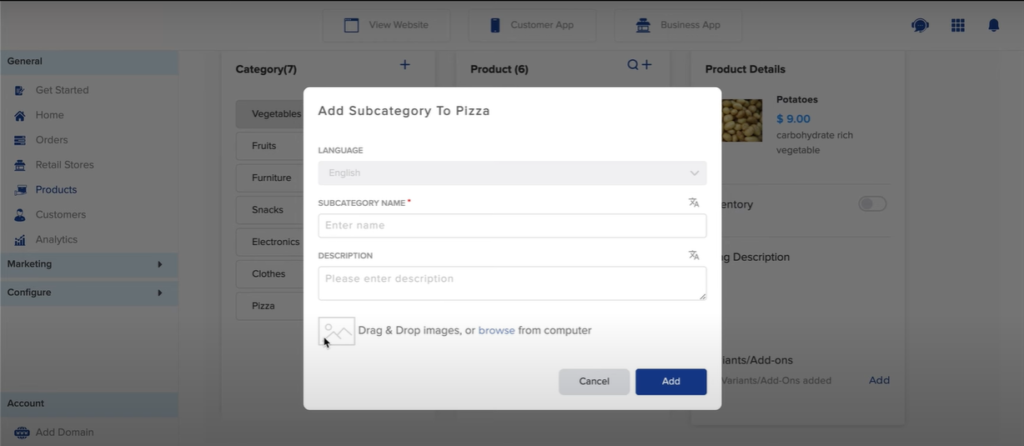
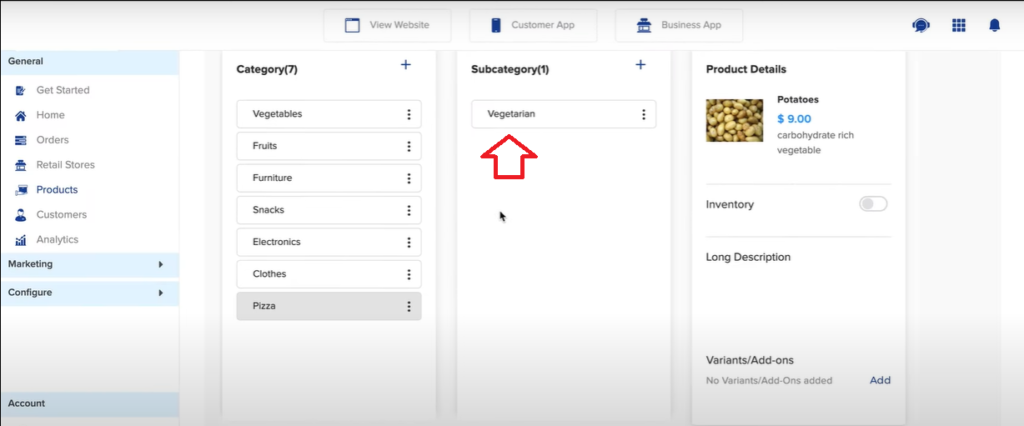
- As you can see, your subcategory has been created.
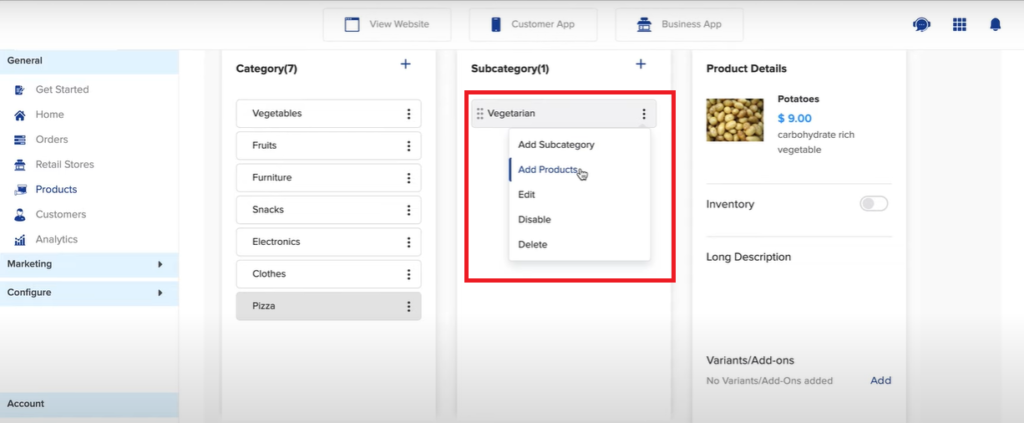
- Now, you can add products. Click on the three dots next to the subcategory name and click on ‘Add Products’.
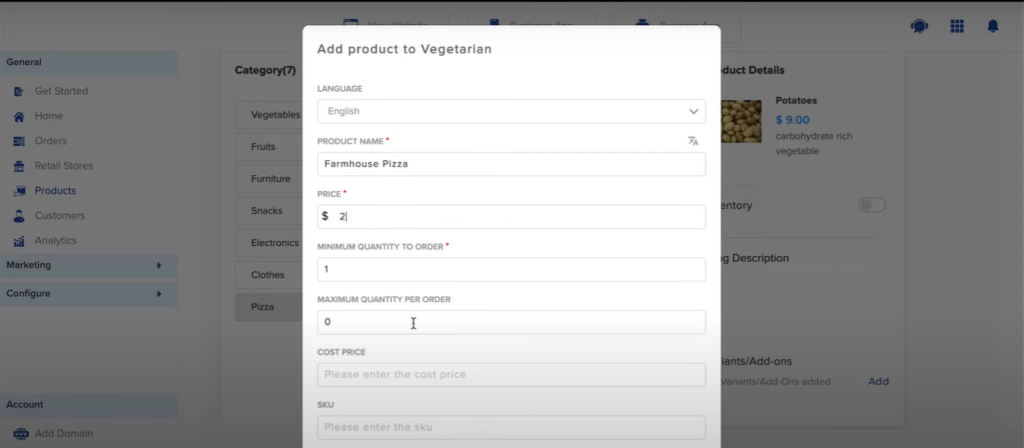
- Fill in the details of the product on the given form and click on ‘Add’.
- Your product has been added successfully.
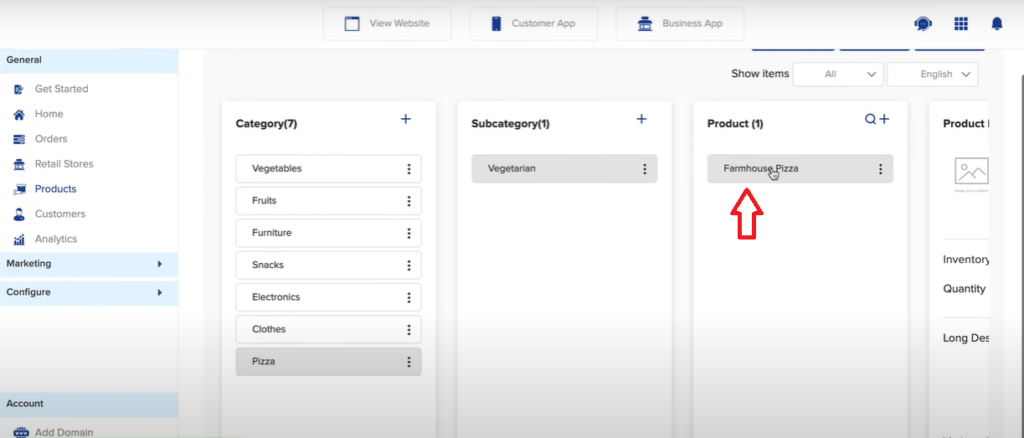
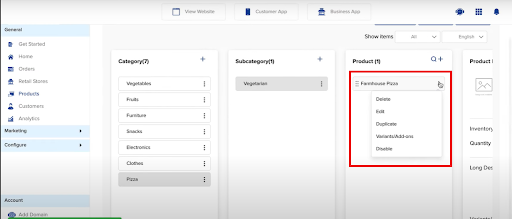
- You can now edit, delete, and do much more with the added products. If there are any variants available, you can add them too. Just click on the three dots next to the product name and click on ‘Variants/Add-ons’.
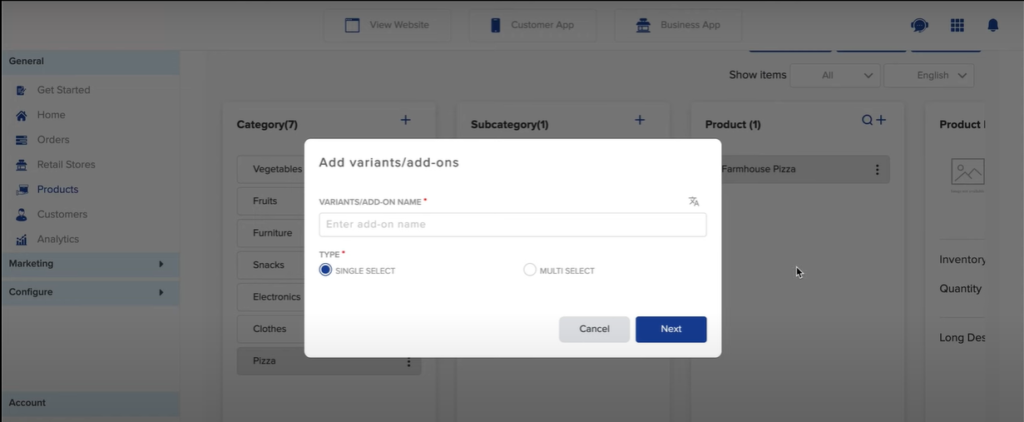
- Add the variant/add-on name and its type. Click on ‘Next’.
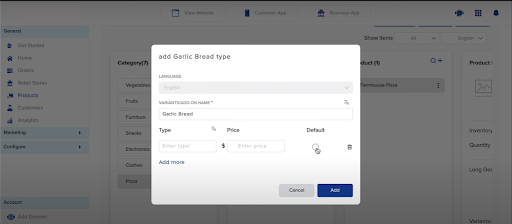
- You can add more details of the variant/add-on, such as prices and more. Click on ‘Add to save the variant/add-on.
- You’ll be able to see the Product Details on your screen now.


Leave A Comment?