
The Merchant Dashboard In Your Marketplace
Admins, as well as merchants, can manage the merchant dashboard. If you are a new or existing merchant, this guide will help you. Read this guide to understand more about the Merchant dashboard.
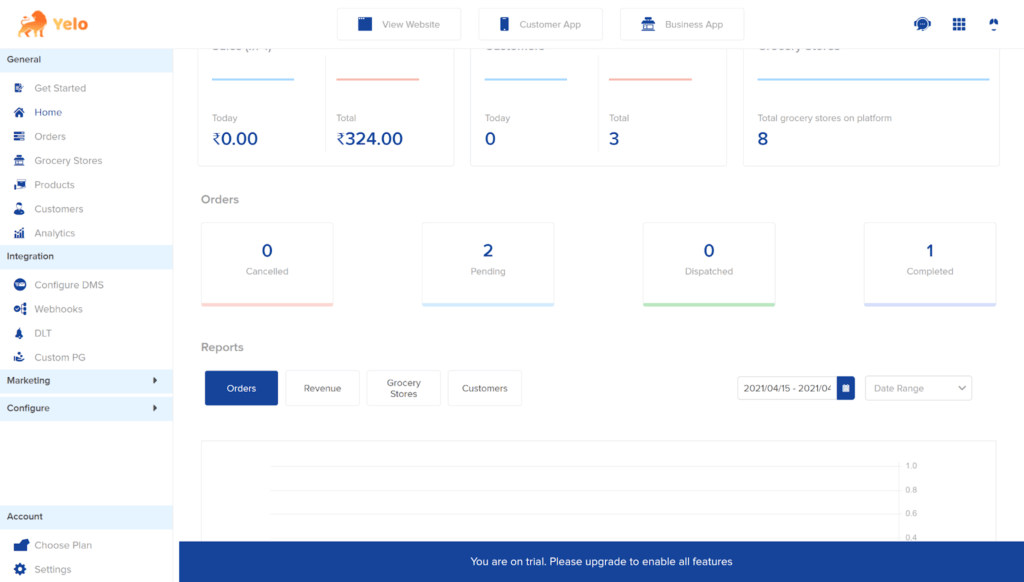
- Log in to the Yelo admin dashboard, where your monthly sales, revenue and orders can be viewed.
- You can make changes to any merchant store by clicking on the left side of the dashboard and clicking on ‘Grocery Stores’.
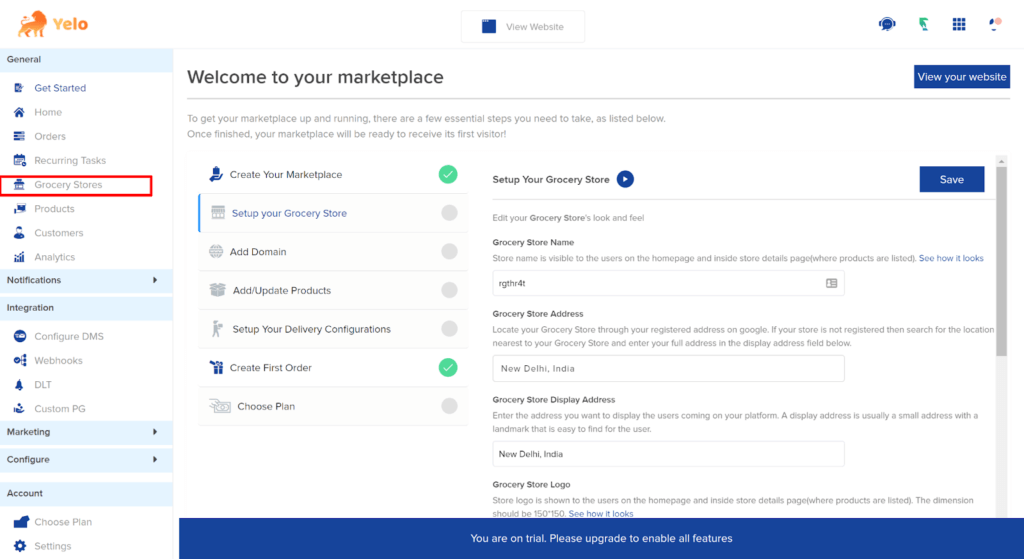
- After selecting the merchant, you will see three tabs.
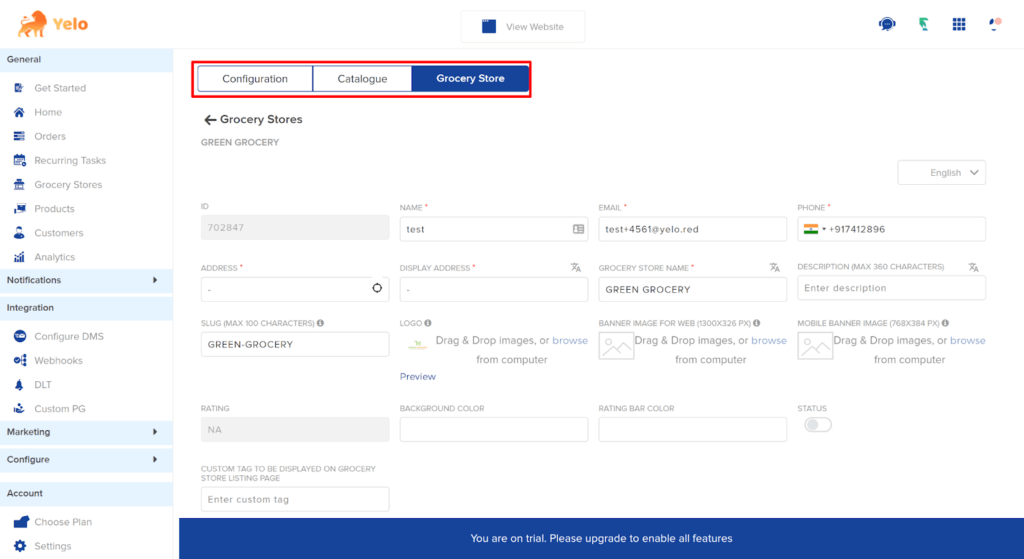
Tab 1: Grocery Stores
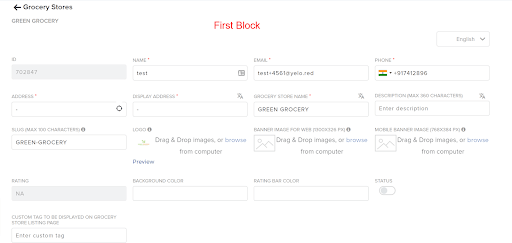
- This tab consists of merchant details such as ID, name, email, phone, address and image in the first block.
- The second block lets merchants manage their serving areas and geofences.
The third block is a QR code that lets merchants open catalogues on their apps.
In the fourth block, admins can add merchants to the sponsored listing and then sort their listings.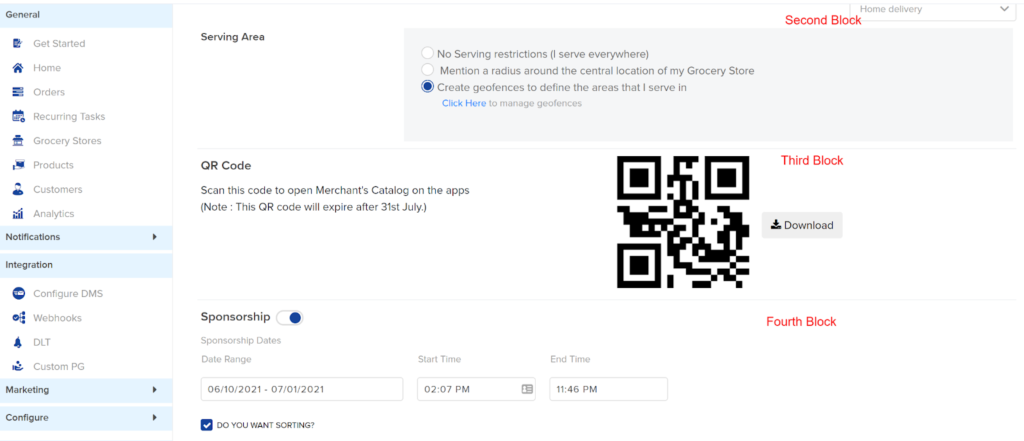
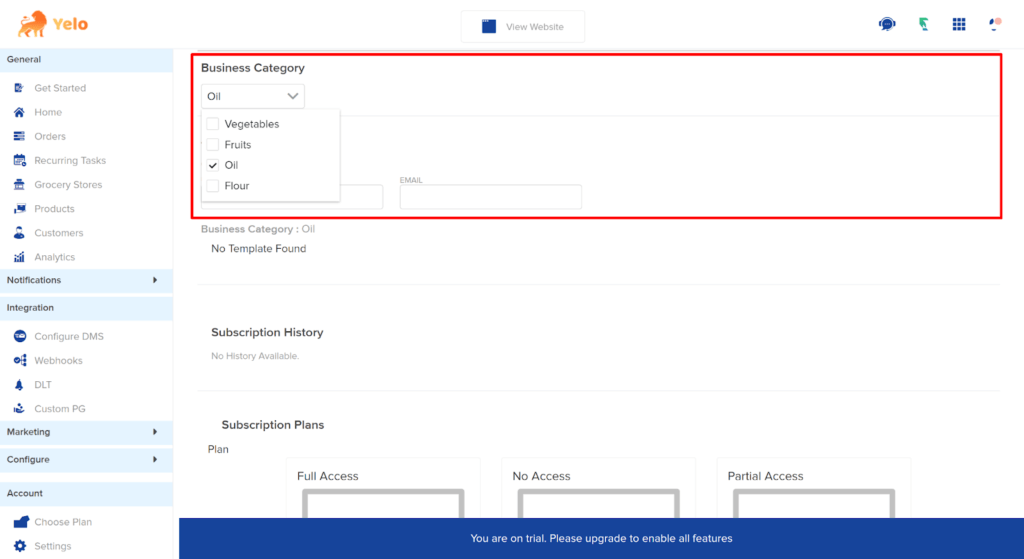
- If you scroll down further, you can choose the business category in the next block by selecting it from the dropdown menu.
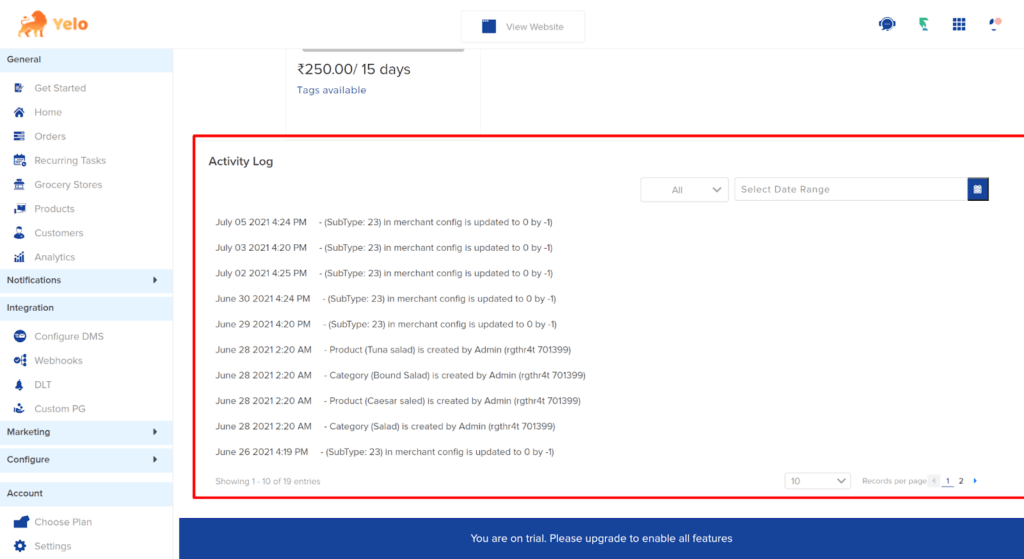
- In this tab, admins and merchants can keep a tab on activity logs, and merchants can see their subscription plans.
Tab 2: Catalogue
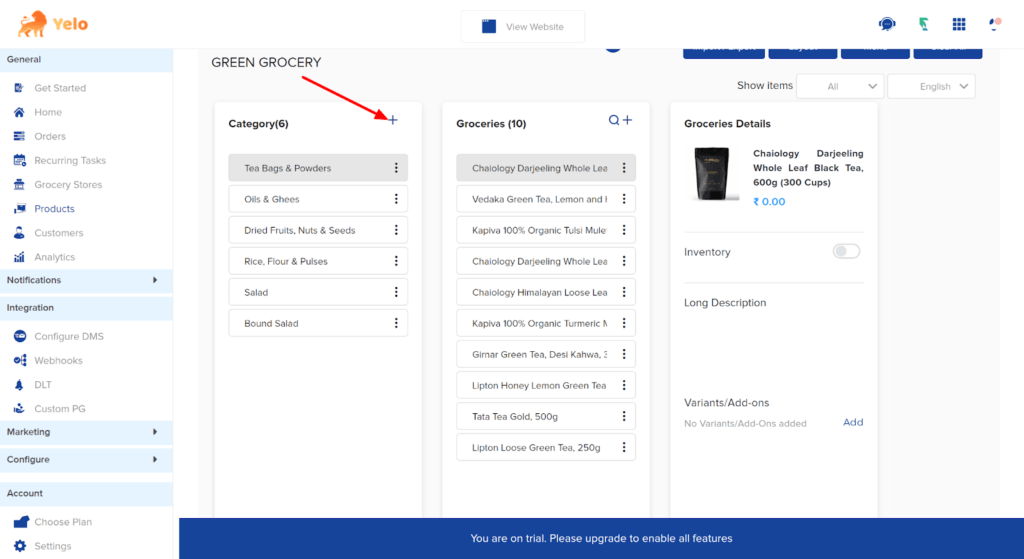
- This tab consists of the merchant store, products and catalogues.
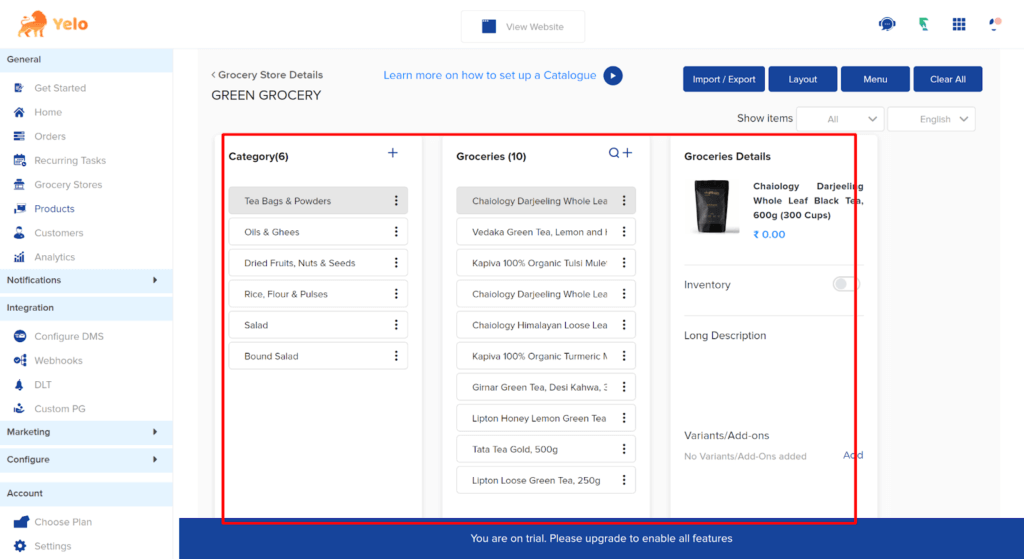
- Here, you can add the category and products inside those categories. To add a category, click on the ‘+’ sign.
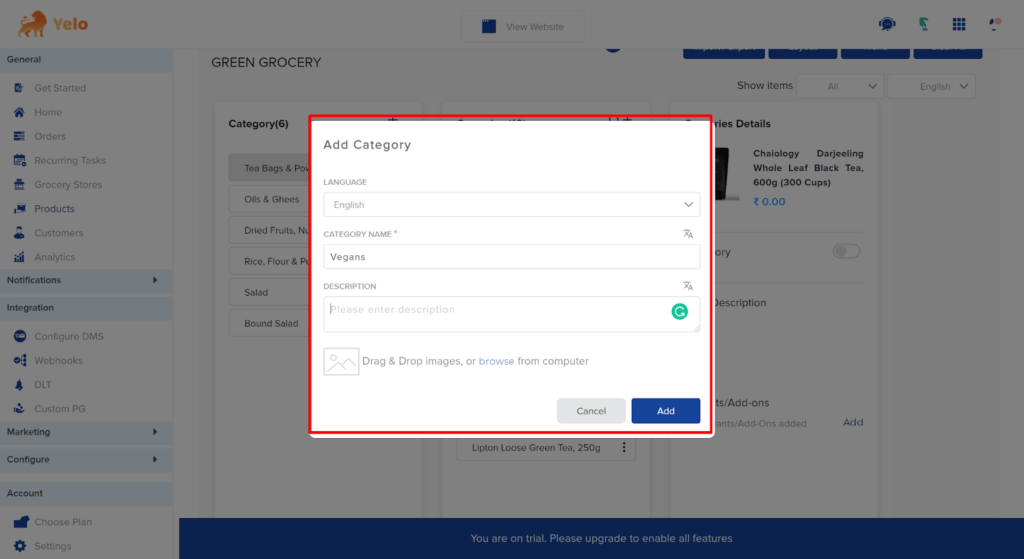
- Add the category name and upload the image to add a new category.
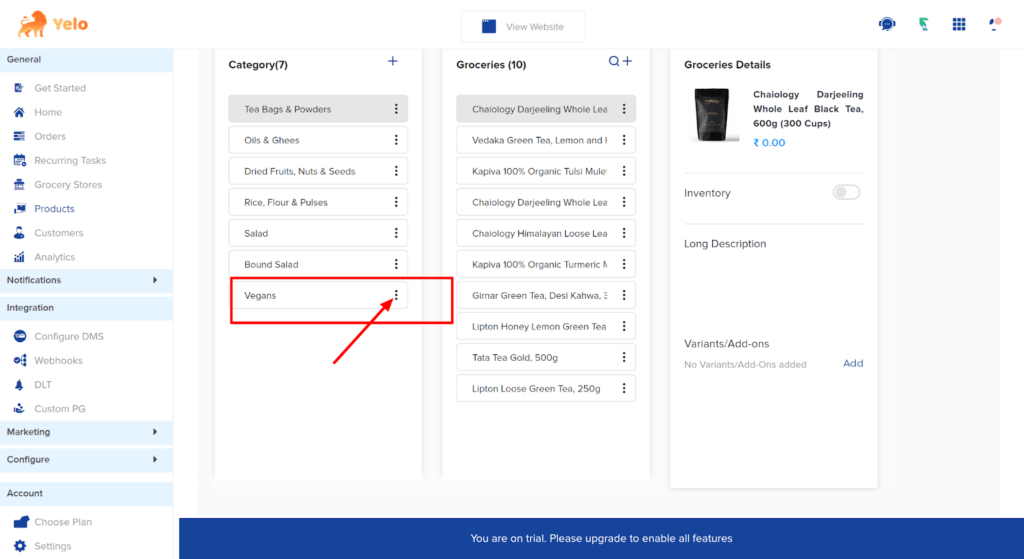
- You can add new products in the existing category or add a new category by clicking on these three dots.
- A new dialogue box will appear. Fill in the required details and upload the product image to proceed.

- After clicking on ‘Add’, your new product will be added.
Tab 3: Configuration

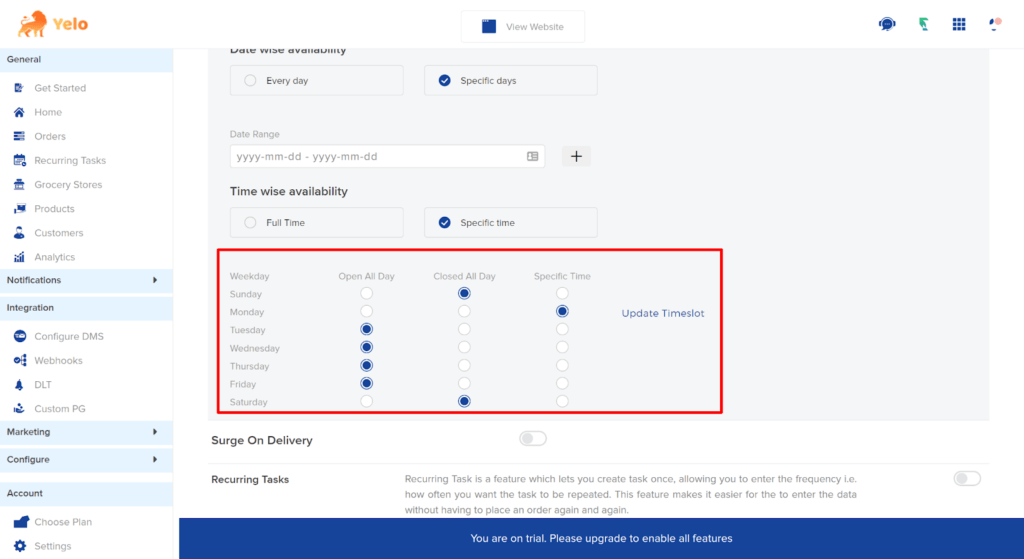
- Here, merchants can choose specific days when they operate, or they can choose to operate every day.
Similarly, they can choose merchant timings as shown below.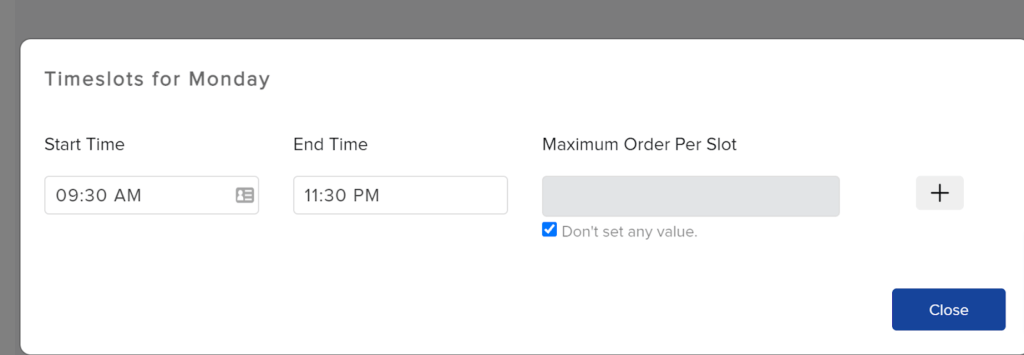
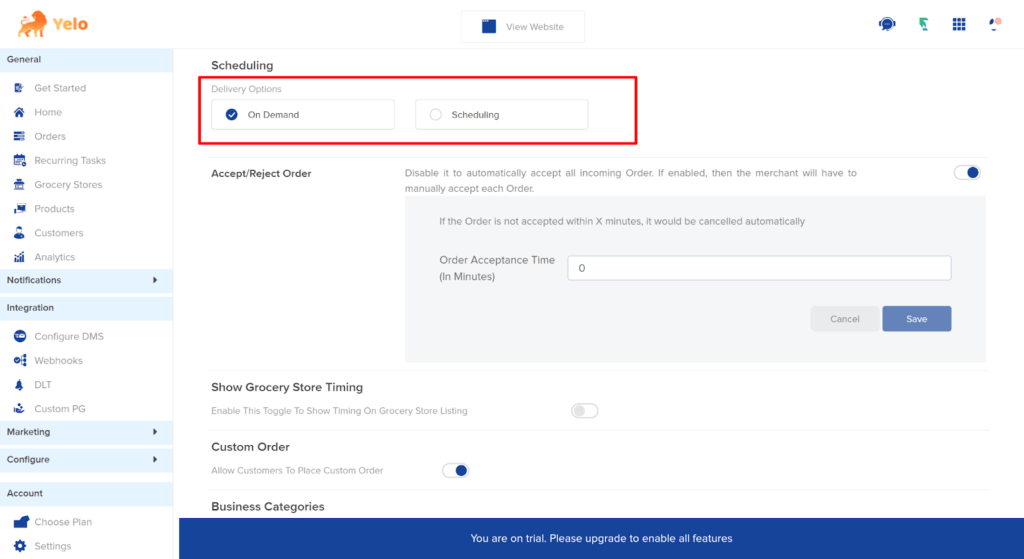
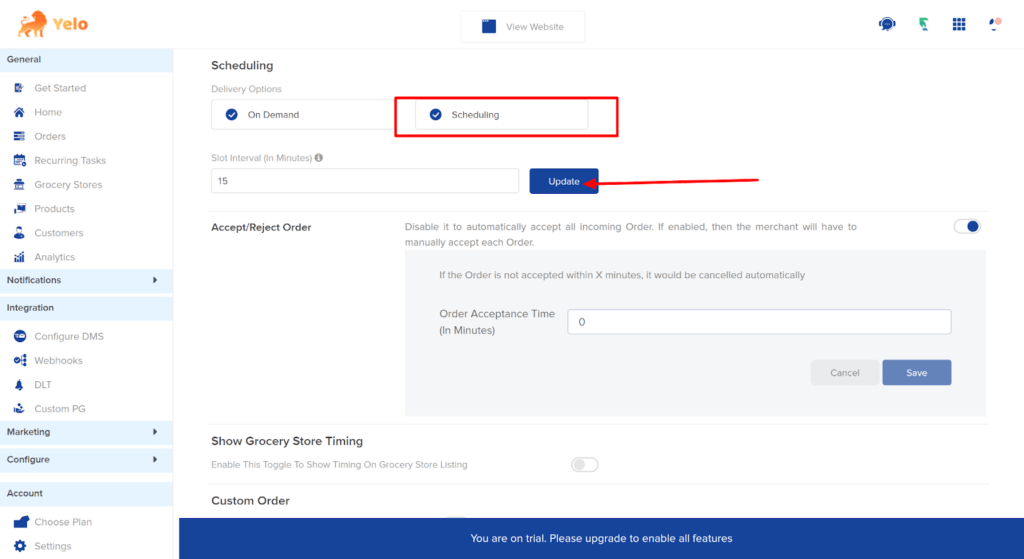
- In this tab, merchants can either choose to deliver on-demand or schedule the order for a specific time.
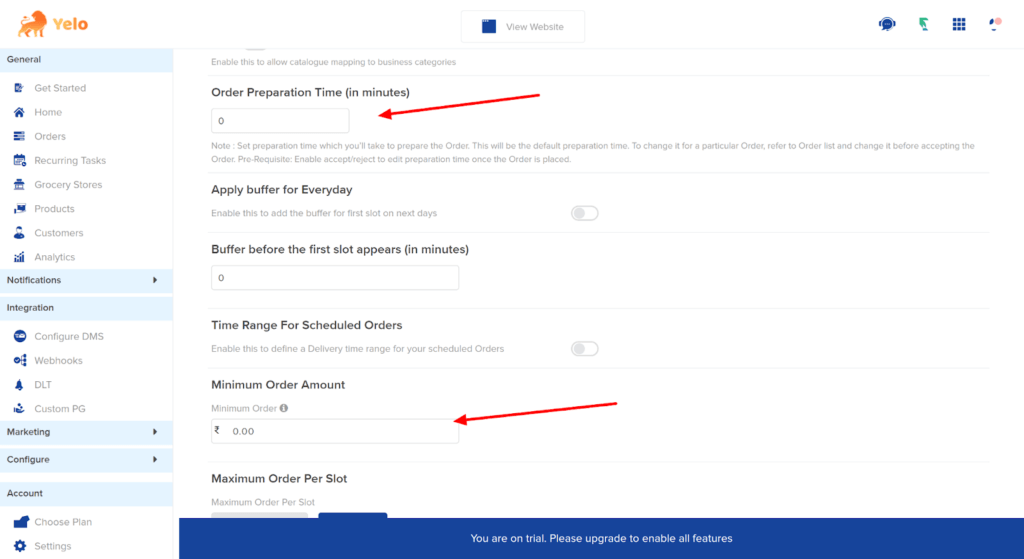
- When you scroll down further, merchants can edit order preparation time, set minimum order amounts, and accept or reject orders.
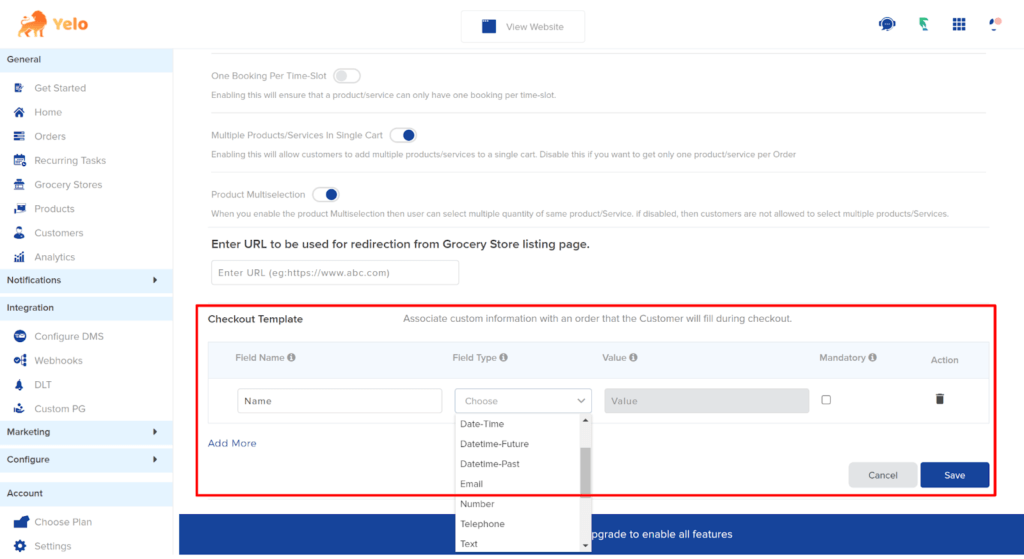
- Merchants can also create fields for their checkout templates.
Leave A Comment?