
Add-ons
From now onwards admin/merchant/manager can create Global add-ons for their merchants and assign them to multiple products. Earlier admins had to create product-specific add-ons.
How to create Add-ons?
Step 1: On the top of the catalogue page is a new Add-ons Button from which the admin/merchant/manager can create Global add-ons. Click on the add-ons Button.

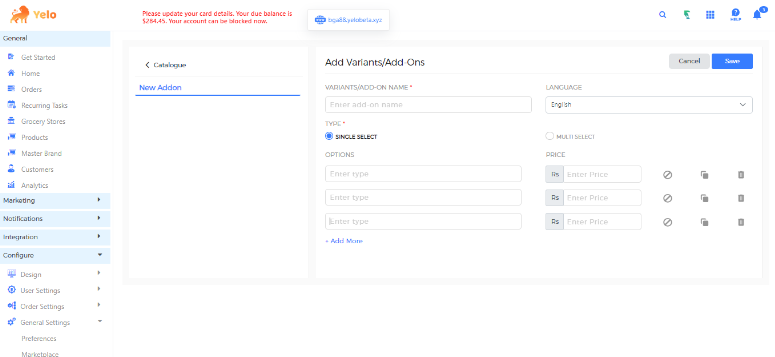
Step 2: After clicking on addons below screen will appear. Click on add new addons to create new addons.

Step 3: After that the below screen will appear. From this page, admins can now create the desired add-ons.
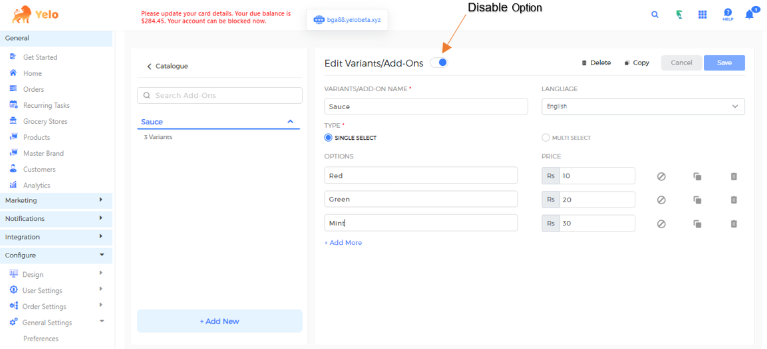
- As shown in the above screenshot admin can Disable add-ons globally.
- Now the admin can delete, and copy add-on options as well.
- Update addons type globally between Single select and multi select.
Admin can create multiple add-ons here according to their need.
How to assign addons?
- After the creation of add-ons globally, the addon “assign” option will be visible on every product.
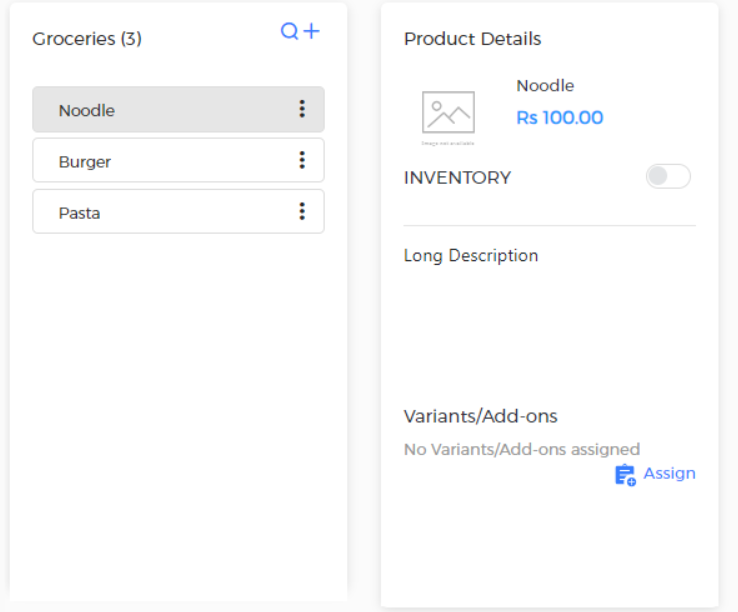
- From here admin/merchant/manager can assign globally created add-ons to the products.
- After clicking on the assign button below popup will appear
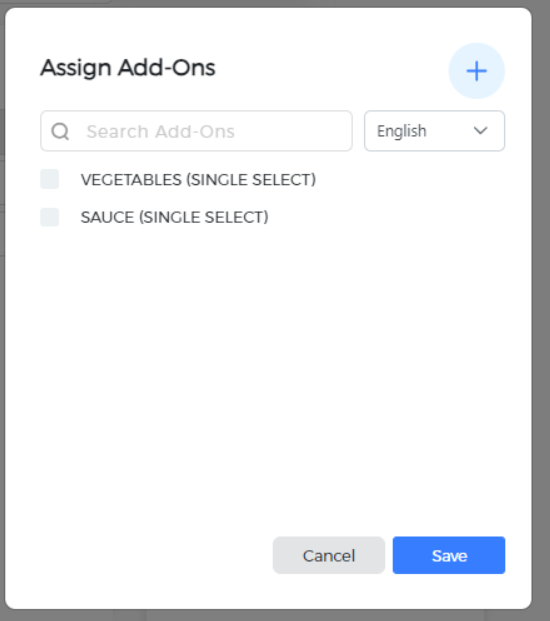
- From this list user can assign any addons to the products with their dedicated configuration as Default customization and exactly “no of add-ons thing”
- Select any add-ons by clicking on the checkboxes.

- You can select the default add-on to be chosen and clear the default settings as well.
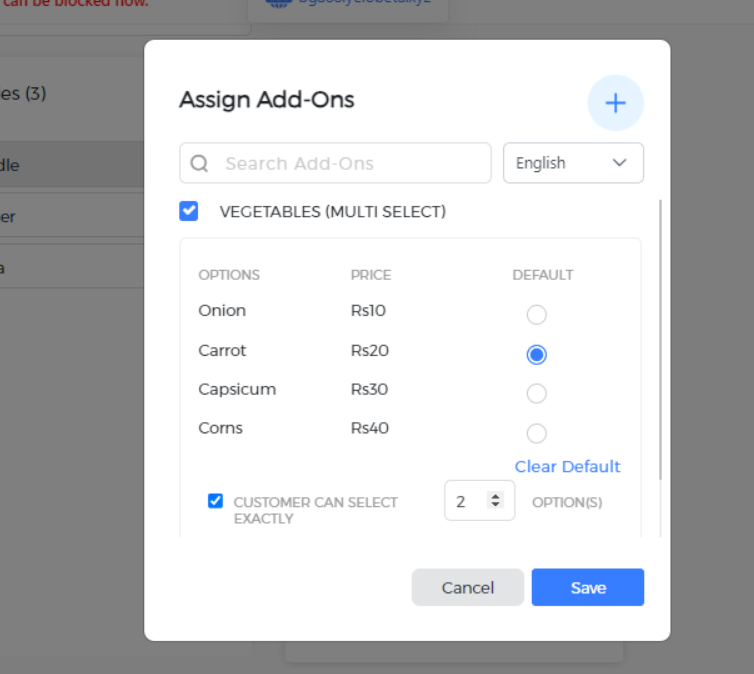
- In the case of multi-select add-ons, you can set the no. of add-ons the customer can choose. Just select the checkbox and set the no. of add-ons that can be chosen.
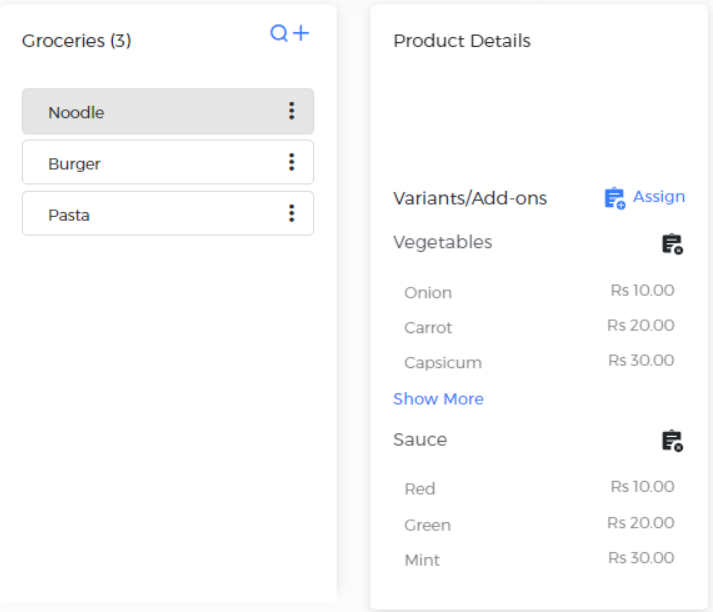
- Assigned add-ons will appear on the product details cards.
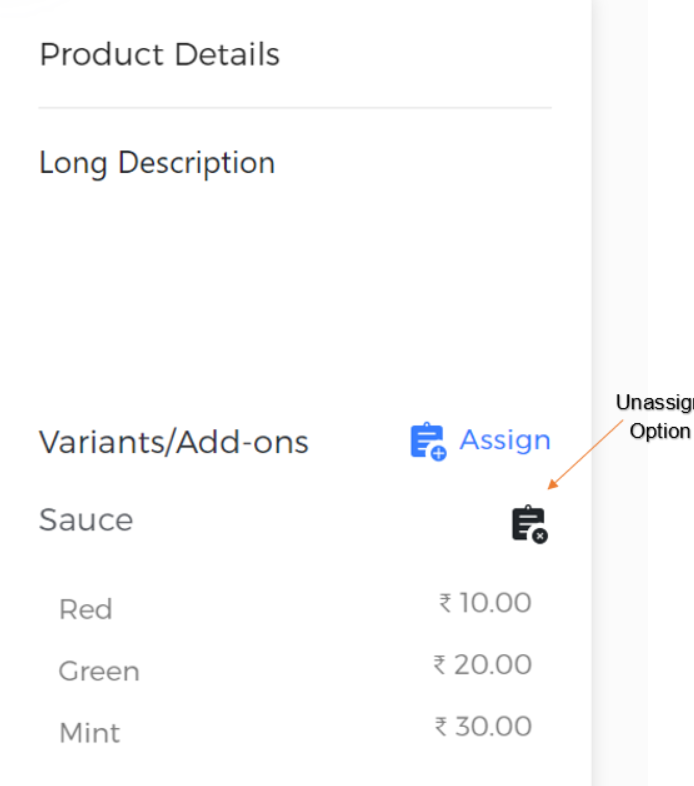
How to Unassign Addons?
- In case you want to unassign the addon click on the unassign button
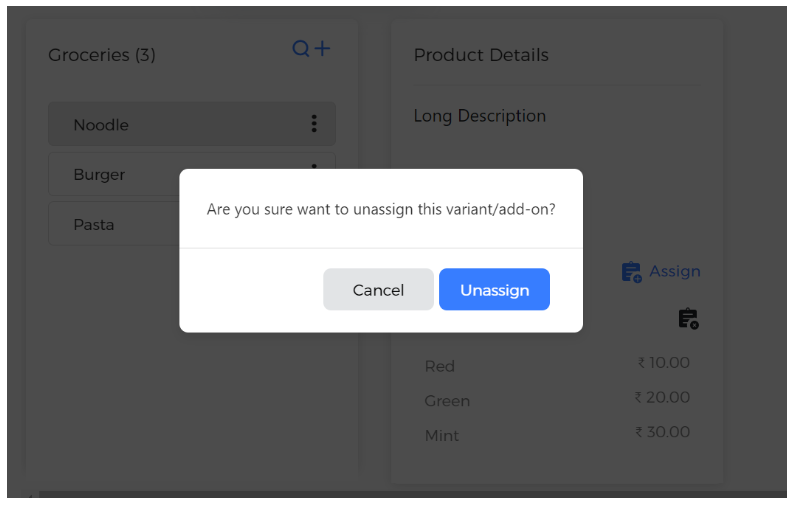
- A confirmation popup will open, click on unassign and the addon will get de-assigned.
CSV
CSV is generally used to add/update data in bulk. Currently, there are 4 types of CSV’s on Yelo
- Category CSV
- Product CSV
- Add-on’s CSV
- Combined CSV
We have not made any changes in the Category and products CSV’s. We have only modified our add-ons and combined CSV’s.
Add on CSV:
Now add-ons add/update flow from CSV’s is a bit different.
Now there will be 2 options:
- Add add-ons
- Map add-ons
New flow: Now users have to add new global addons first by using add addon CSV then by using Addon mapping CSV they will have to map addons to the products.
If you have not added any add-ons earlier or your add-ons list is empty then you will only see add Add-ons option initially.
1. Add add-ons:
This option provides the flexibility to add new add-ons globally for the merchant.
3 options come under this section.
- Sample CSV
- Existing CSV
- Sample update CSV
Sample CSV is used to create new add-ons. In the sample CSV now there will be 6 important and mandatory fields to add add-ons.
- Addon Name*
- Multi Select*
- Delete
- Addon Option Name*
- Price*
- Enabled
Let’s say you have to add Sauces to your add-ons with 4 addon options then you’ll have to input data like the attached Image.
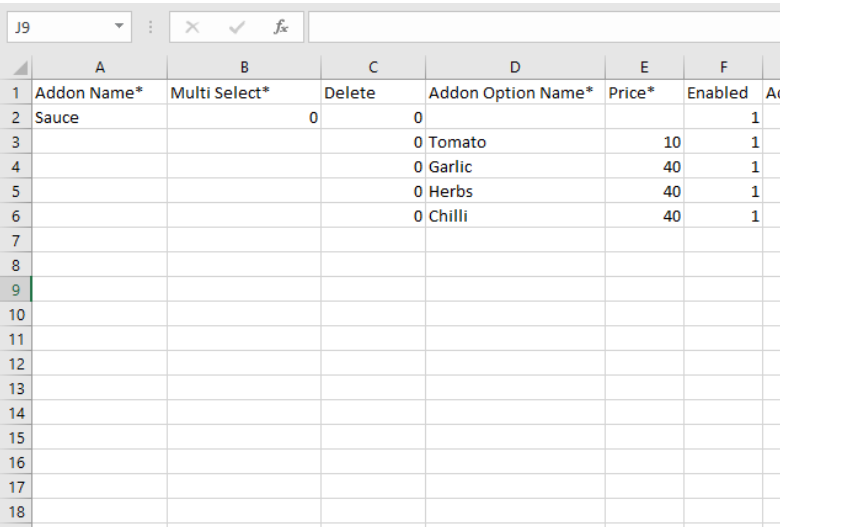
- Multi Select: This option provides the flexibility to mark addons as single-select or multi-select. It can have 2 possible values 0 or 1.
0 represents the addon as a single select.
1 represents the addon as a multi-select.
- Delete: If you have to delete any addon or any addon option just input the value as 1 in the corresponding column.
0 represents no deletion operation will be performed.
1 represents the deletion operation that will be performed on the row.
- Enable: It provides the flexibility to mark any addon or addon option Enable/Disable.
0 represents the addon/option is Disabled.
1 represents the addon/option is Enabled.
Existing CSV:
Existing CSV provides all the data of global add-ons created on the merchant.
Sample Update CSV:
Update CSV provides the flexibility to update any specific addon corresponding to their addon/option ID.
To use this you just have to
– Download the sample updated CSV
– Input the required data
– Switch the toggle to update csv
– Select the CSV and import it.
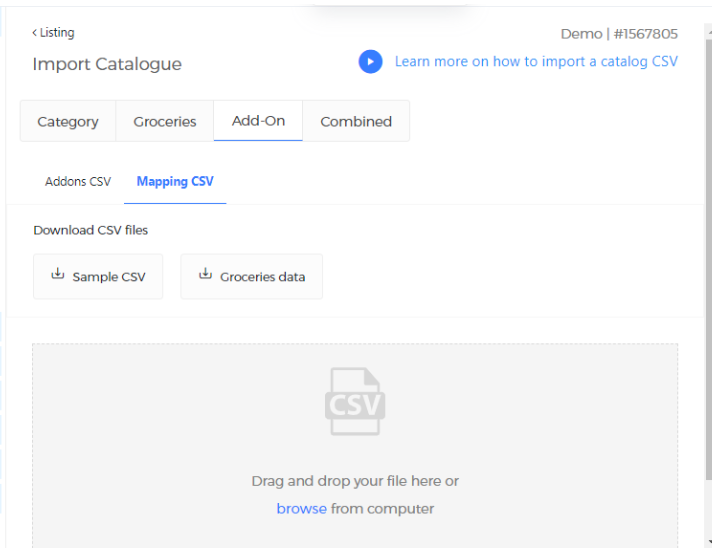
2. Addon mapping CSV:
Mapping CSV is used to map add-ons with the products. After creating addons users will have to map addons with the products.
To map products with add-ons, users will have to download the mapping sample CSV and fill in the required data.
For Example:

- Product ID: You have to input the product ID to which you want to add/assign an addon.
- Add-on ID: In this column, the user has to add add-on IDs corresponding to product ID’s.
- Default Cust ID: Enter the addon option ID you want to make as the default Customisation for that product.
- Minimum Selection Required and Minimum Selection: This field is used with multi-select addons if you are using single-select then you don’t have to input any values in this field. For multi-select let’s say you have an add-on named Sauces which has 5 addon options and you want customers can select exactly 2 addon options, then you have to input 1 in this column to mark it as mandatory and then you have to input the value 2 in the Minimum Selection Column.
- Deleted: If you have mapped addons with products and you want to delete the mapping then you have to insert that value as 1 in this column to remove the mapping in the corresponding column.
0 represents no deletion operation will be performed.
1 represents the deletion operation that will be performed.
Combined CSV:
No significant alterations have been made to the overall structure of the combined CSV file. The only updates pertain to the addons section within the combined CSV. Users are now restricted to mapping add-ons in accordance with the addon mapping CSV.
Important Points:
- As of now while duplicating merchants, addon duplication from one merchant to another is not supported.
- When we will push this feature live, no data loss will happen with any customers.
- For native app users, an app rebase is not required.
Leave A Comment?