
Create Merchant filters in Marketplace
Now, you can add the custom fields in the Yelo Merchant page and get noticed using the filters by your customers. You can follow these simple steps to set up the custom fields in the marketplace.
- Log in to the Yelo admin dashboard, where you can see your monthly sales, revenue and orders.
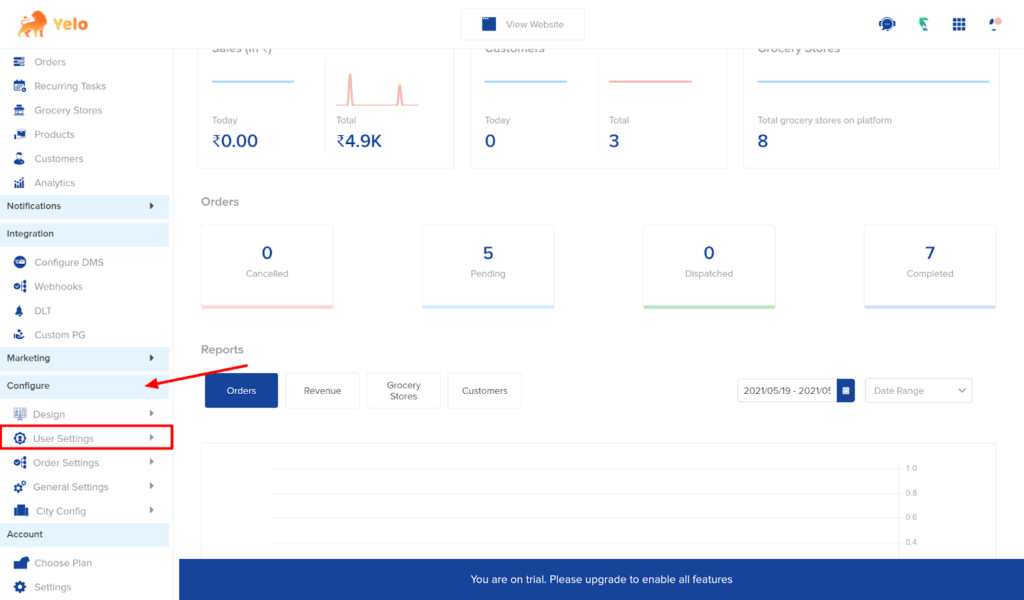
- To the right of the dashboard, go to Configure and find User Settings.
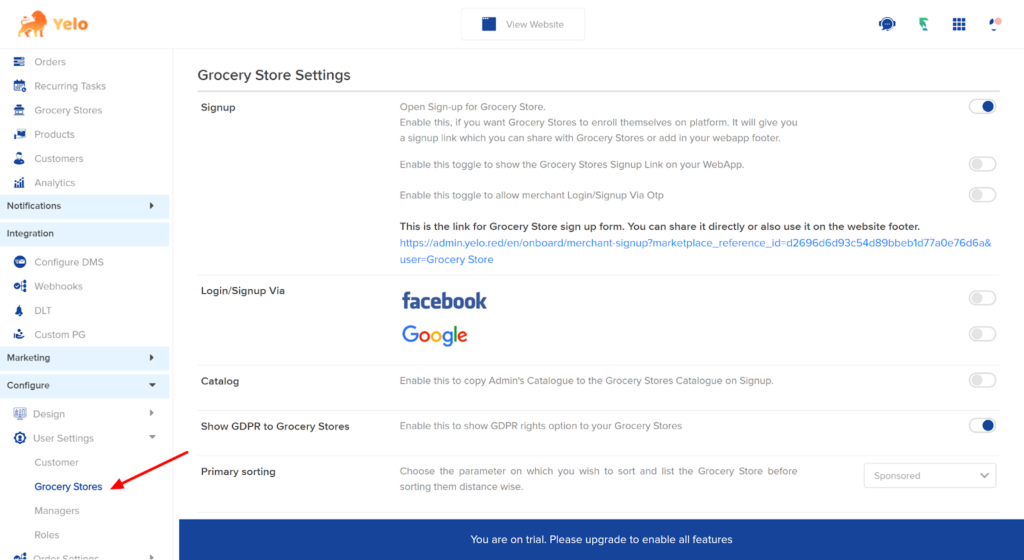
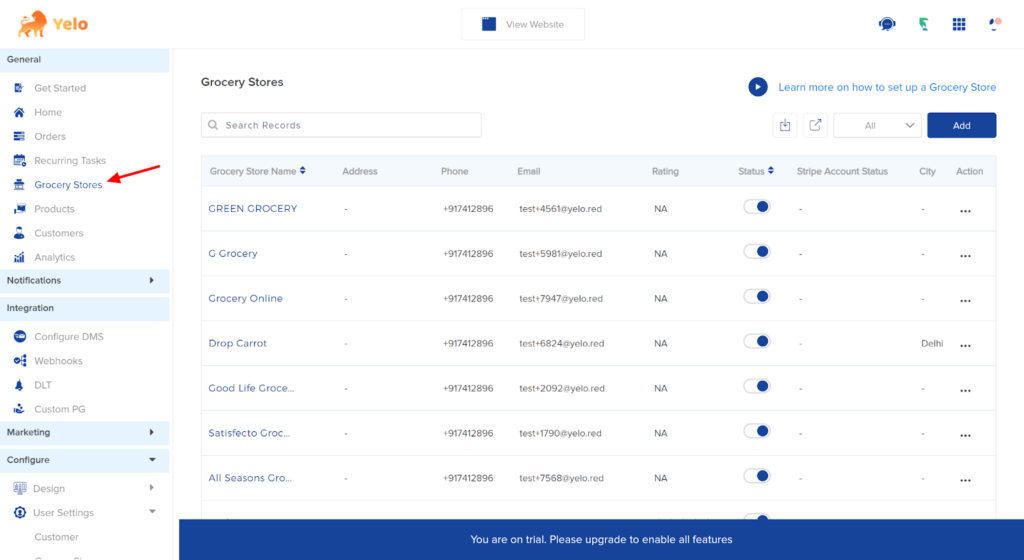
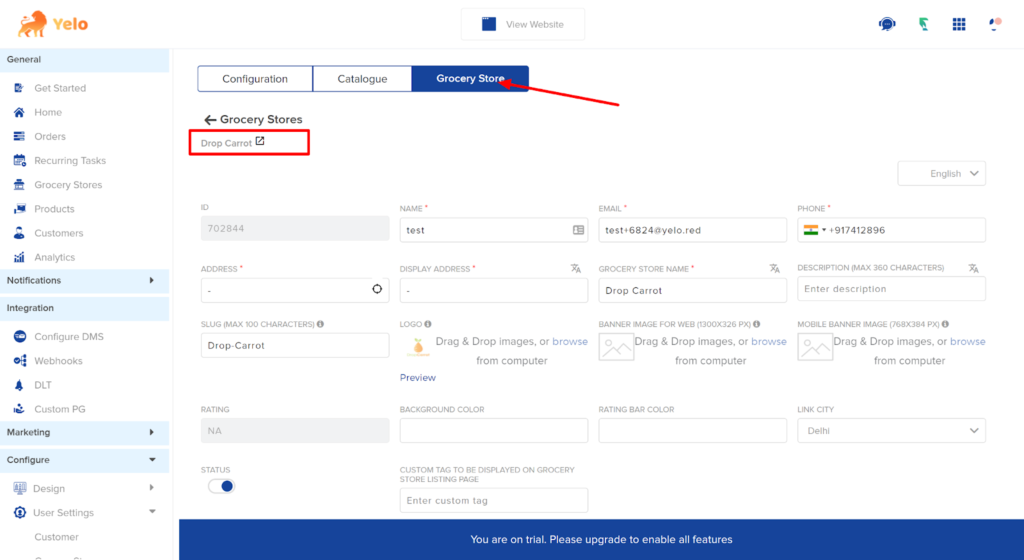
- From the drop-down, click on Merchants store. In this example, we have shown a Grocery store.
- Scroll down the page and toggle on the button ‘Custom Fields’.
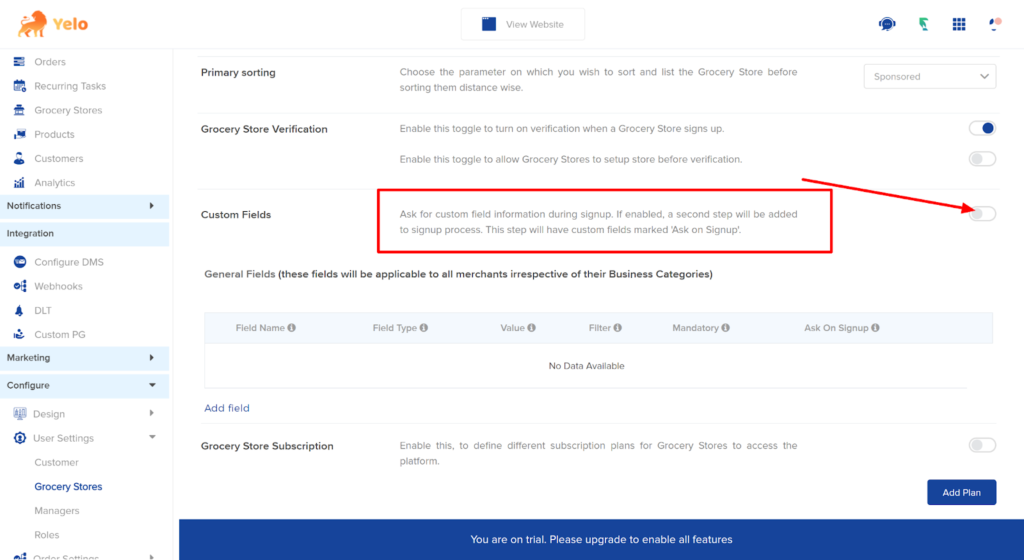
- After toggle on, click on ‘Add Field’ to add any custom field to the marketplace merchant store.
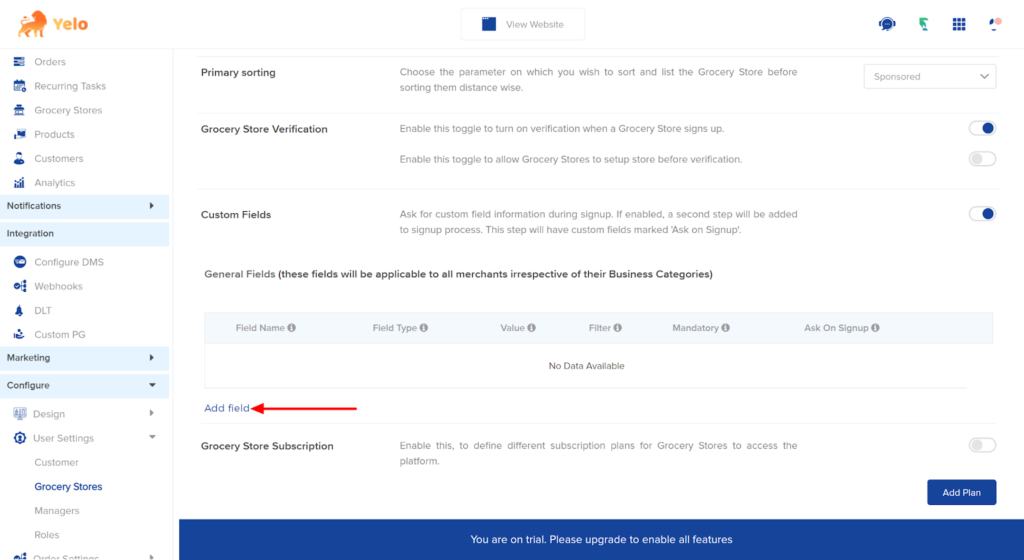
- In the box, enter the Field name such as Product type or Brand, delivery options. You can add various filters to the marketplace. Select the field type from the drop-down depending on the type of filter you want to set up.
Enter the value in the box and choose if the field is mandatory or not or if you need the information during Sign up. In case you have more than one item to sell, you can choose the multi-select option.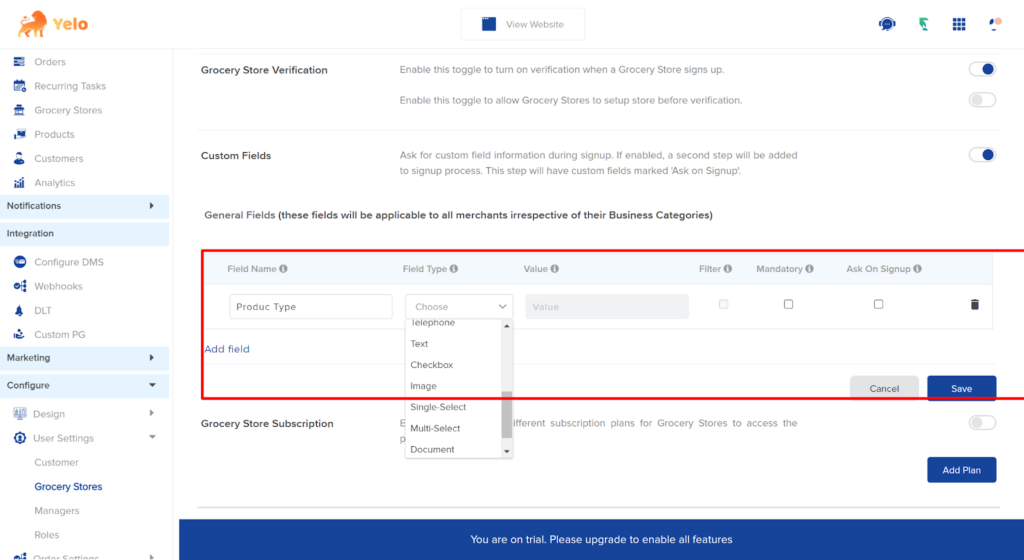
- Now, head to the Merchants store and choose if you want to customise a store specifically.
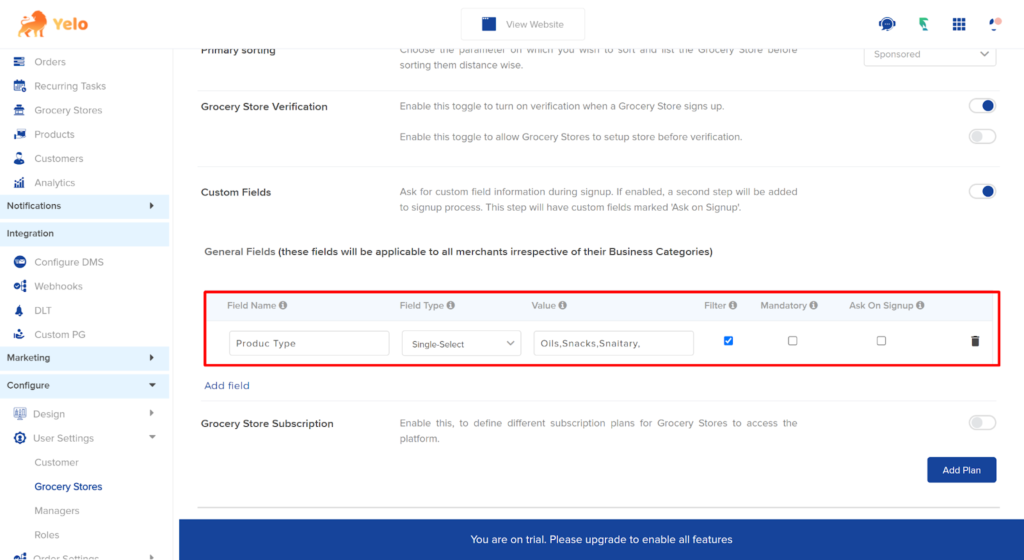
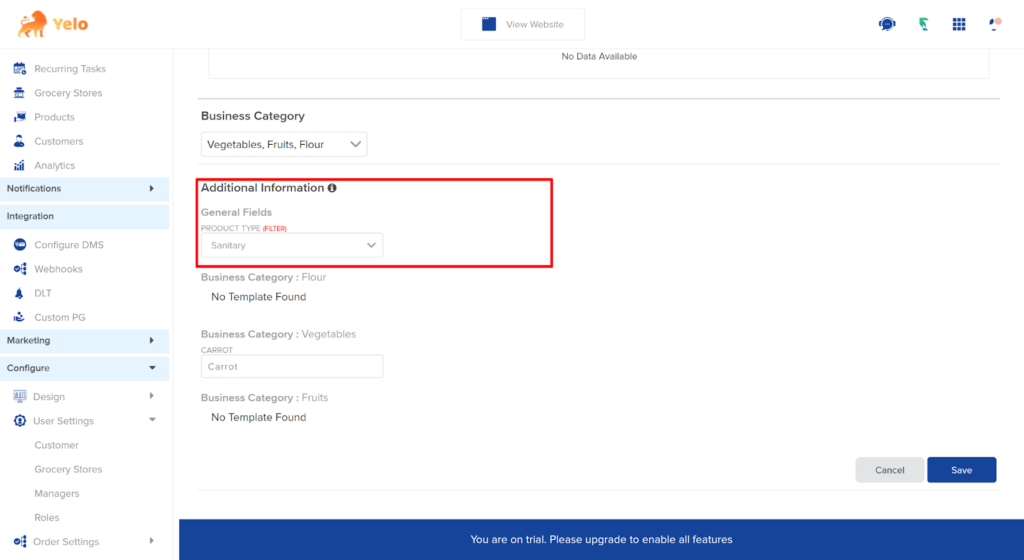
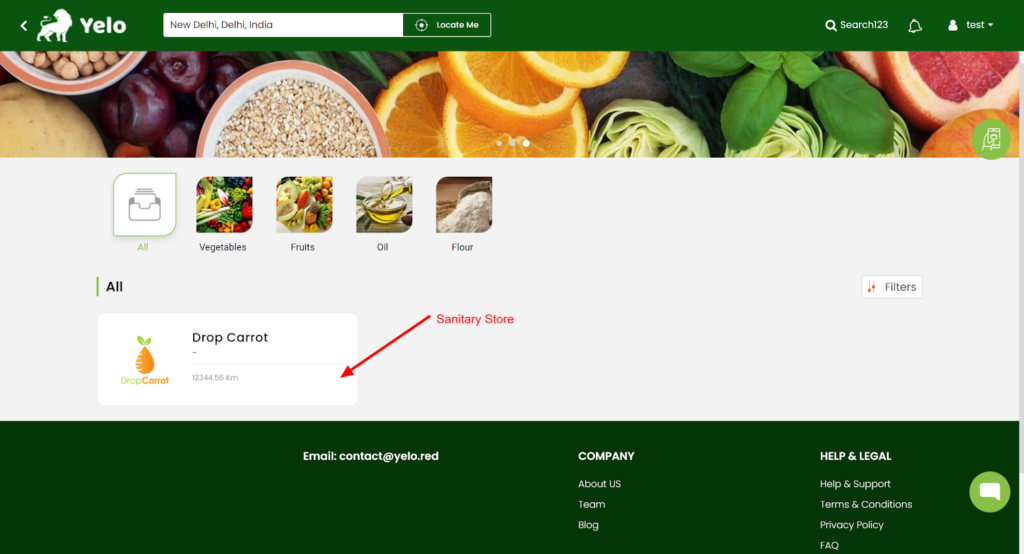
- For example, if a store specifically sells the Sanitary, you can add filters to it. To do this, click on the merchant store and scroll down.
- Scroll down and choose the field type for your store. Click on ‘Save’.
- The customers can now use the filters to sort the stores based on the items on the website.
Customers can choose the filters accordingly and save their preferences.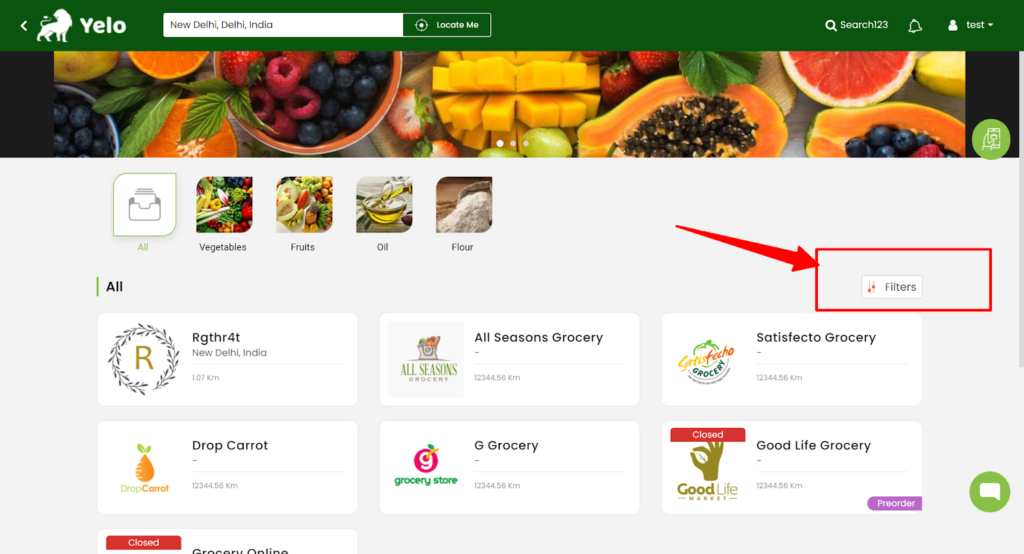
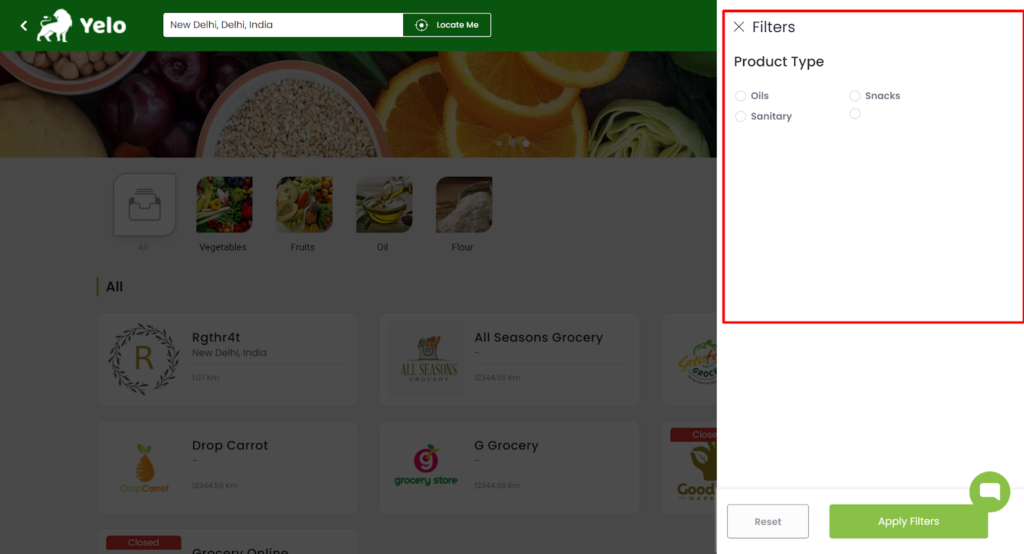
- This is how the customer’s preference will get sorted. Here, we have selected the stores selling sanitary items.
Leave A Comment?