
Overview
This guide will walk you through the process of integrating Google Calendar seamlessly with Yelo. This integration allows you to leverage the power of Google Calendar for efficiently managing booking/appointments created on Yelo.
Integration Steps
Step 1: Obtain Google Calendar Credentials
To get started, you’ll need to obtain Google Calendar Credentials. Follow these steps:
- Go to the Google Cloud Console.
- Create a new project or select an existing one.
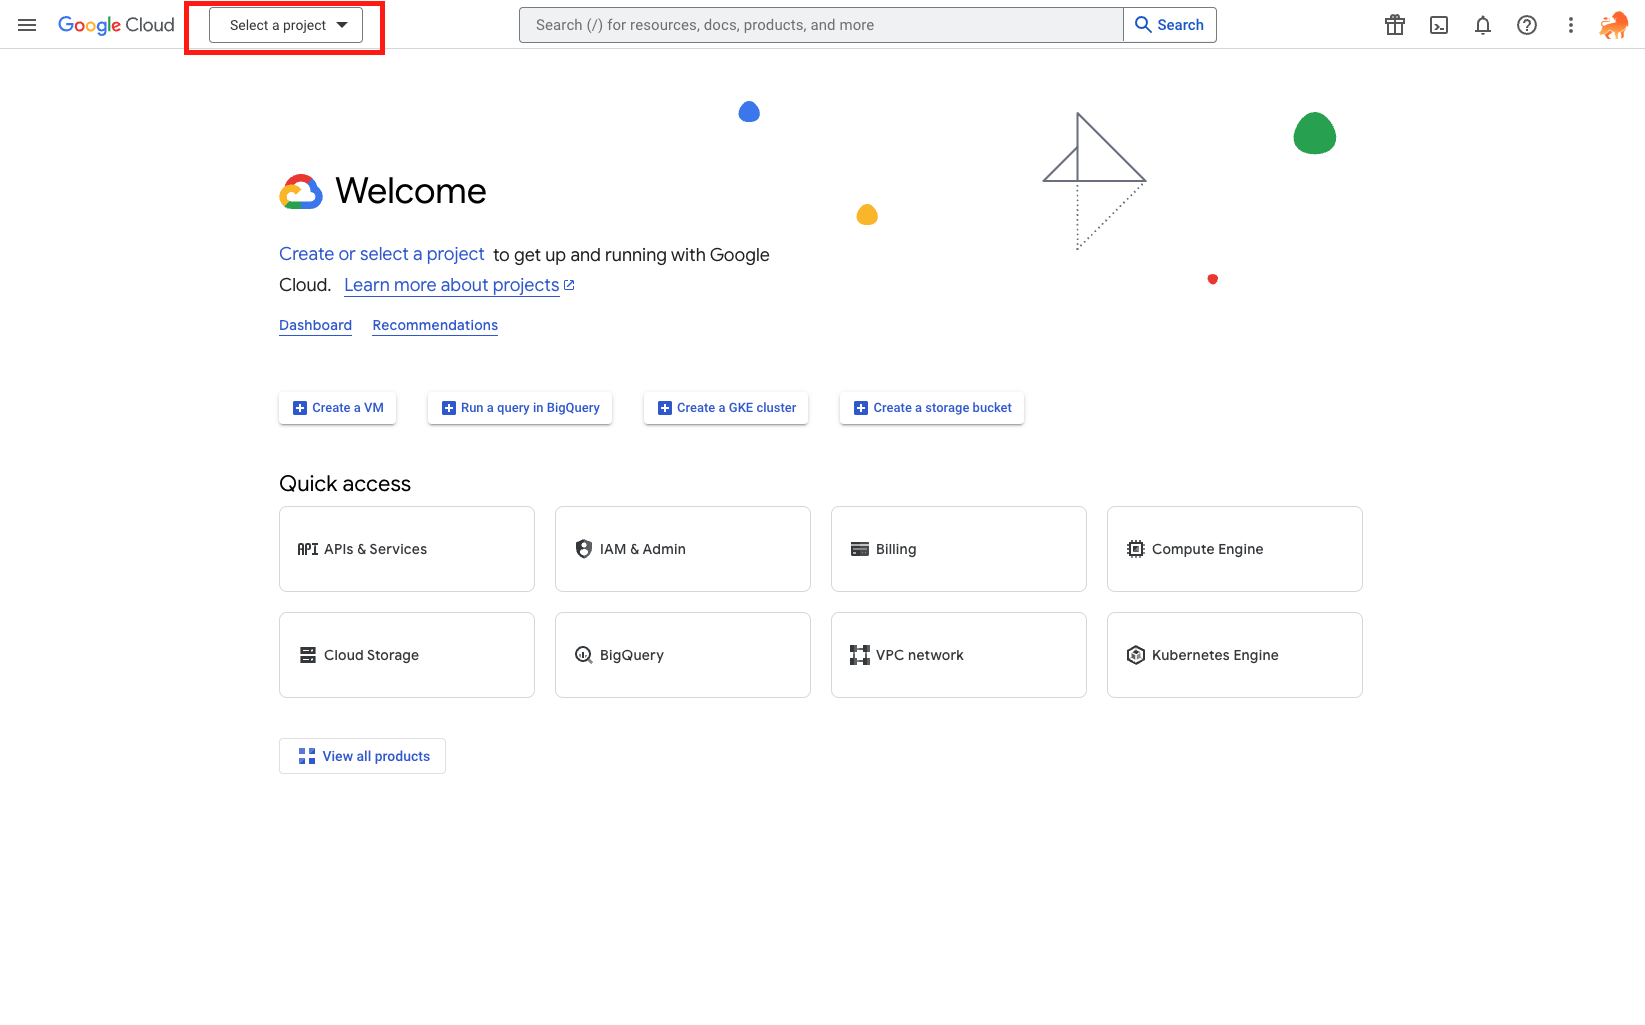
Select/Create a project on Google Cloud Console - On the cloud console go to APIs & Services > Enable APIs & Services.
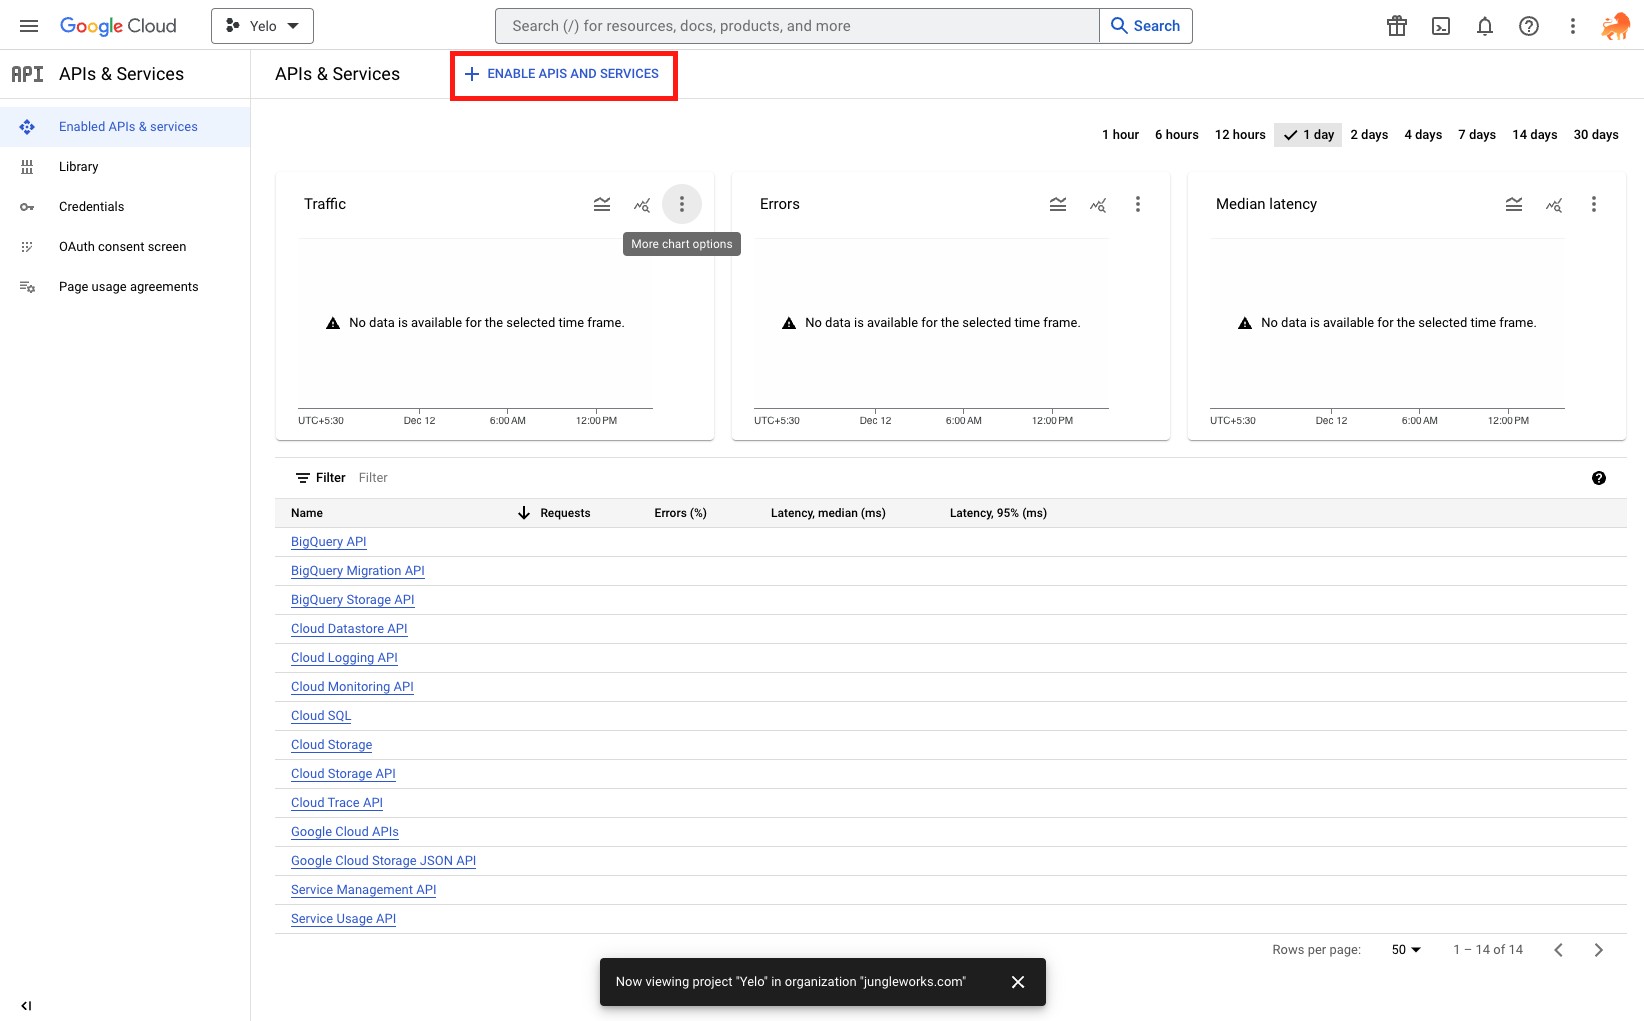
Navigate to Enable APIs & Services - Search and enable the Google Calendar API for your project.

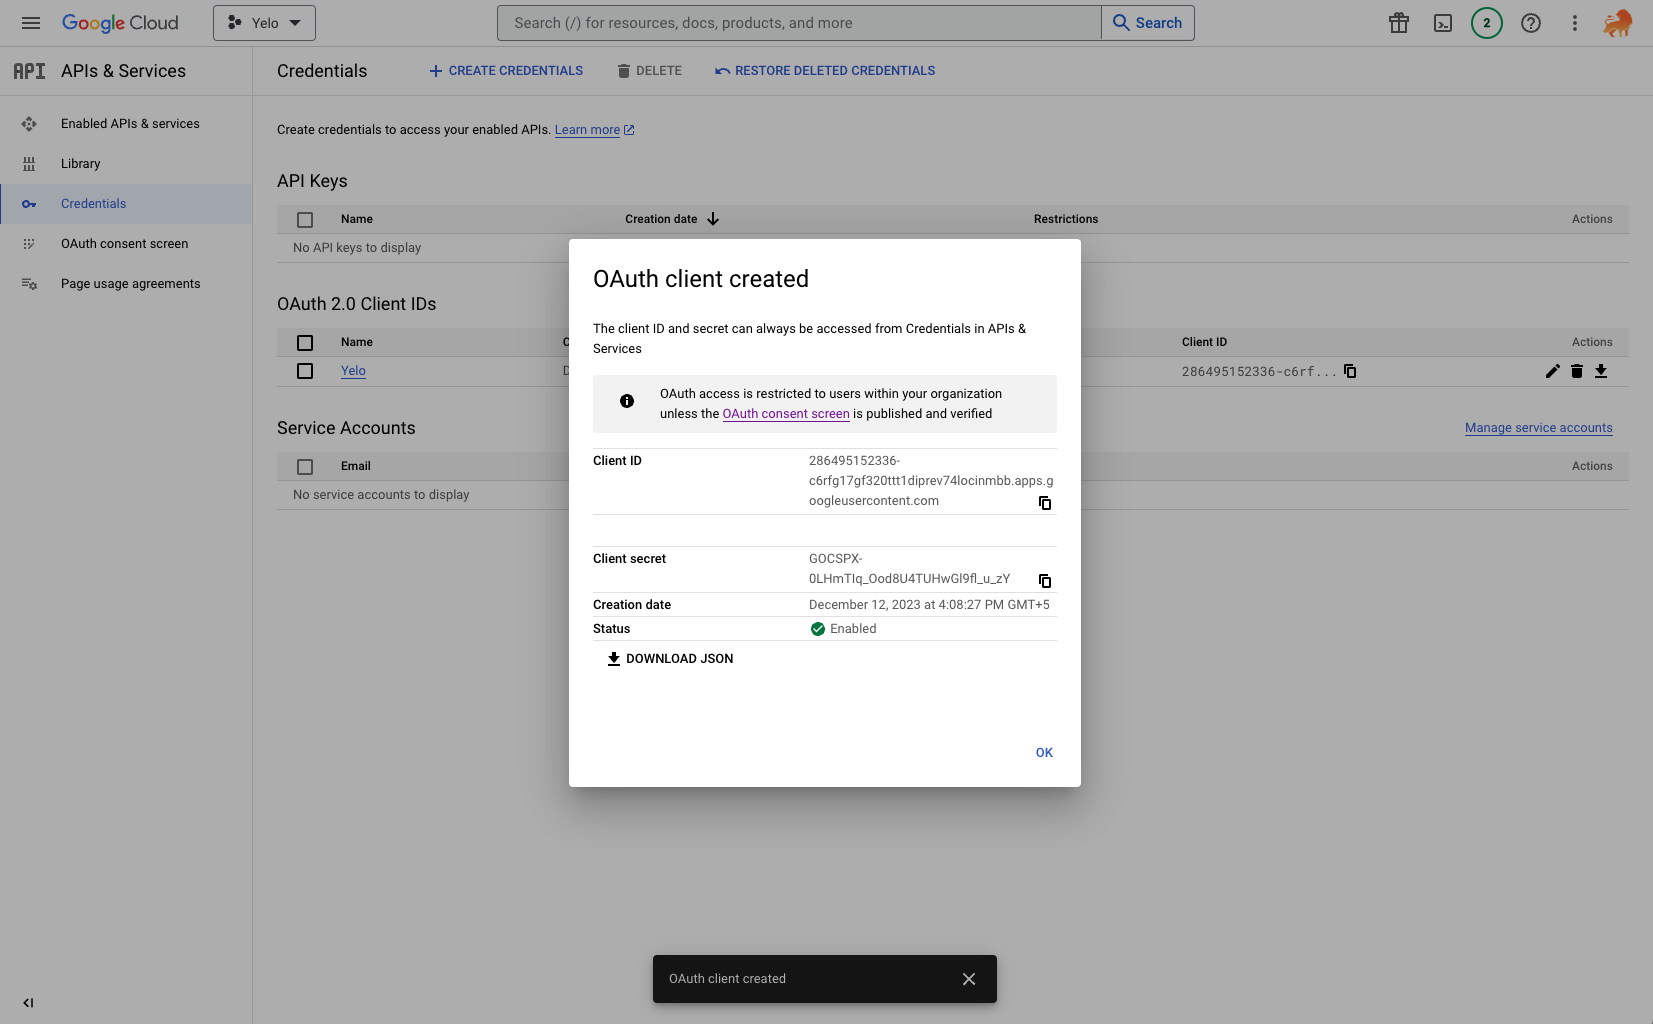
Search and enable Google Calendar API - From the dashboard go to Credentials > Create Credentials and choose the OAuth Client ID option.
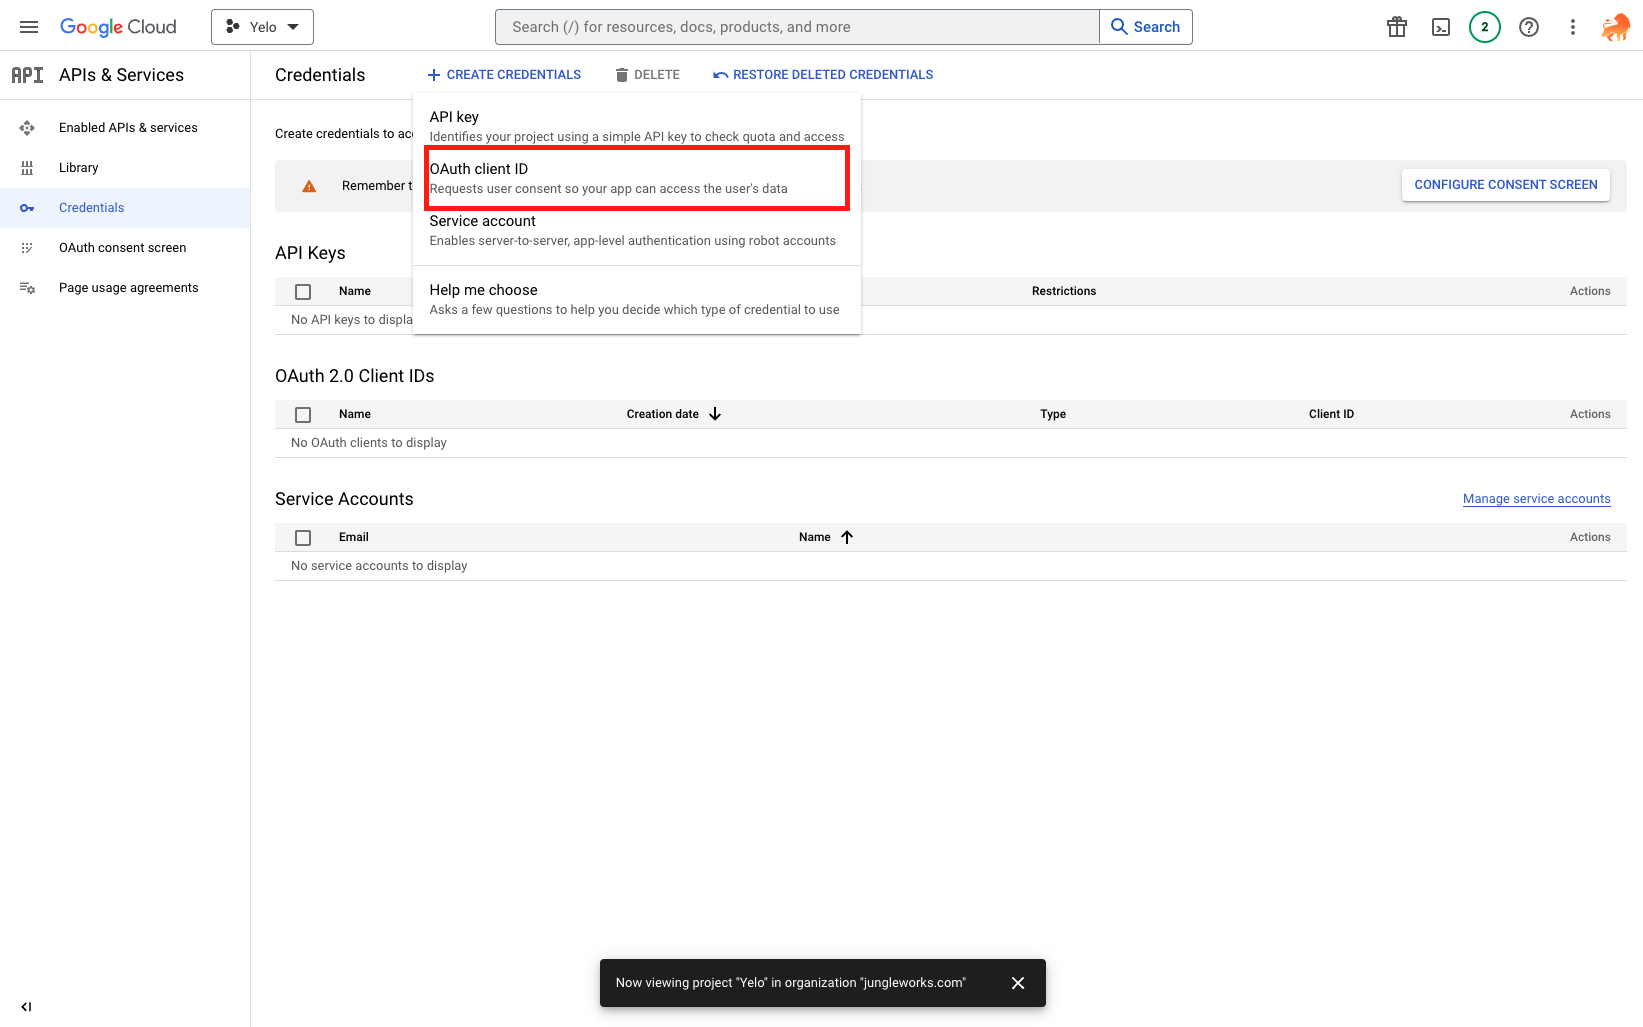
Creating Credentials - If you haven’t already configure consent screen first.
- Set Up Google OAuth 2.0.
-
- Under application type choose “Web Application”.
- Enter the name of the application.
- Under Authorised redirect URIs input the the following URL.
https://api-integration-layer.yelo.red/calendar/google/oAuth2/{{user_id}}/callback
Note: In the URL make sure you replace the “{{user_id}}” with your actual merchant user id and not your marketplace user id.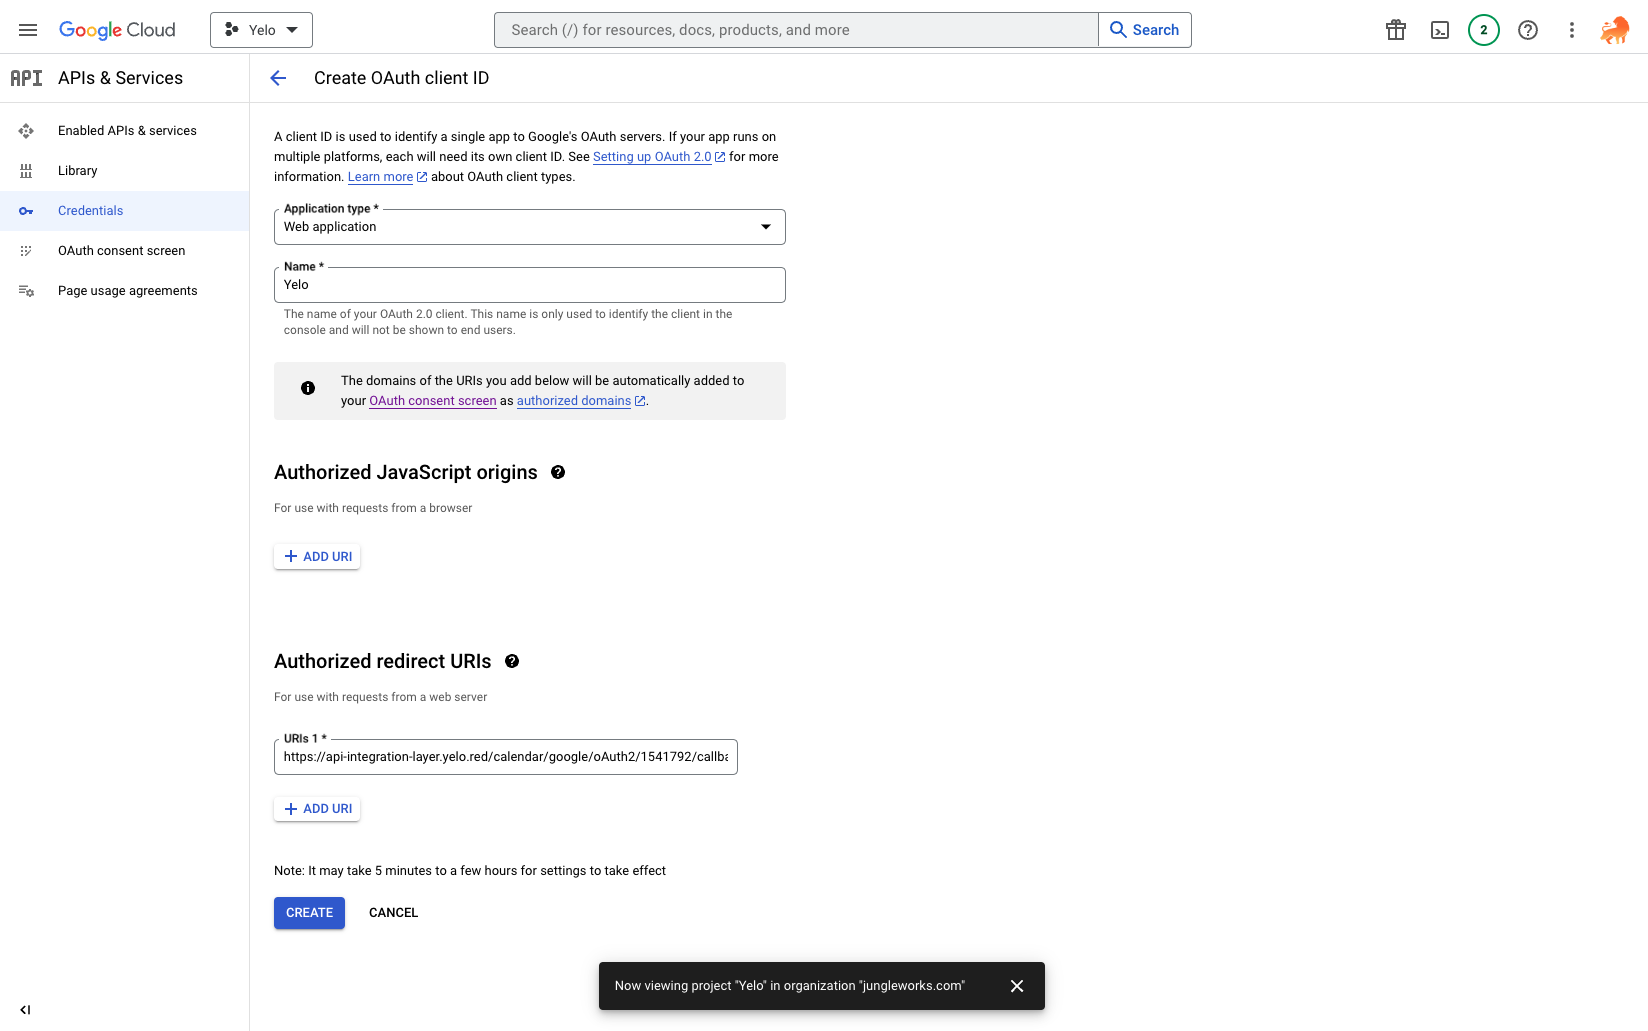
Configure OAuth
-
- Download and store the credentials on your computer.
Download Credentials
Step 2: Configure Yelo Settings
Once you have the API key, configure Yelo to integrate with Google Calendar
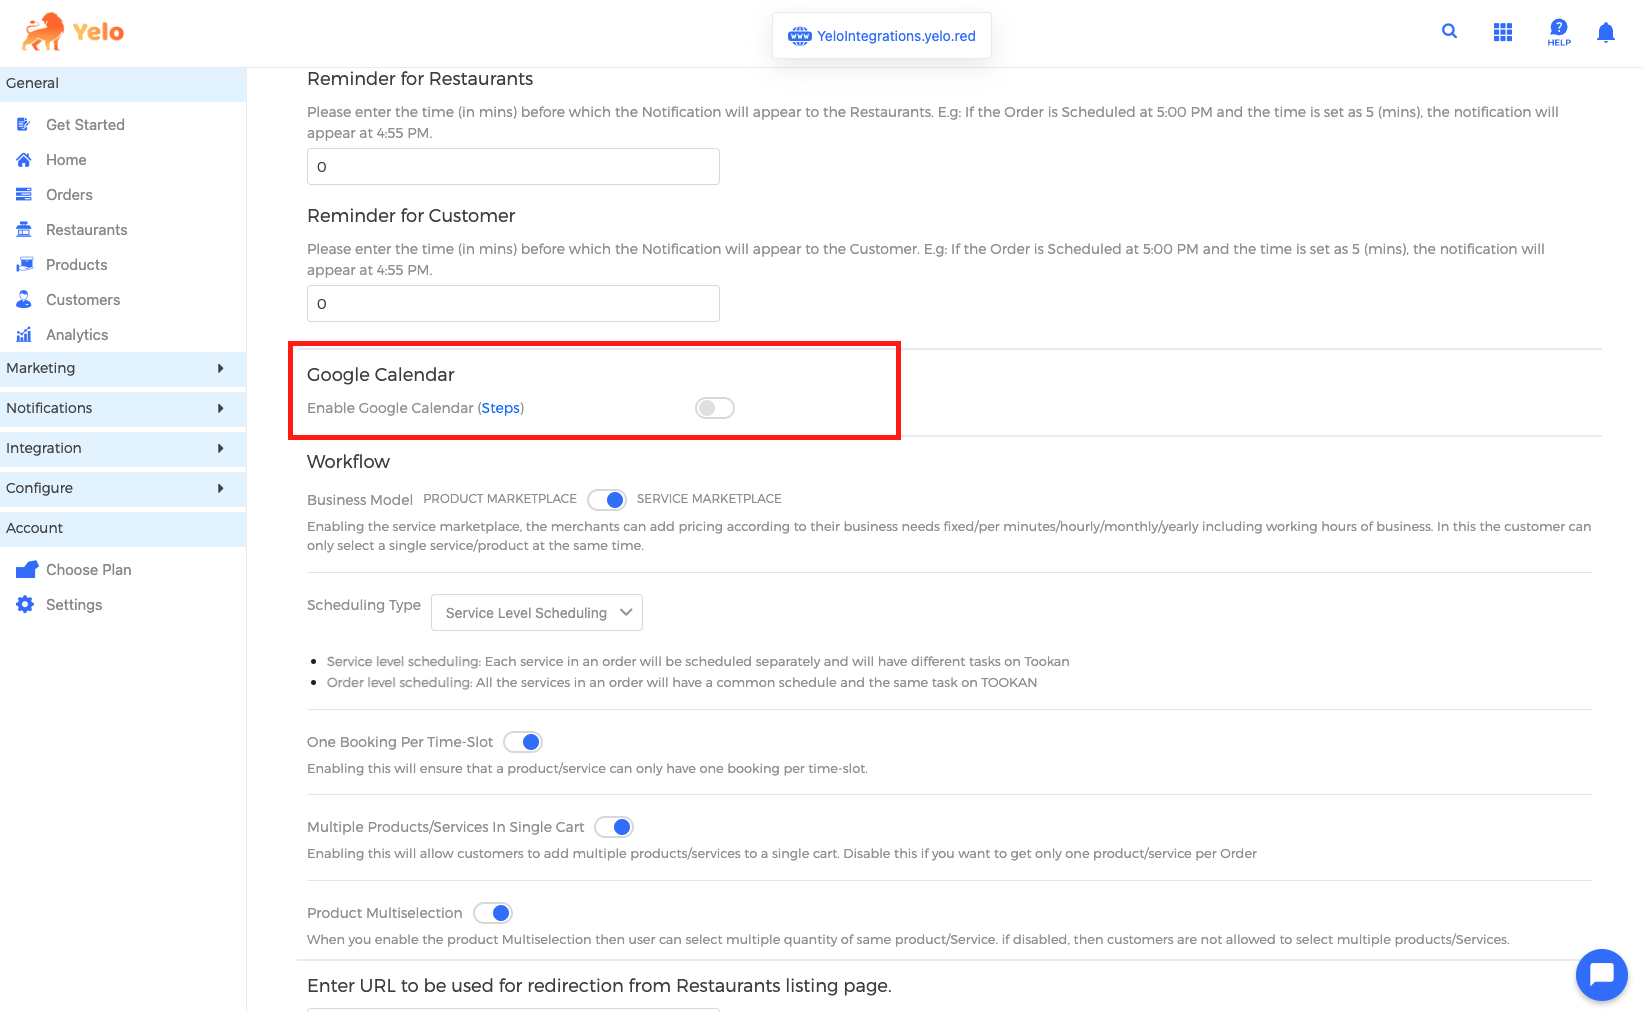
Note: The google calendar integration is a merchant level integration and will only be visible for configuration when the merchant’s workflow is set to service marketplace.
-
-
- Log in to your Yelo admin dashboard.
- Navigate to Extensions.
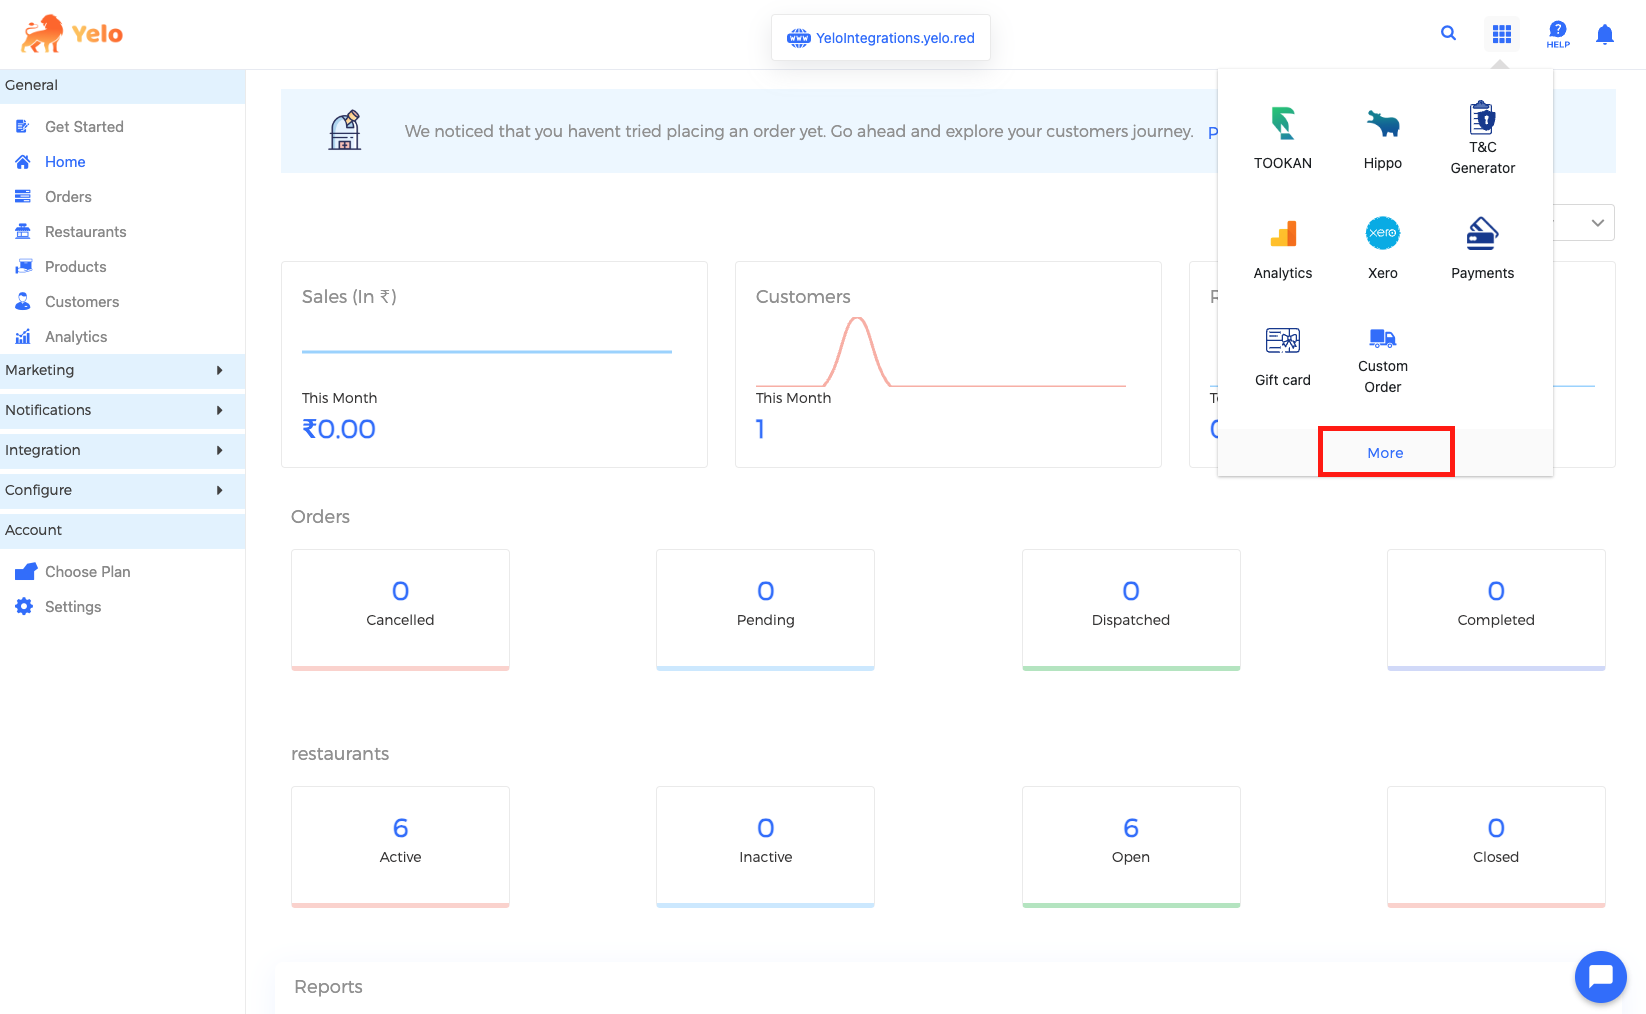
- Search and enable Google Calendar.
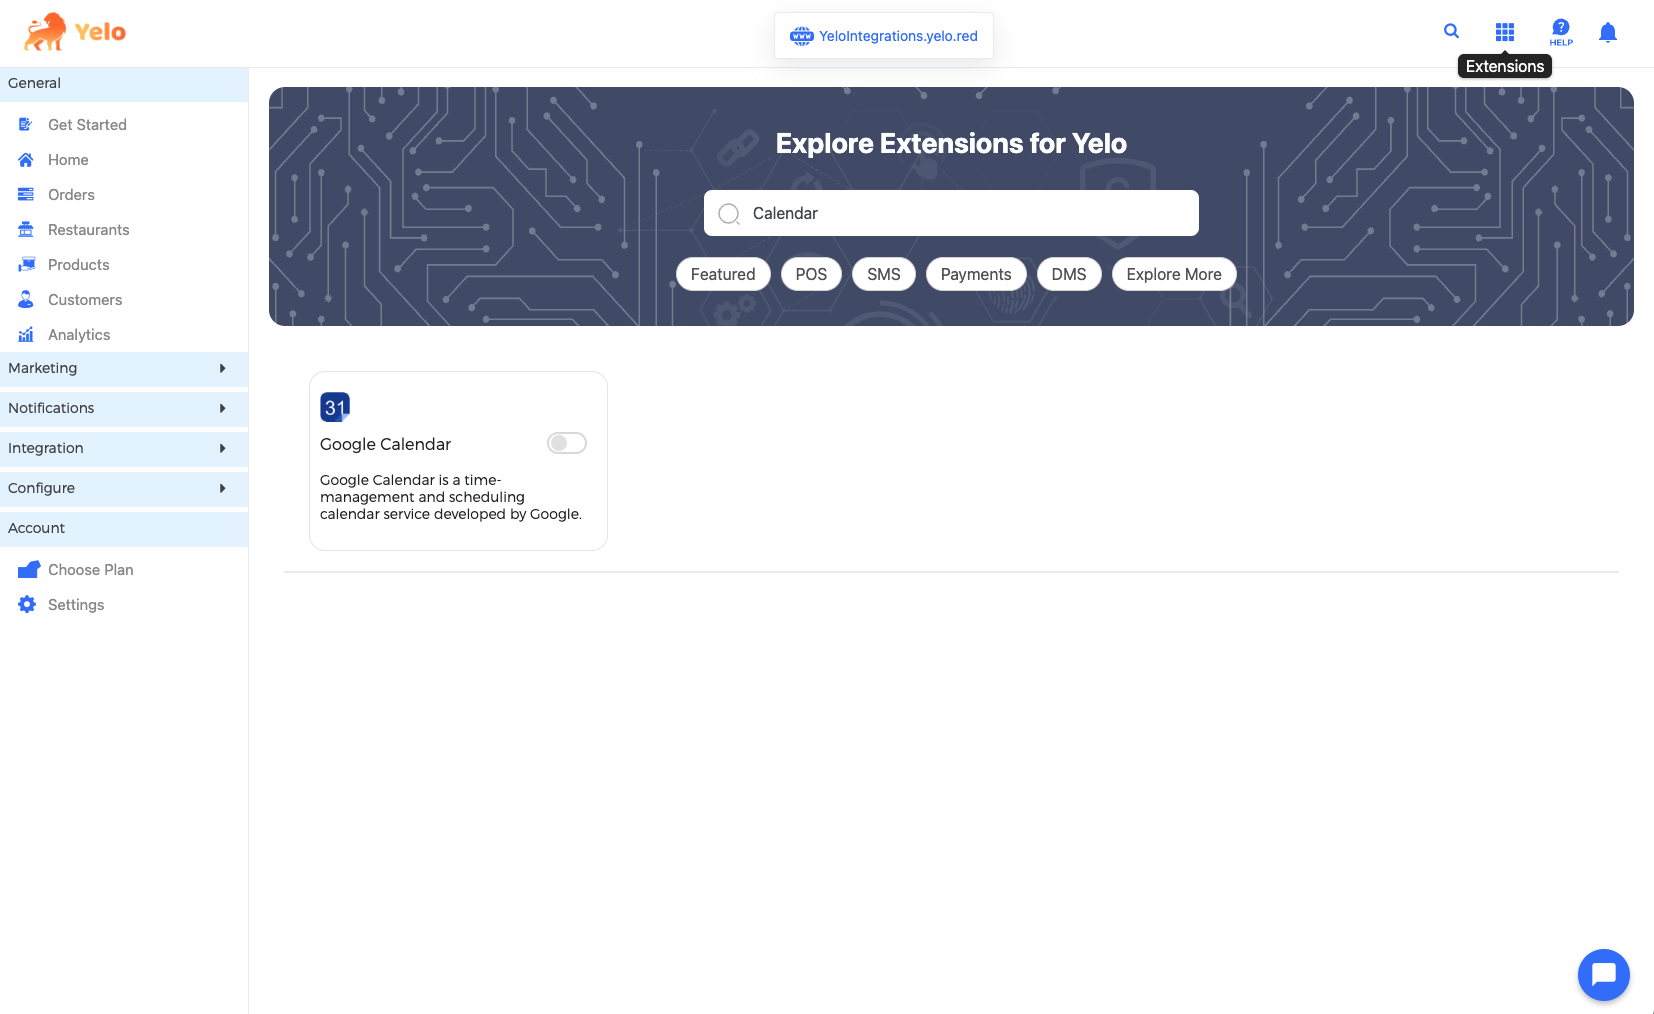
Search and enable Google Calendar Integration - Scroll down under “Merchant Configuration” and find the Google Calendar toggle – enable it.
- On Admin Dashboard navigate to Merchants > Choose Merchant > Configuration
- On Merchant Dashboard navigate to Settings > Preferences
Enable calendar toggle in merchant config
- Upload the JSON file you previously downloaded.
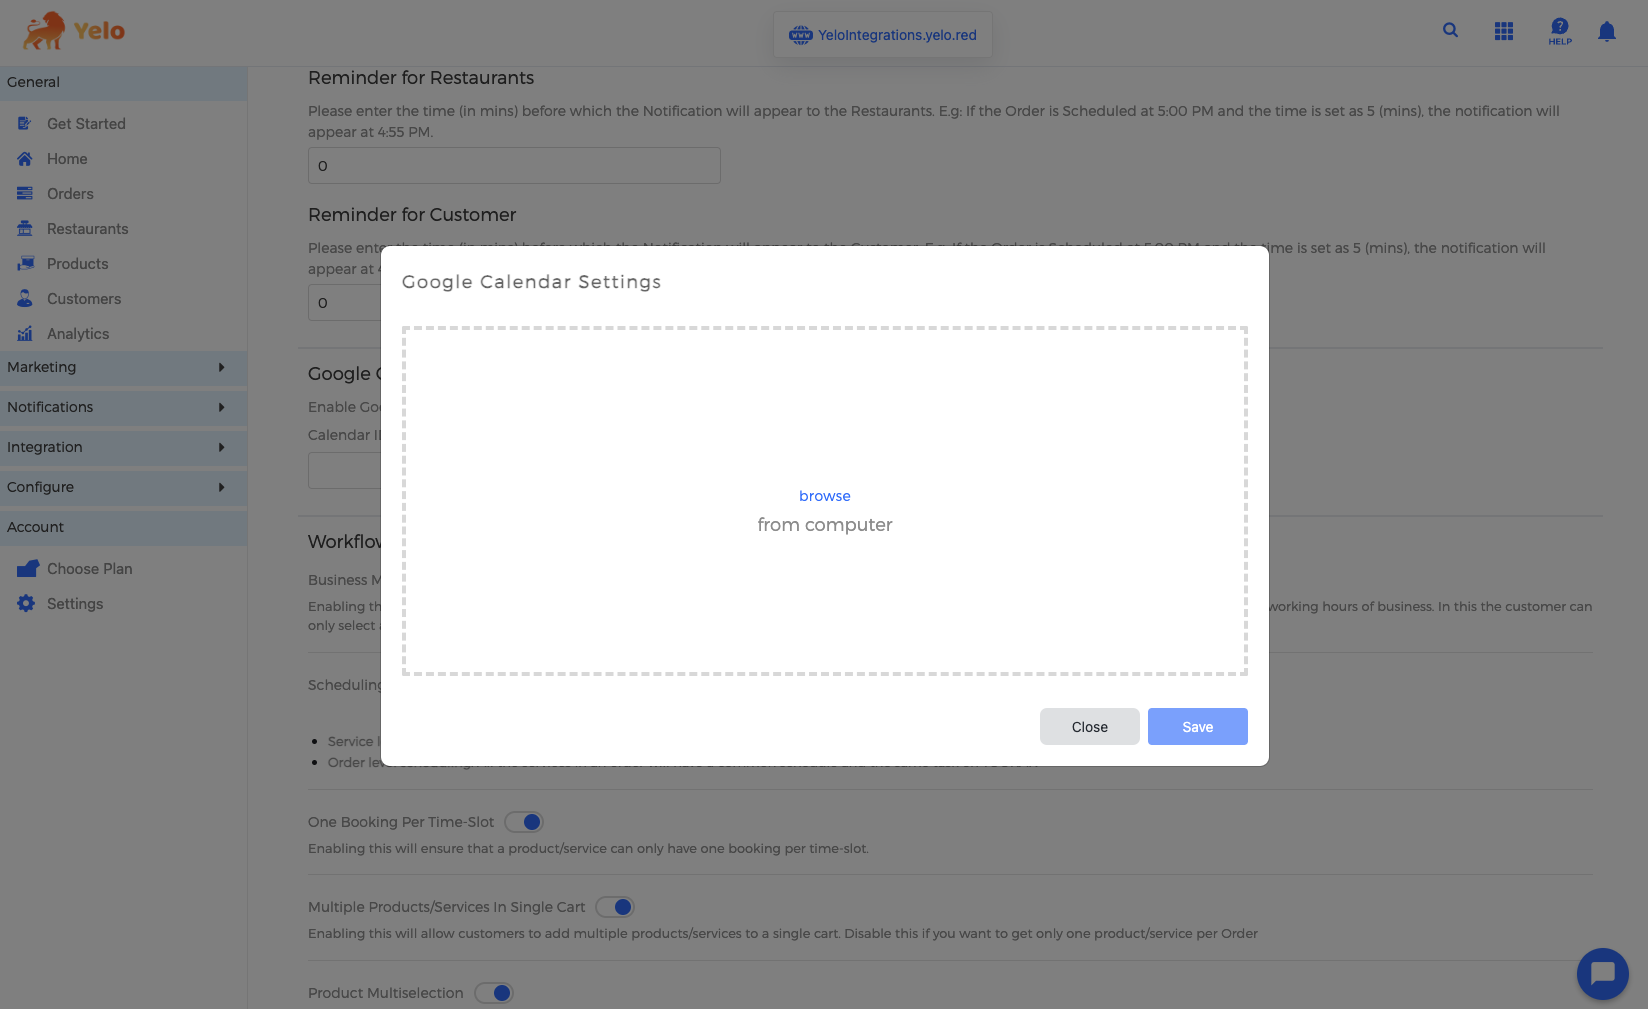
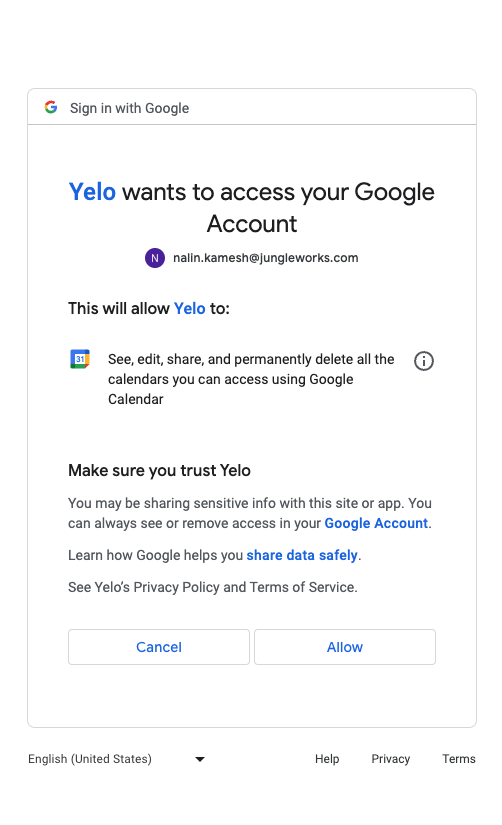
Upload Google Credentials - You will be redirected to Google’s consent form.
Google Consent Form - After providing consent, return to the Yelo dashboard where you can input your calendar ID.
- You can find your calendar if by opening Google Calendar and navigating to My Calendars > More Options (3 Dots) > Settings.

Google Calendar Settings - Scroll down to find your calendar id.

Calendar ID
-
Step 3: Additional Configurations
You can have different Calendar IDs for each service you offer. To configure this :
- Ensure that Service Level Scheduling is enabled.

Service Level Scheduling - Navigate to catalogue

Service level config for google calendar
Your Google Calendar is now seamlessly integrated with Yelo, providing a powerful solution for managing your schedule and enhancing customer interactions.
Additional Support
If you encounter any issues during the integration process or have specific questions, our support team is ready to assist you. Reach out to us at integrations@yelo.red or by raising a ticket from the dashboard.
Leave A Comment?