
Merchant Set Up
Yelo lets the admin set up the merchants and make various changes to them. With few simple steps, you can make changes and customize the merchant store.
Changing the Name of Merchant Page:
Here is how to do that:
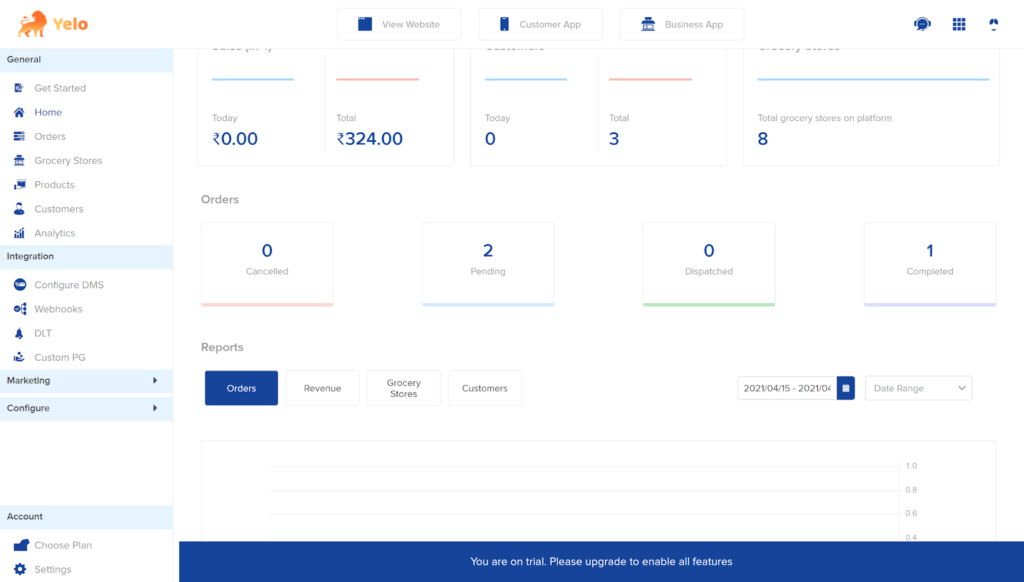
- Log in to the Yelo admin dashboard, where your monthly sales, revenue, and orders can be viewed.
- On the right sidebar of the dashboard, go to ‘Configure’ and then choose ‘General Settings’ from the drop-down menu.
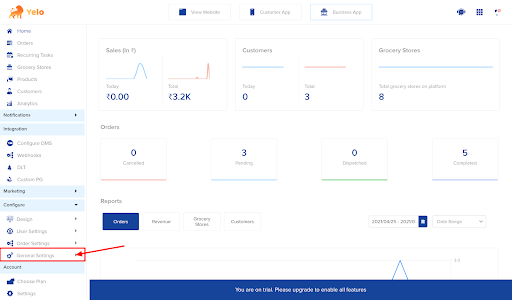
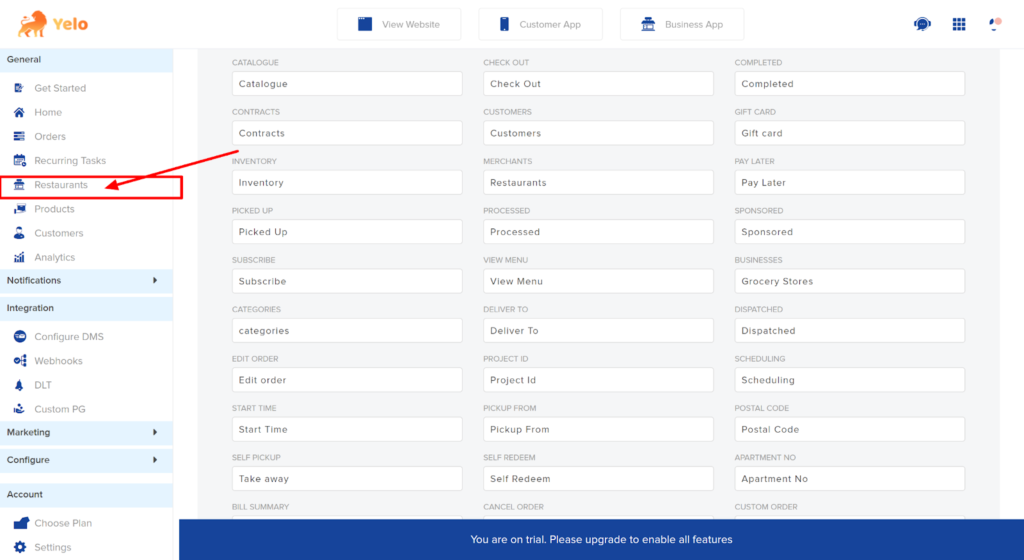
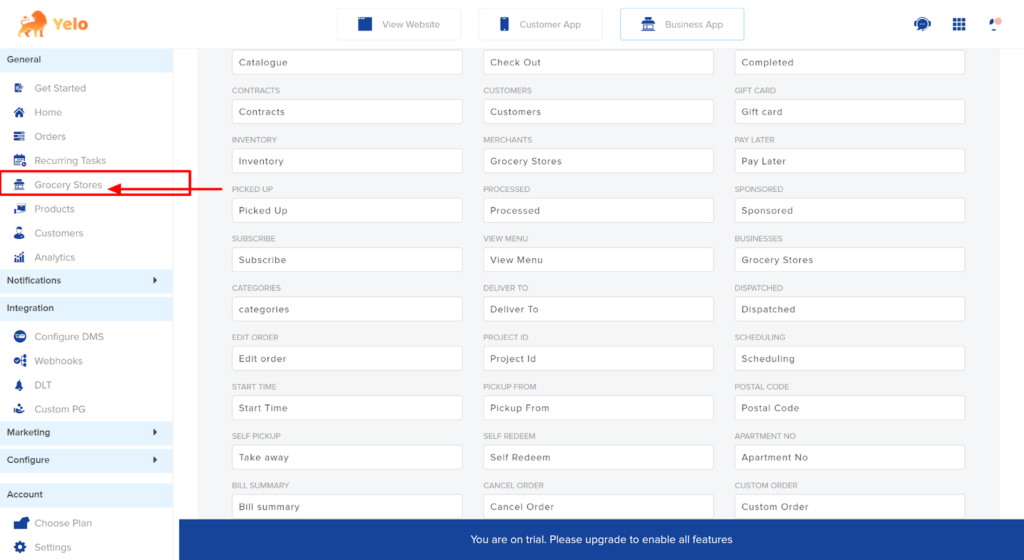
- Under General Setting’s dropdown, select ‘Terminology.’ A new page will appear.
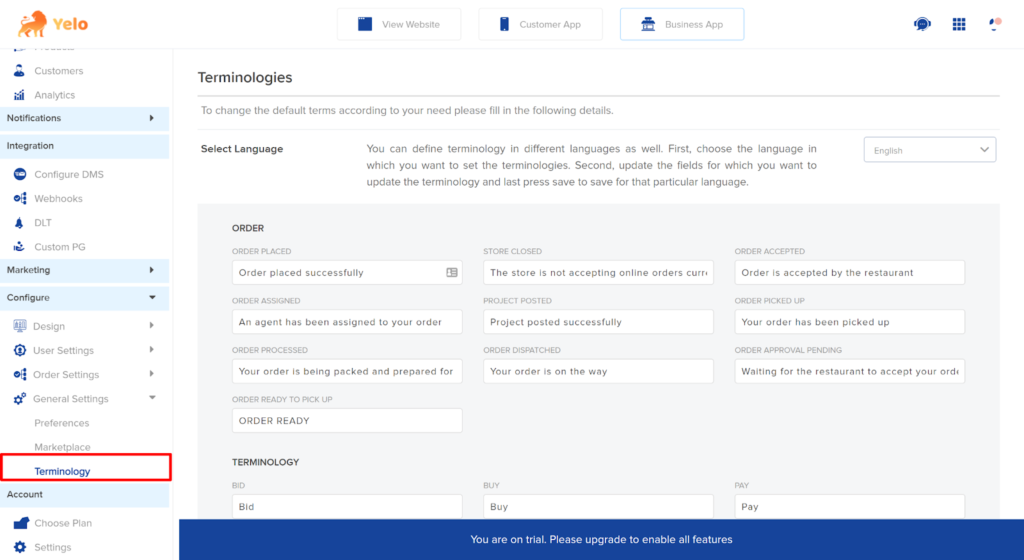
- Scroll to the bottom of the page till you find the ‘Merchants’ row in the middle.
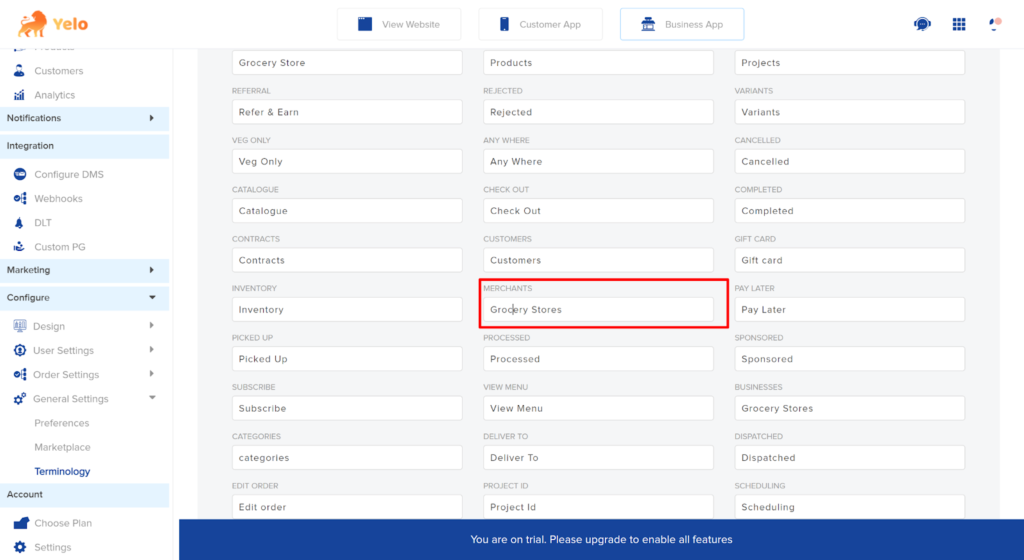
- Rename the page to whatever you want and click ‘Save.’
To modify Merchant active status:
- On the right sidebar, find the Merchant Stores option. Here, we have the Merchant store as the Grocery stores.
- On clicking, the list of Grocery stores will appear.
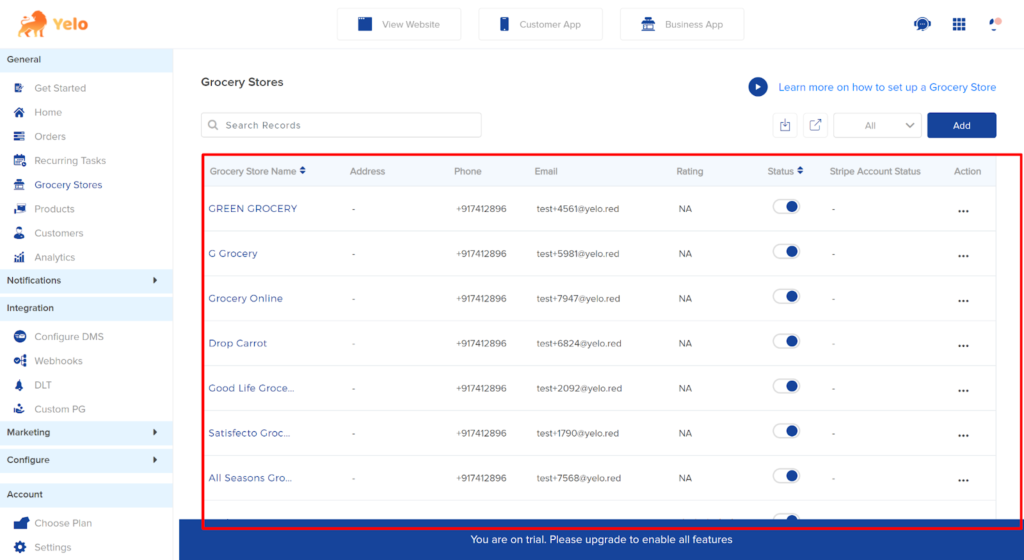
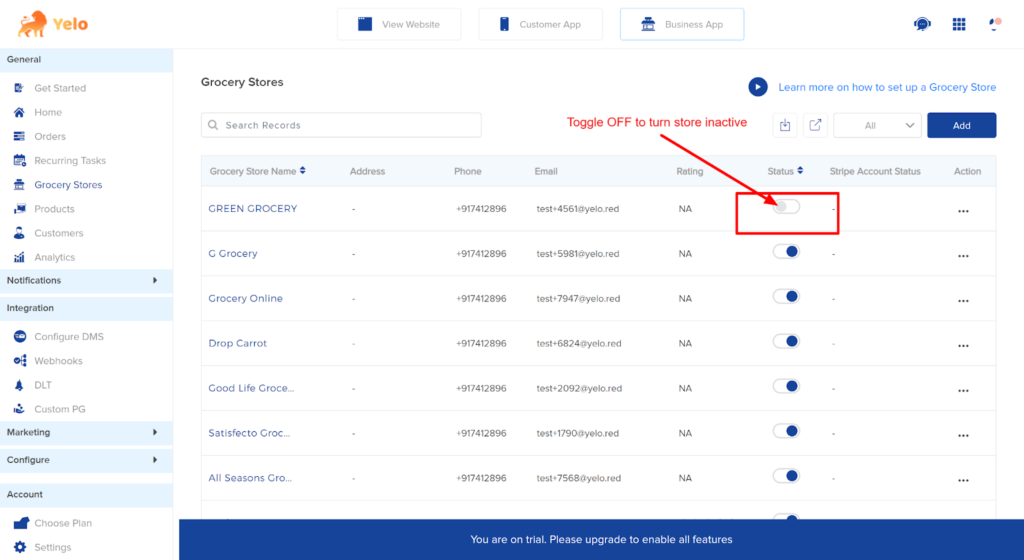
- Toggle OFF or ON the status button for the merchant store under the status option.
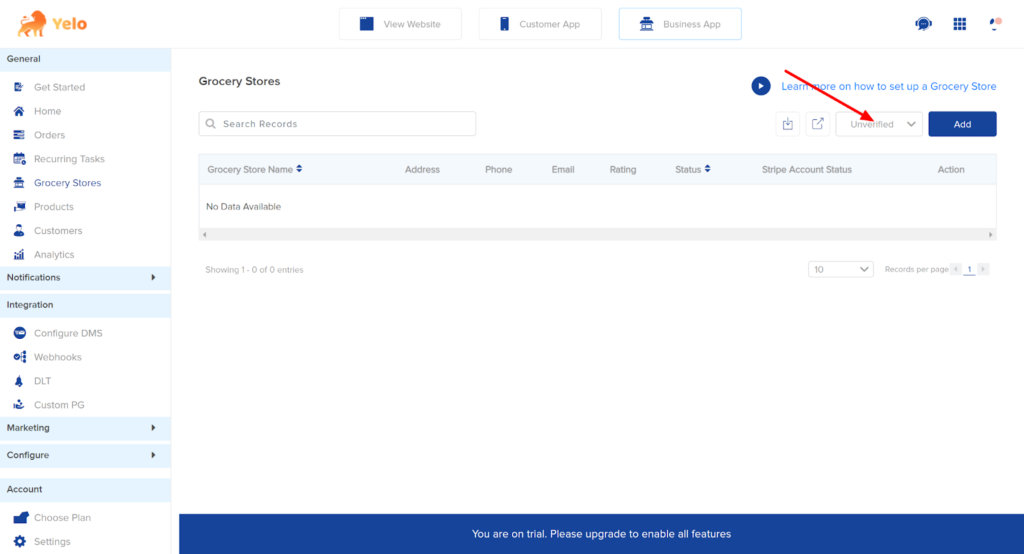
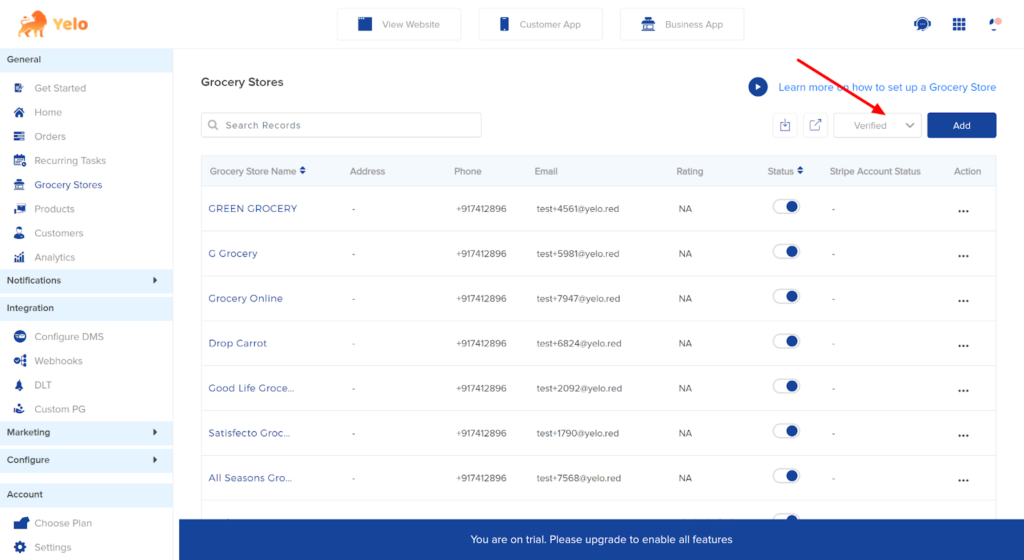
Finding the Verified and Unverified Merchants:
- To do this, click on the dropdown menu beside the ‘Add’ button.
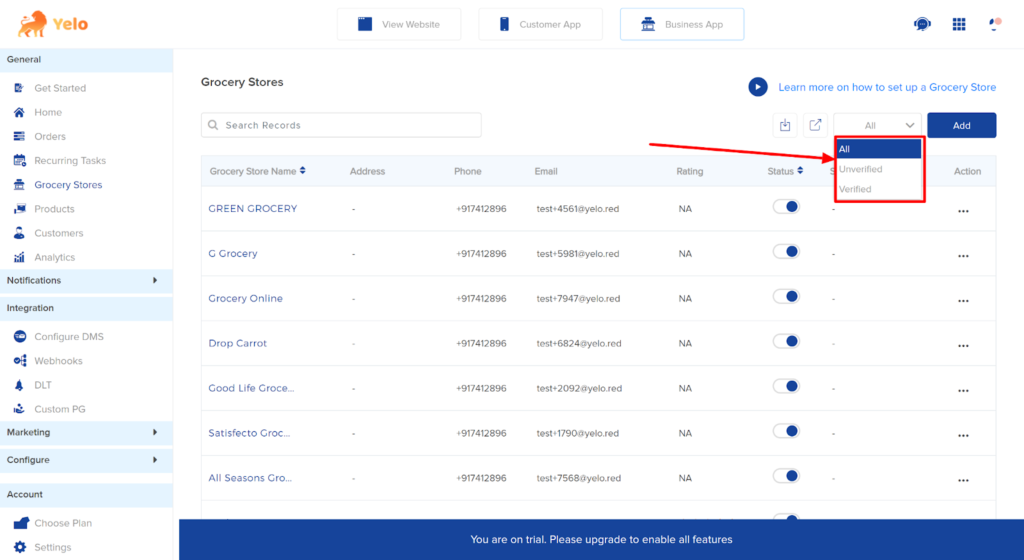
- You can choose the verified option to find the verified stores and the unverified option to find unverified stores.
To edit the information provided by the Merchants:
- In the Merchants tab, click on the merchant for which you want to make edits.
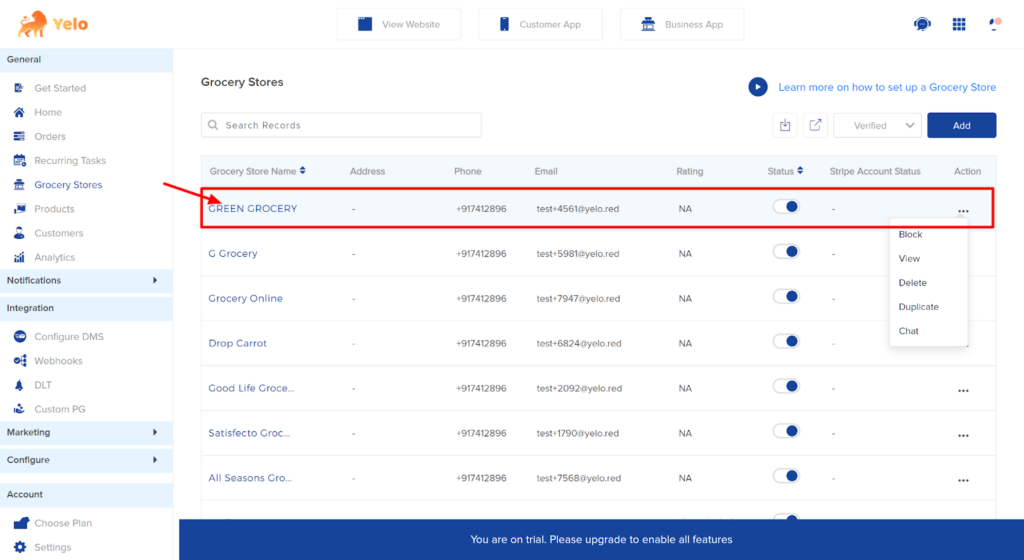
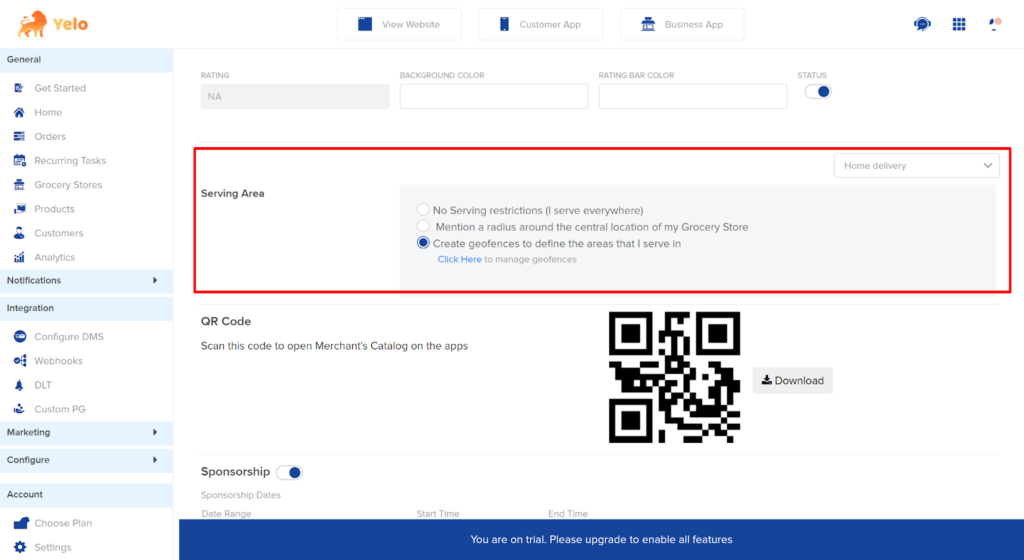
- Scroll down and change the ‘Service Area’ according to the store’s availability and delivery agents.
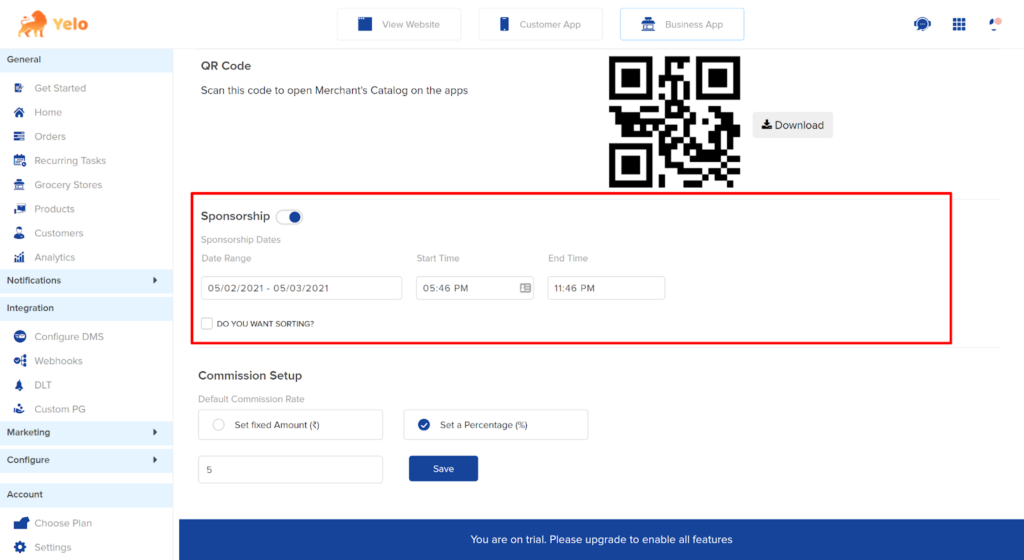
- Below the QR code, find the sponsorship button to add the merchants to the sponsored featured list. Here, you can set the date and time range and check/uncheck the sorting option.
- You can also change the ‘Business Category’ by using the dropdown menu option and alter the business category.
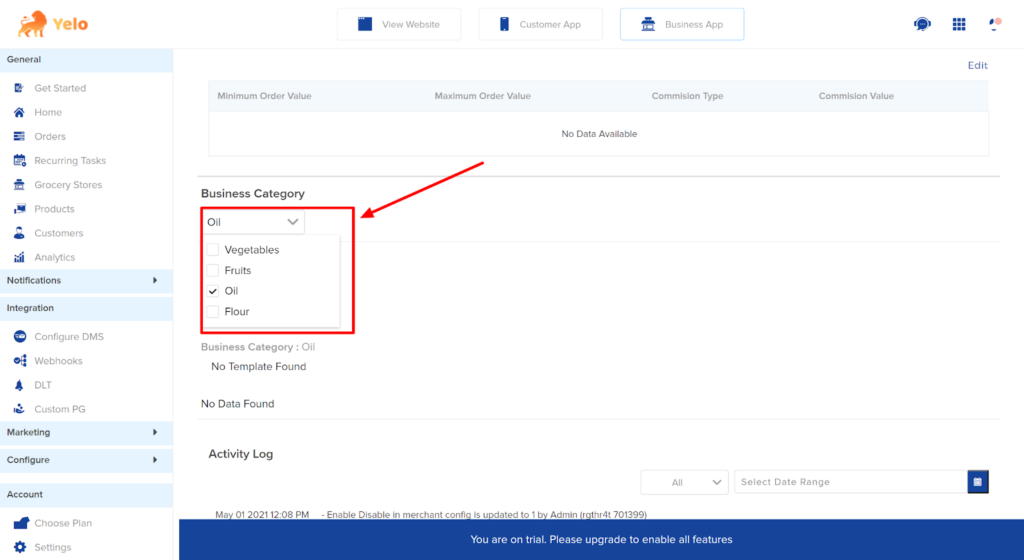
- When you scroll down to the bottom of the page, you can find all the activity logs of the merchants.

This is how you can easily set up a merchant through the dashboard and get going.
Leave A Comment?