Step-by-Step Guide to Adding Store Pages on Yelo.
Adding store pages on Yelo is a straightforward process. This guide will walk you through the steps to efficiently add store pages for the admin and merchant dashboards.
Step 1: Log In to Your Yelo Admin Dashboard
- Access the Dashboard: Visit the Yelo login page and enter your username and password.
- Dashboard Overview: Once logged in, you will see an overview of your sales, profit, merchant stores, and other relevant data.
Step 2: Navigate to the Configure Option
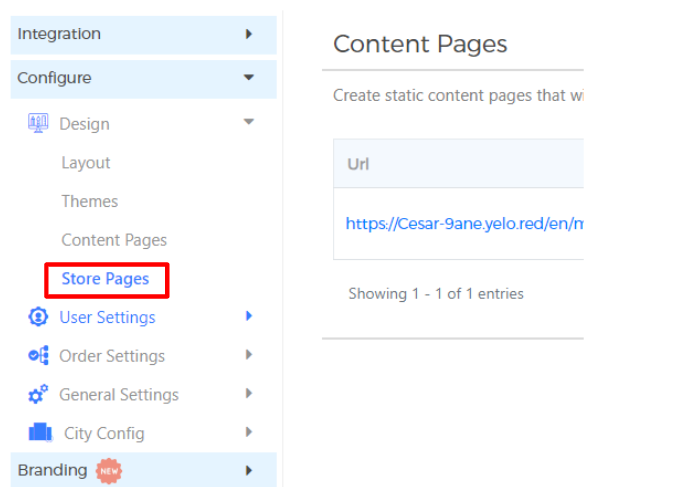
- Locate Configure: On the right side of the dashboard, find the ‘Configure’ option.
- Open Configure Menu: Click on ‘Configure’ to open the drop-down menu.

Step 3: Access the Design Section
Select Design: In the configure drop-down menu, click on ‘Design’.
Open Store Pages: Next, click on the ‘Store Pages’ option. A new page will appear where you can manage store pages.

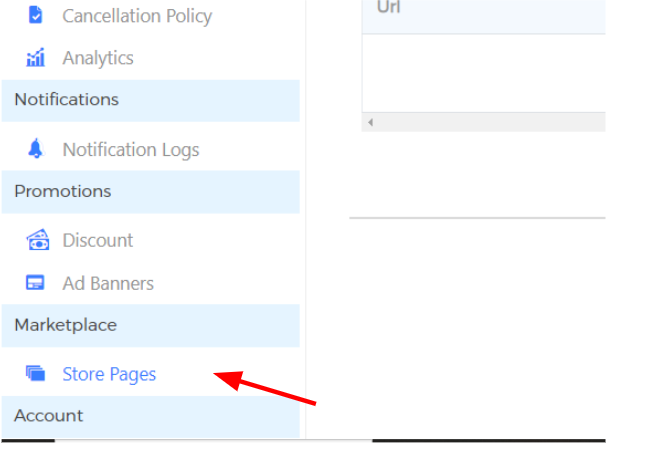
Access the Marketplace Section for the Merchant Dashboard

Note: Store pages can be added from the admin dashboard for admin stores and from the merchant dashboard for merchant stores.
Step 4: Add a New Store Page
- Click Add Page: On the Store Pages management page, click on ‘Add Page’ to create a new store, merchant, or restaurant page.

2. Enter Page Details:
-
- Page Title: Enter the title for the store page.
- Content Description: Write a detailed description of the store.
- Route: Specify the route (URL path) for the store page.

Step 5: Preview and Save
- Preview: Click on the ‘Preview’ button to see how your store page will look.
- Save: If you are satisfied with the preview, click on ‘Save’ to publish the store page.
Making the Most of Your Store Pages
Once your store pages are created, you can use them in various ways to enhance your marketplace:
1. Promoting Merchants and Products
- Highlight Key Merchants: Use store pages to showcase your top merchants, providing detailed information about their offerings and specialties.
- Feature Products: Include sections on store pages that highlight popular or new products, encouraging customers to explore and purchase.
Add in: Footer, Redirection Links for Merchants
2. Enhancing User Experience
- Detailed Information: Provide comprehensive details about each store, including hours of operation, contact information, and special offers.
- Customer Reviews: Integrate customer reviews and ratings to build trust and encourage more sales.
Add in: Banner, Signup Template, Checkout Template
3. Seasonal and Promotional Content
- Special Events: Create and update store pages with information about seasonal sales, promotions, and events.
- Limited-Time Offers: Use store pages to promote limited-time offers, creating a sense of urgency for customers.
Add in: Footer, Banner, Redirection Links for Merchants
4. Building Brand Identity
- Consistent Branding: Ensure each store page aligns with the overall branding of your marketplace, using consistent colors, logos, and fonts.
- Storytelling: Share the story behind each merchant or store, creating a personal connection with customers.
Add in: Footer, Signup Template, Checkout Template

Leave A Comment?