
Introduction:
This document provides a comprehensive guide to setting up the WhatsApp Order Bot. Follow the steps outlined to configure your app, integrate WhatsApp, and create a functional order bot for your business.
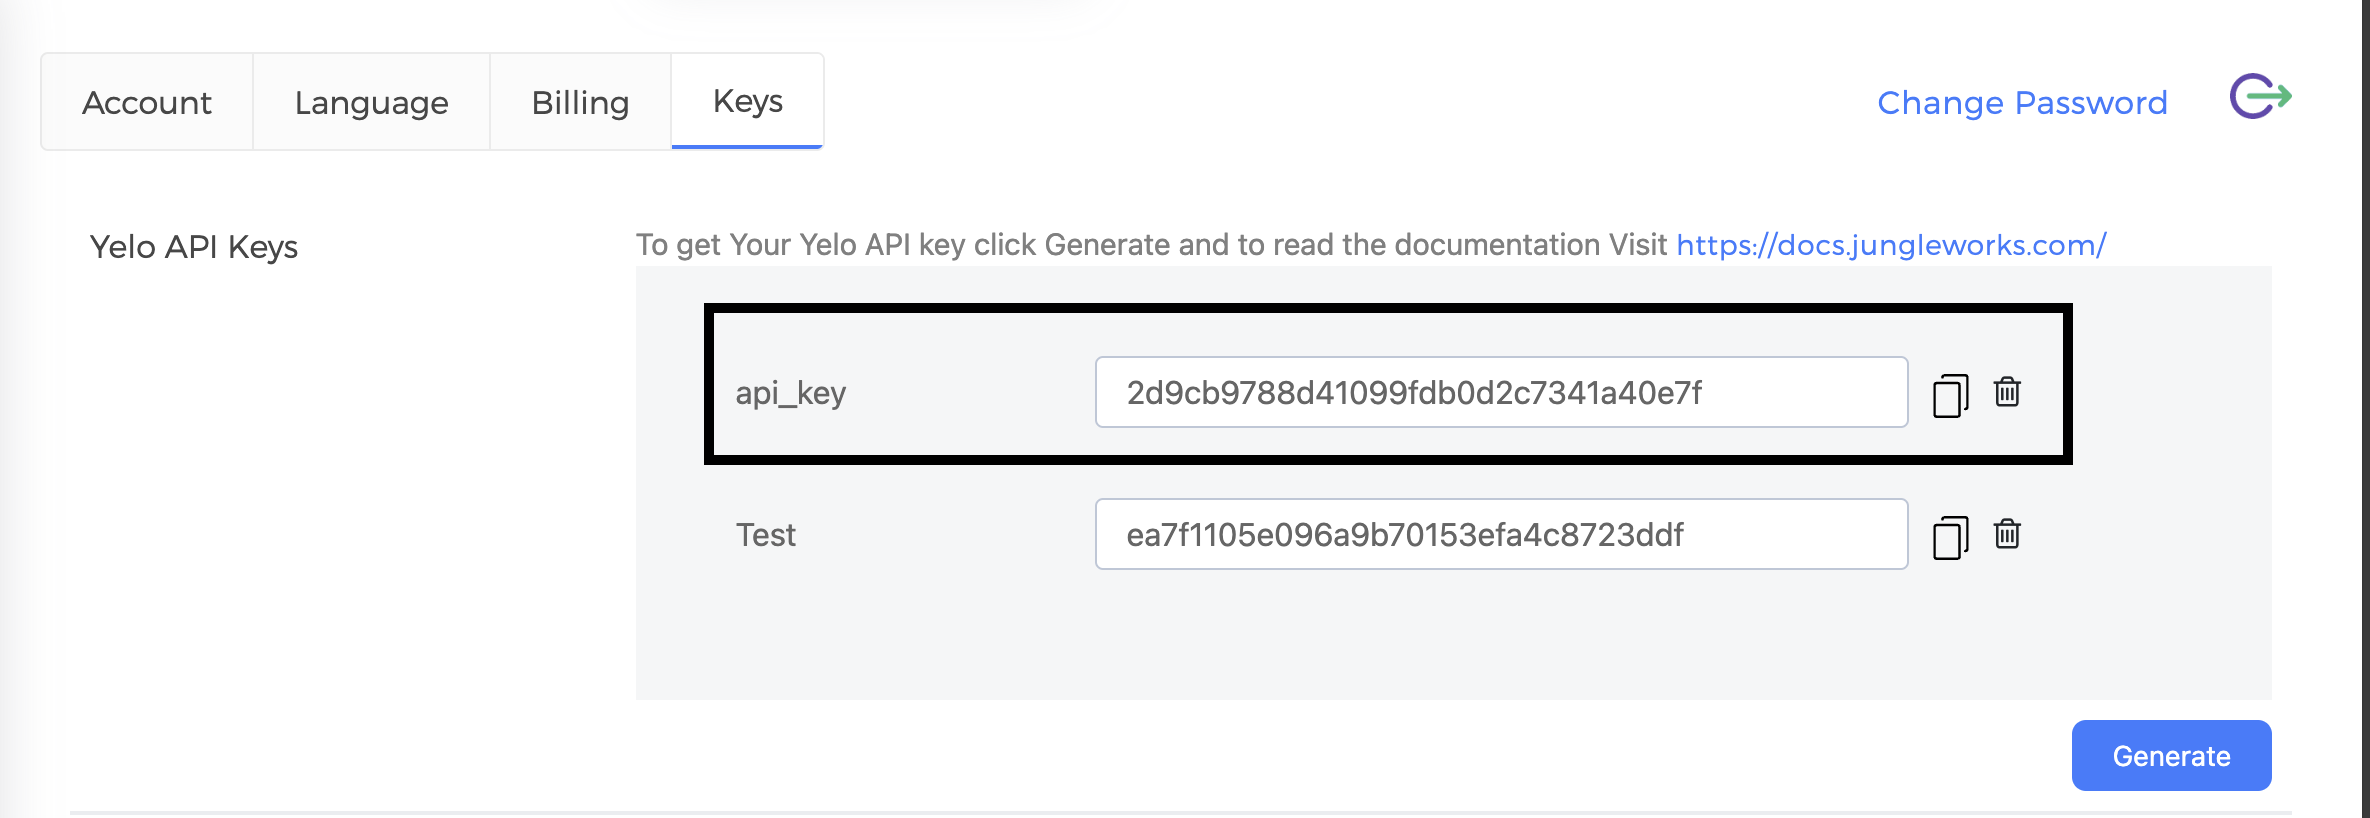
1. Generate your api_key
Follow this link to generate api_key on your Yelo account if not already present.
2. Create or Access Your App:
Start by visiting Meta for Developers > My Apps to either create a new app specifically for this purpose or use an existing app if you have one.
3. Add WhatsApp Product:
Inside your app’s dashboard, navigate to the “Add Products” section and select WhatsApp if it’s not already added to your app’s capabilities.
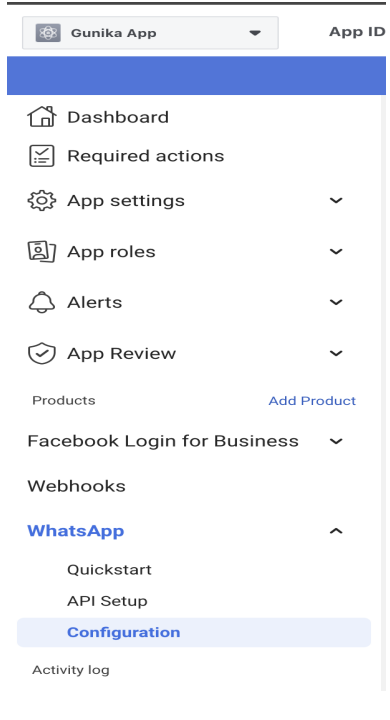
4. Configure WhatsApp:
In the sidebar, locate the WhatsApp option and click on it. Then, proceed to the “Configuration” tab within the WhatsApp settings.
5. Set Hippo Webhook:
Under the configuration settings, find the option to set up a webhook.
- Input the Hippo webhook URL: https://integration.hippochat.io/api/whatsapp/meta/webhook.
- Set the “hipposecret” as the verification token to ensure secure communication between services

6. Subscribe to Webhook Fields:
Select the specific webhook fields you want to subscribe to for updates. It’s recommended to subscribe to fields like “message_template_status_update” and “messages” to help us stay informed about relevant activities.

7. Add WhatsApp Number:
Navigate to Whatsapp > API Setup to integrate a phone number with WhatsApp Business into your account. This number will be used for communication and interaction.

8. Generate Permanent Token:
Create a permanent access token within the developer dashboard. This token will grant your app ongoing access to the WhatsApp Business API.
- Sign into the Meta Business Suite.
- Locate your business account in the top-left dropdown menu and click its Settings (gear) icon.
- Click Business settings.
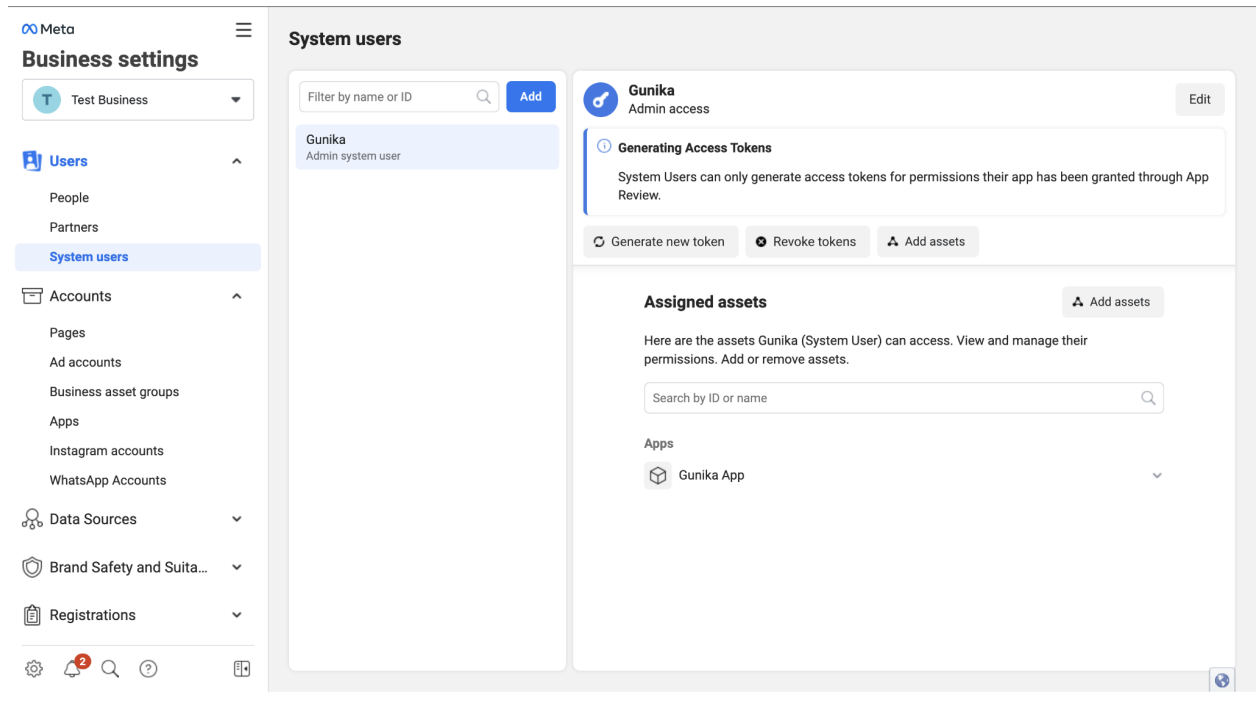
- Navigate to User > System users.
- Select the appropriate system user from the list of system users.
- Click the Generate new token button.
- Select the app that will use the token.
- Select business_management, whatsapp_business_management, whatsapp_business_messaging, public_profile permissions the app needs to function properly and generate the token.
- Copy that token for future use.
9. Retrieve Necessary IDs:
Obtain the essential IDs for your integration:
– WhatsApp Business ID
– Phone Number ID
– Phone Number
10. Create whatsapp template
- Navigate to the Business Template Page and create a WhatsApp template named “wa_template” in the English language.
- Set the header as none and paste the following text in the body:
Hi {{1}} 😄👋,
Welcome to {{2}}, we are happy to assist you. Kindly click on the services option below to proceed👇
- You will need to create 3 buttons (2 Visit Website and 1 custom)
- For the ‘Place an Order’ button, add your store domain(https://example.store.com)
- For the ‘Chat with Us’ button, add https://hippochat.io/
Final Template should have a preview like this

Leave A Comment?