
Quick Start Guide: Optimize Routes
Mappr makes it fast and easy to plan efficient routes, saving your business precious time and fuel. This guide will teach you how to use Mappr for optimizing routes in 5 easy steps.
Let’s go!
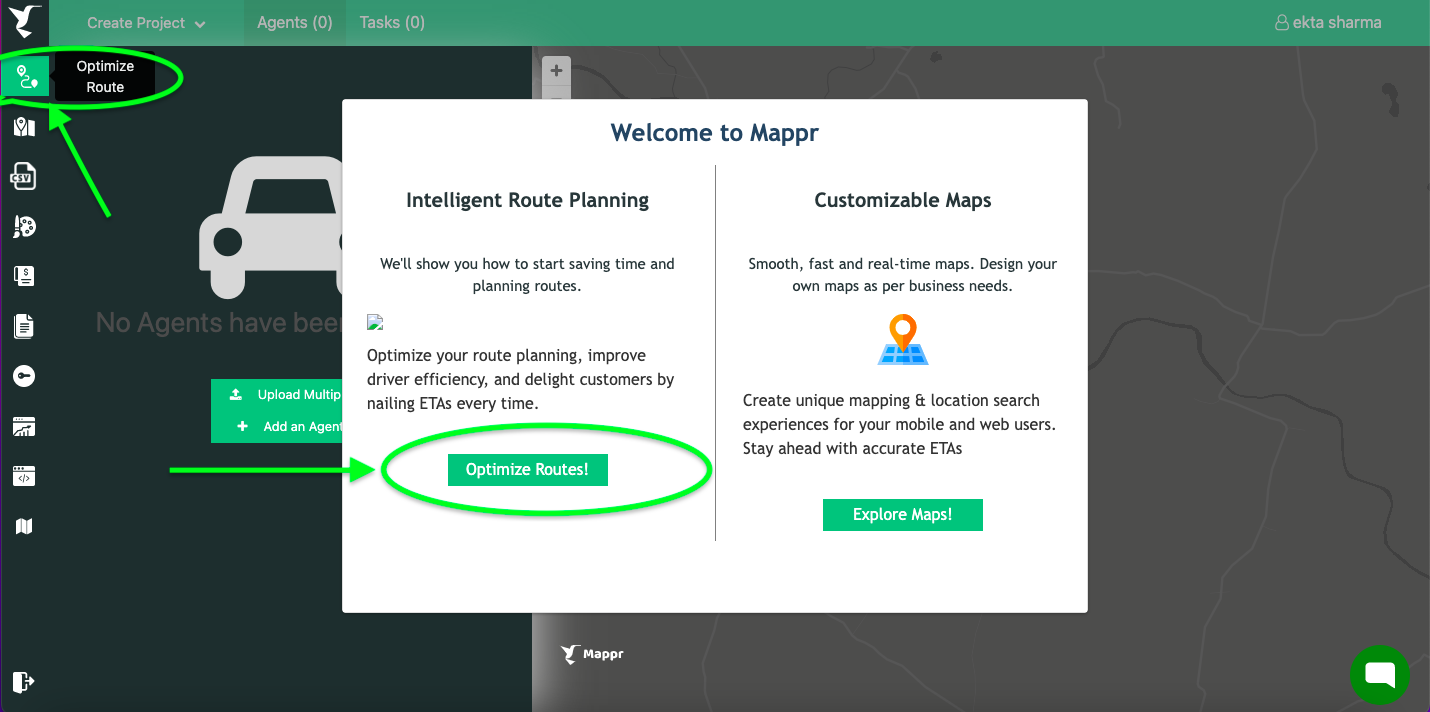
After you sign up, a popup will appear on the screen with one of the options to “Optimize Routes”. You can choose to optimize routes from here or by choosing the “Optimize Routes” option in the left-hand side menu. Kindly refer to the screenshot below:
Step 1: Project
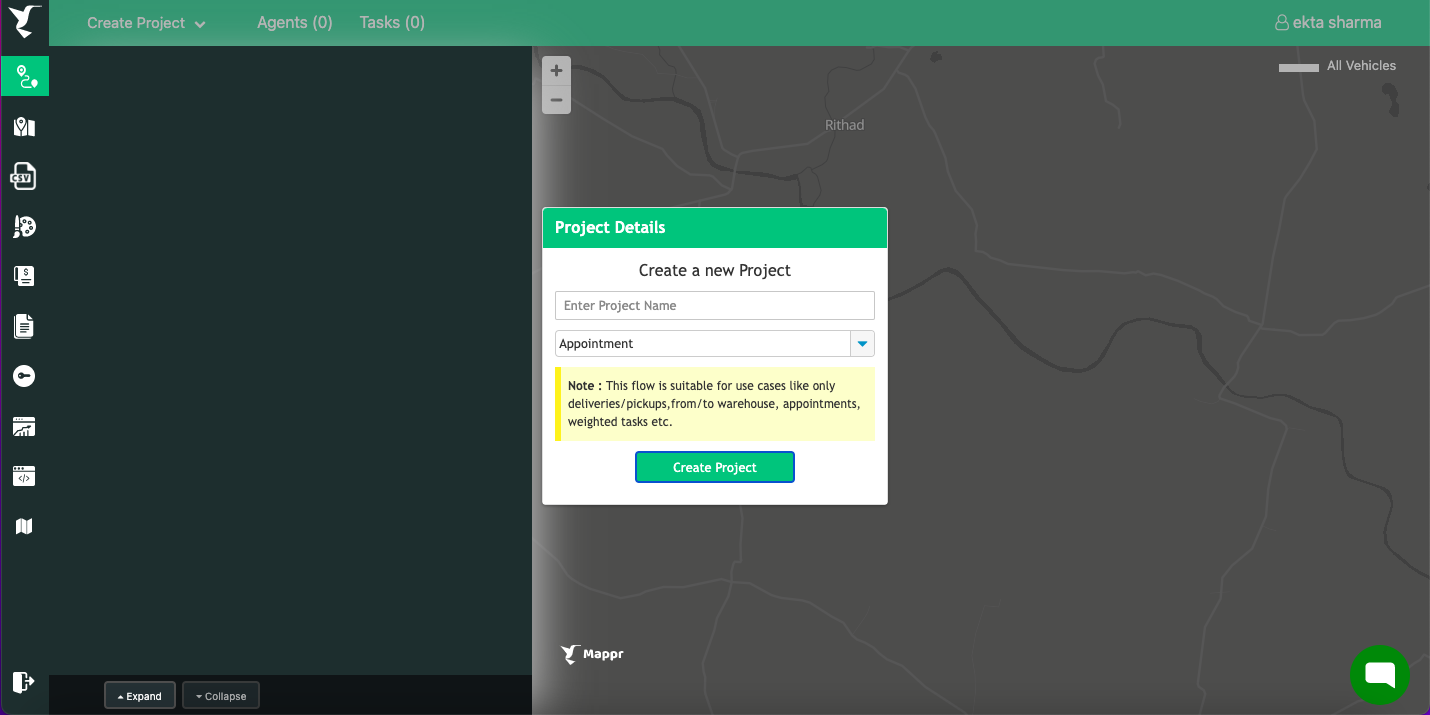
Next, you will get an option to create a project. In order to configure route optimization, you must first create a project. A project is a collection of all your stops and routes for a day. Give it a name, select one workflow: Pickup and delivery/Appointment/Custom and click on “Create Project”
Step 2: Agents
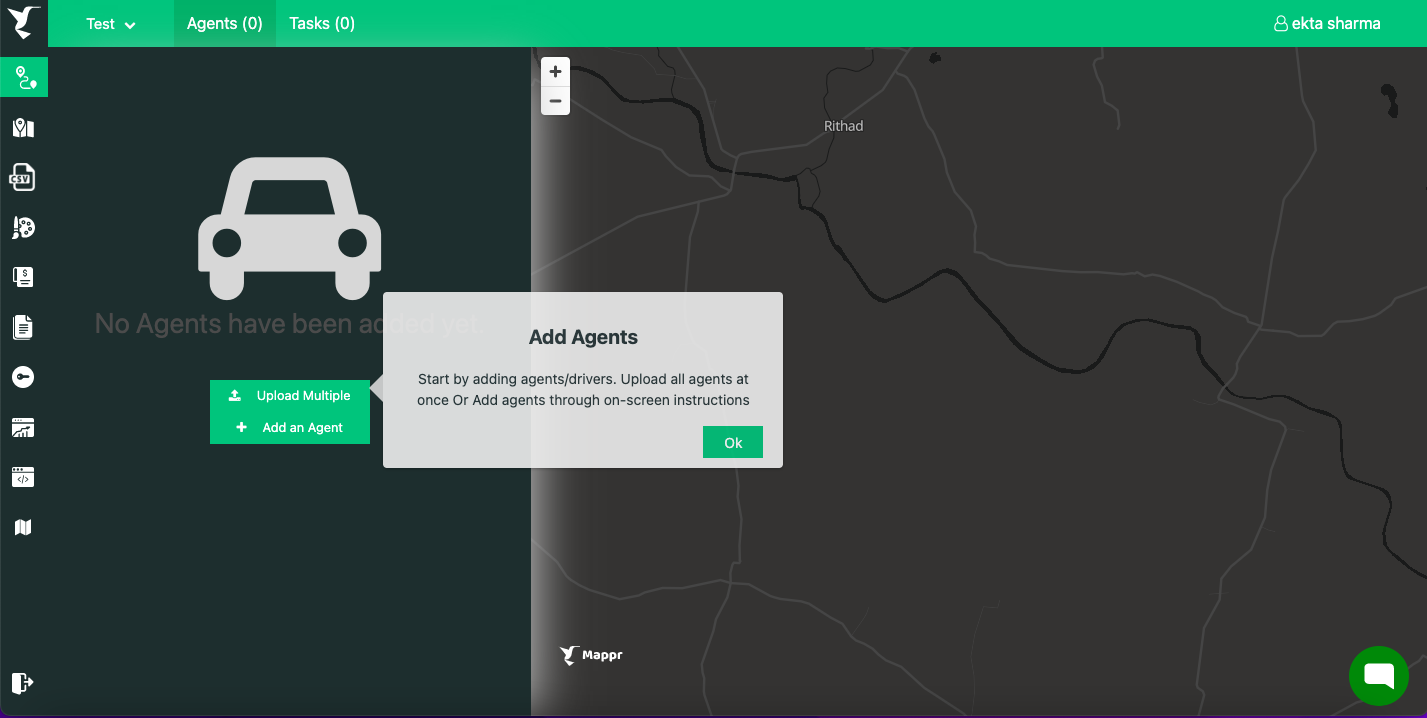
The next step is to add agents one by one or upload multiple via a spreadsheet in CSV format. If you already have agent information in Mappr, simply select the agents you want to route from the “Agent” tab on the top menu of the screen.
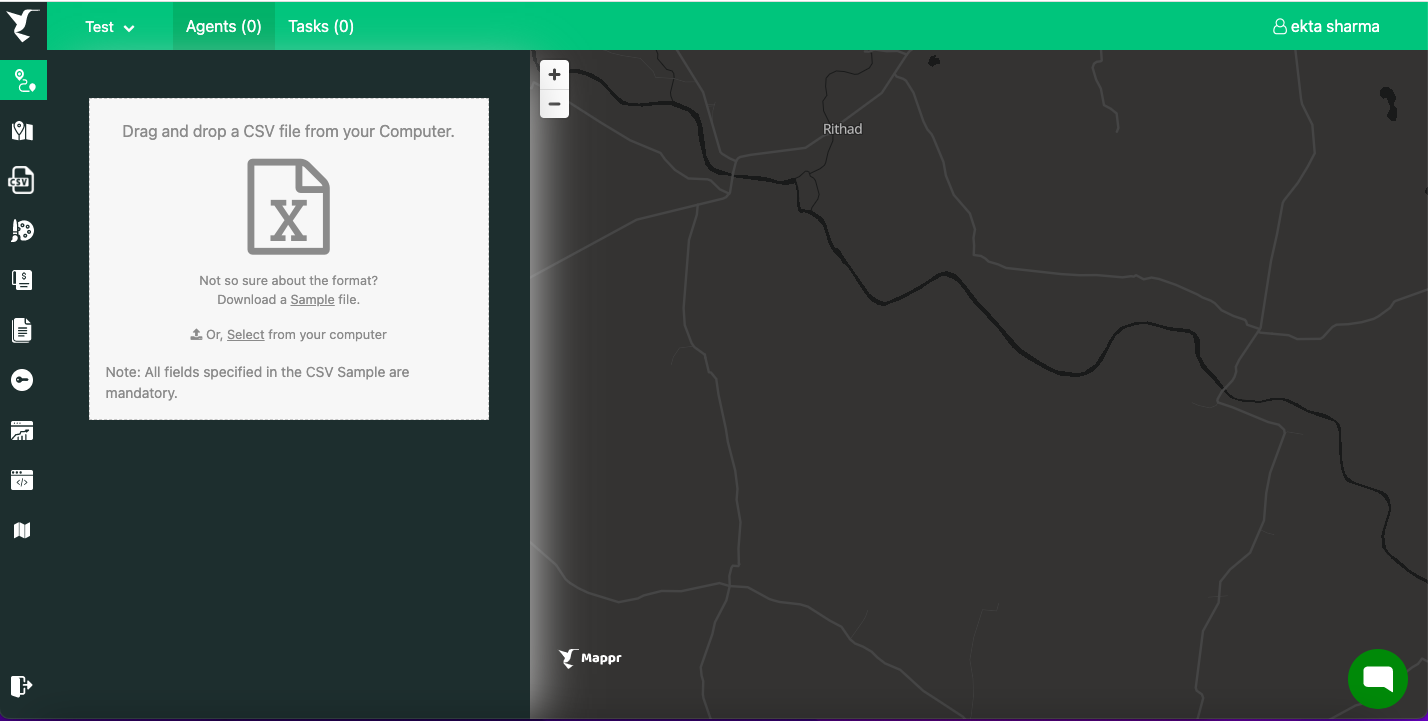
a. Add agents via CSV
Click on the “Upload Multiple” option. Then either drag and drop your file or click “Select from your computer”.
Note: You must first download a sample CSV file and upload the same after entering the details.
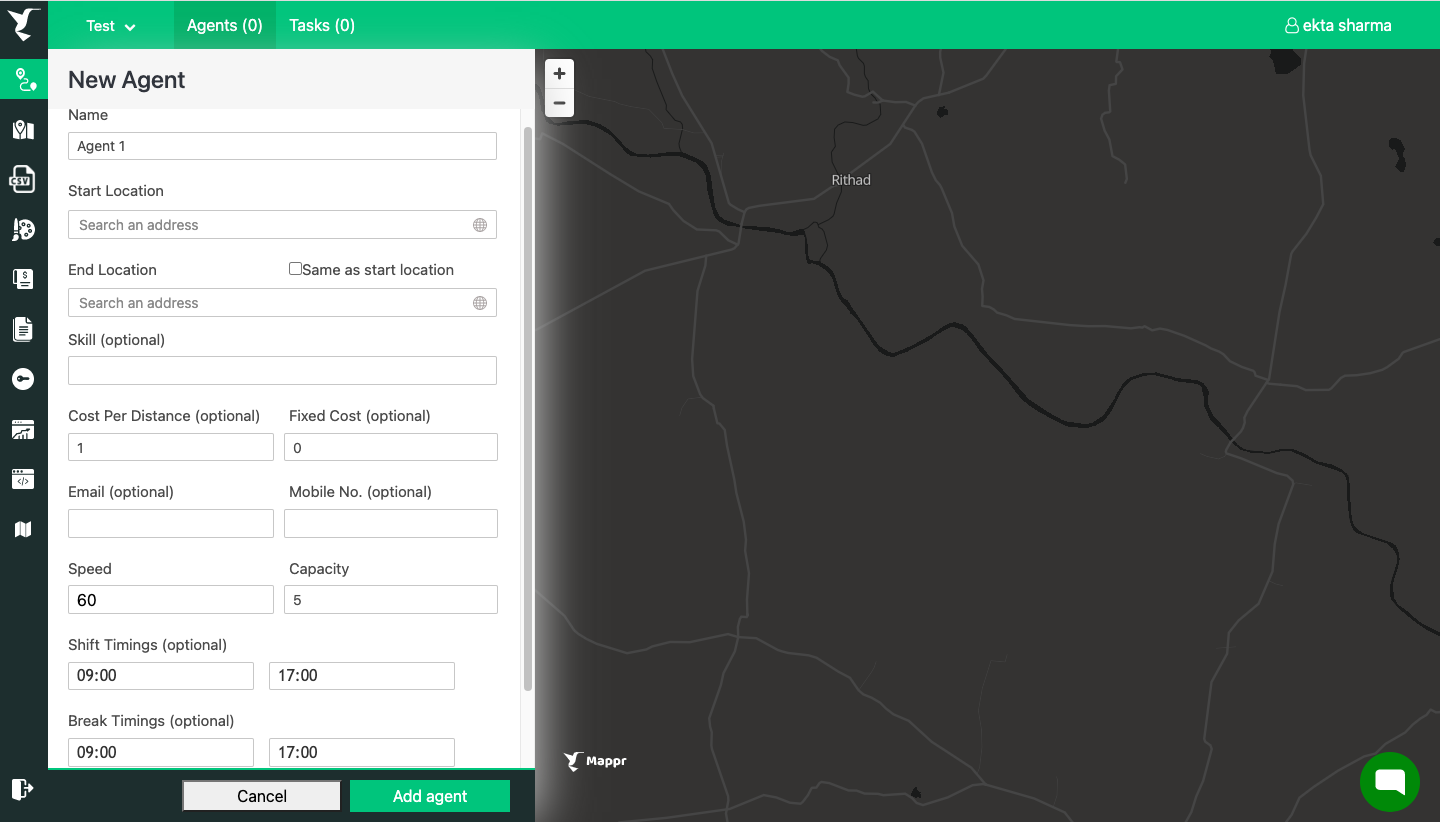
b. Add agents one by one
Click on the “Add an agent” option. Then enter the details in the fields shown in the screenshot below:
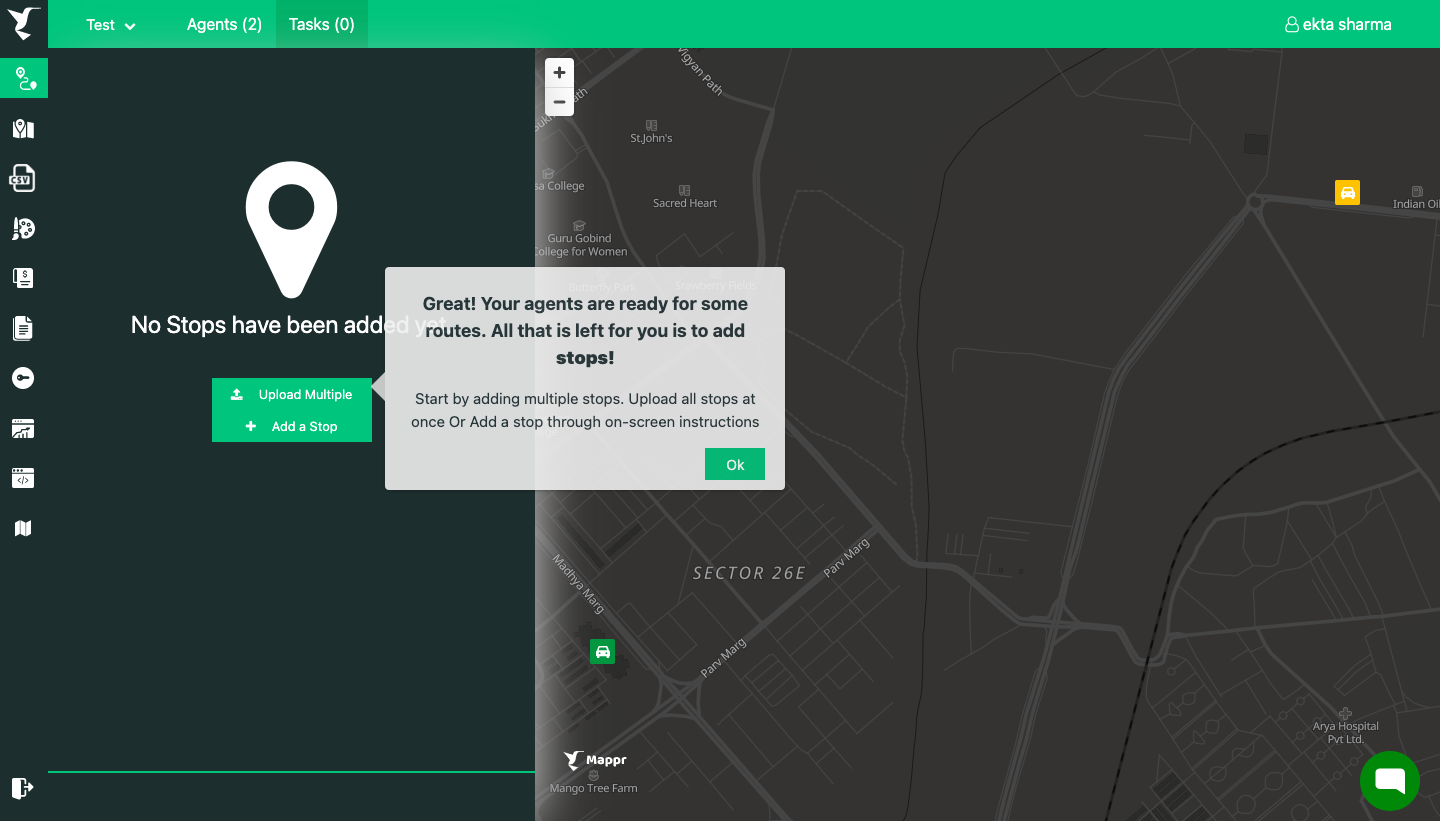
Step 3: Add Stops
The next step is to add stops one by one or upload multiple via a spreadsheet in CSV format.
Pro tip: You can upload stops automatically through our API. Contact us to learn more.
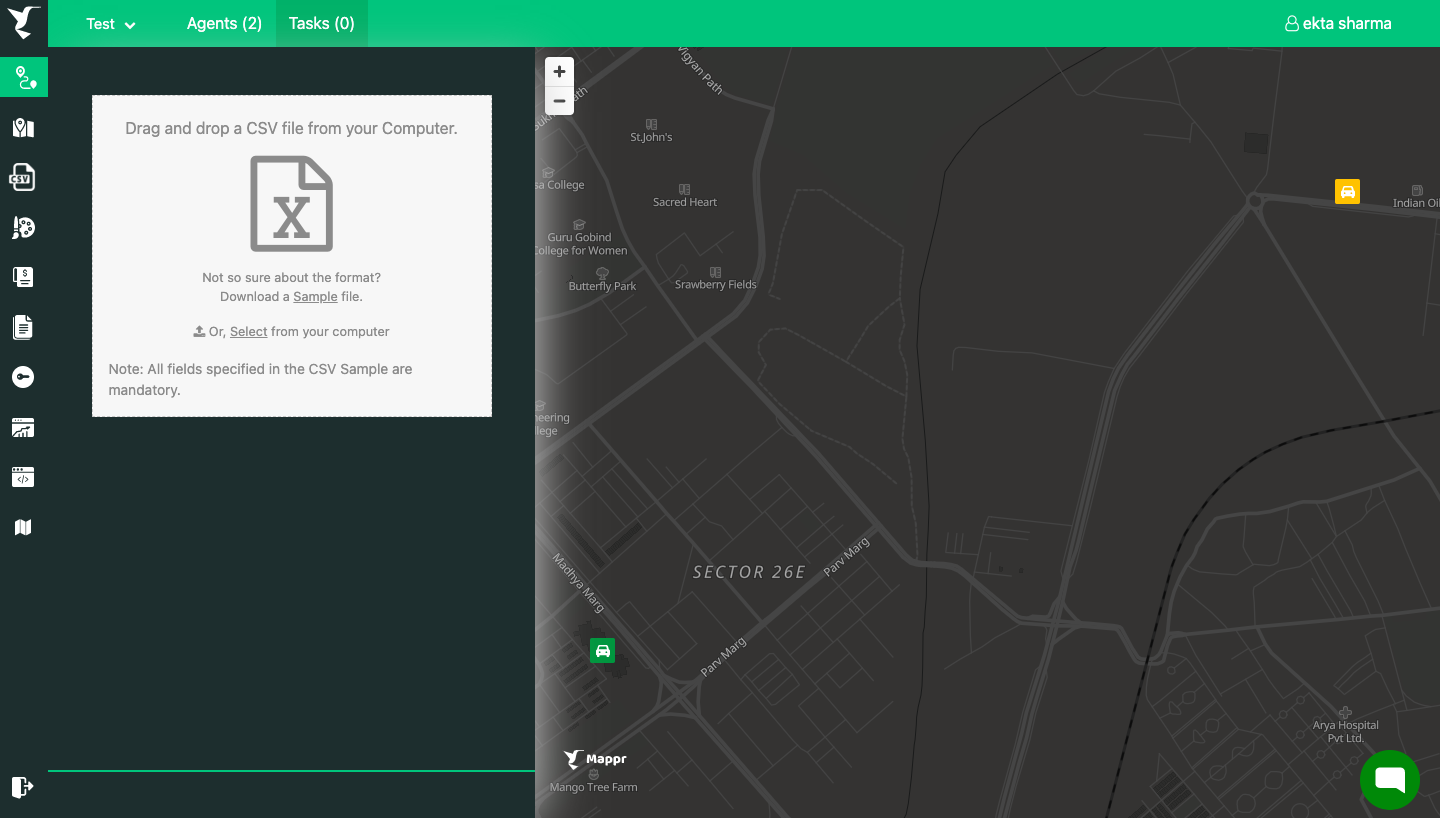
a. Add stops via CSV
Click on the “ Upload Multiple” option. Then either drag and drop your file or click “Select from your computer”.
Note: You must first download a sample CSV file and upload the same after entering the details.
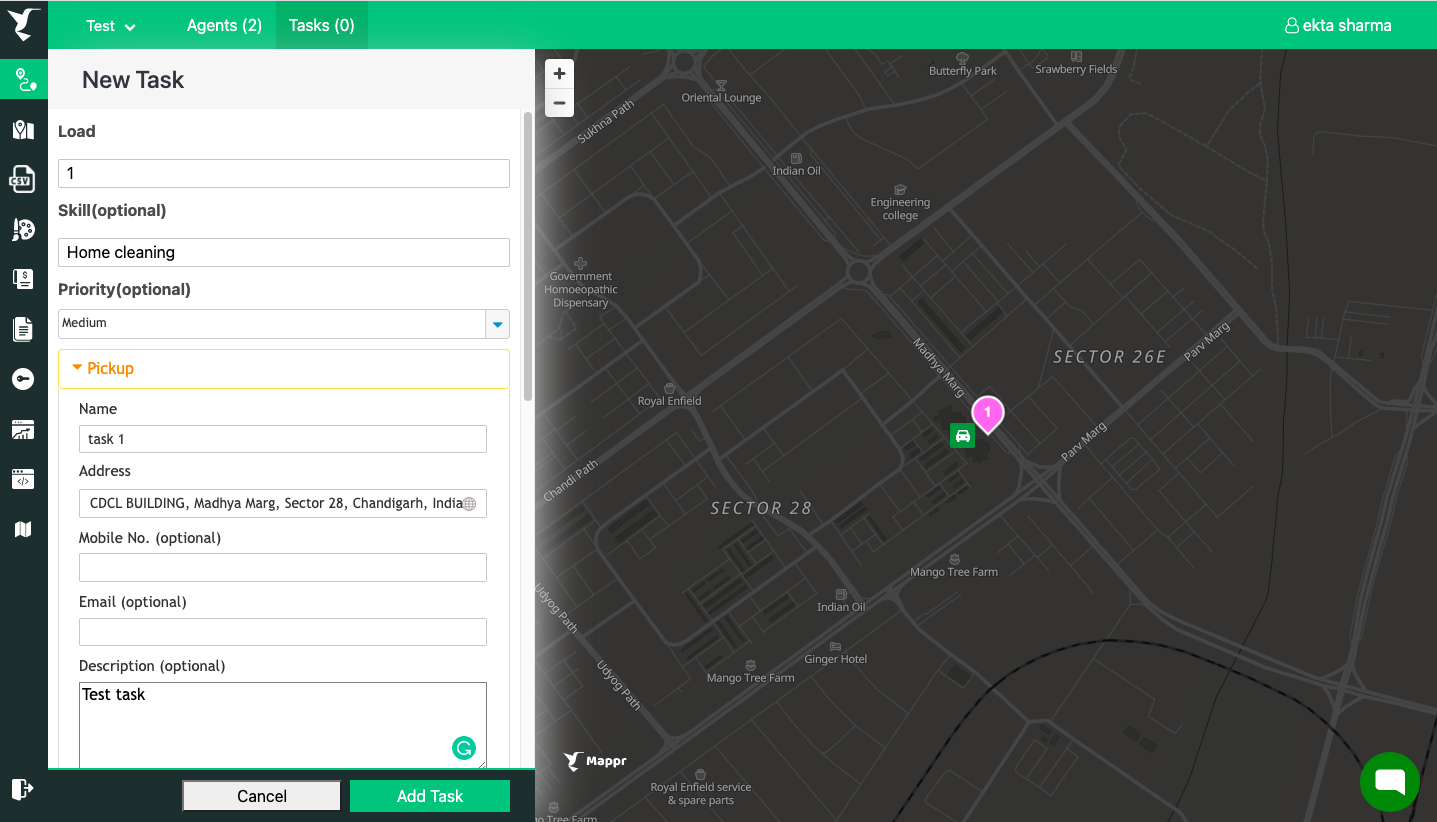
b. Add stops one by one
Click on the “Add Stop” option. Then enter the details in the fields shown in the screenshot below:
Step 4: Optimize
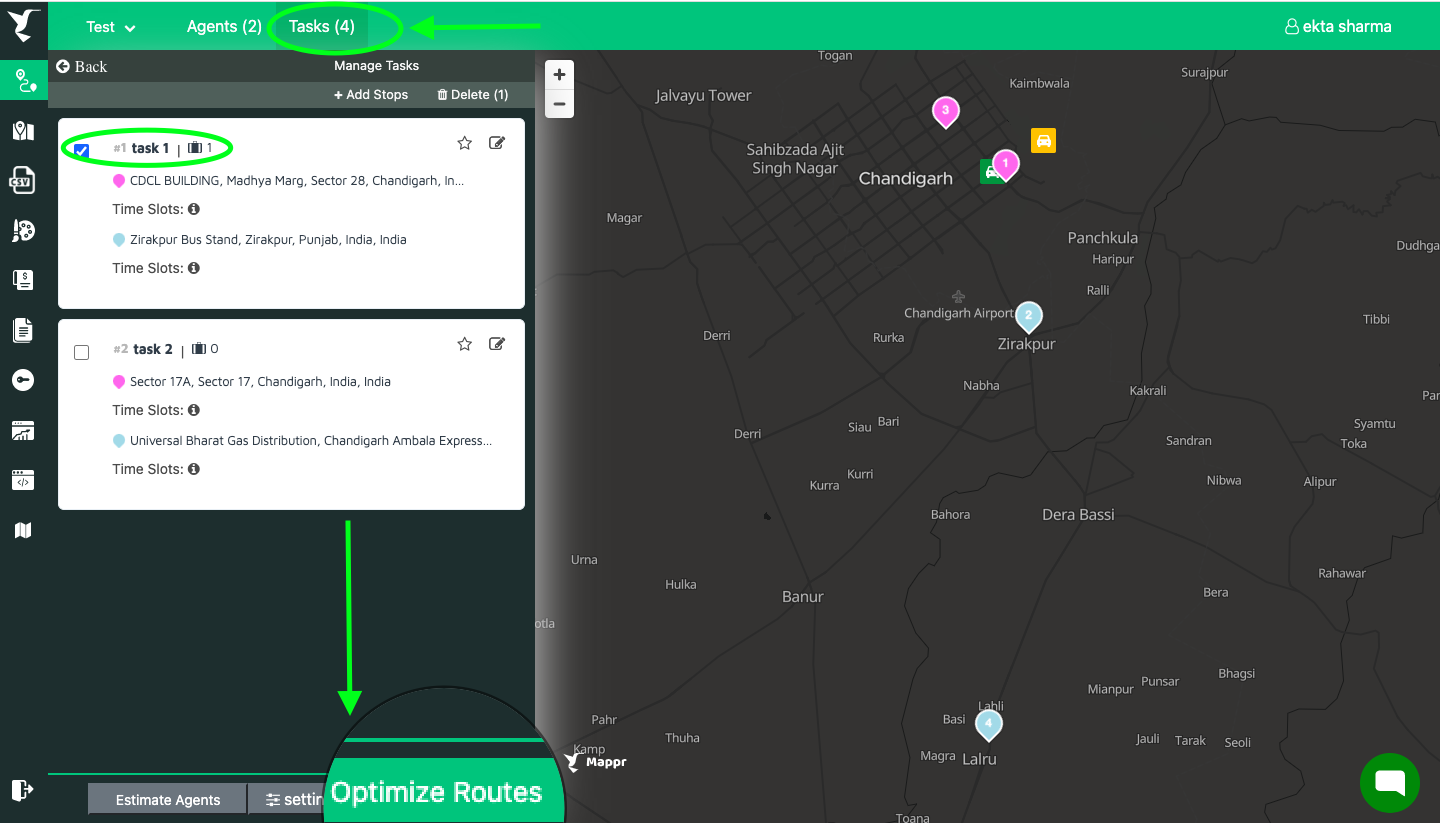
Once you have added the stops, Click on the “Optimize Routes” button at the bottom of the “Tasks” screen.
Sit back, and let Mappr create the most efficient routes for your delivery agents.
Step 5: Dispatch Routes to Agents
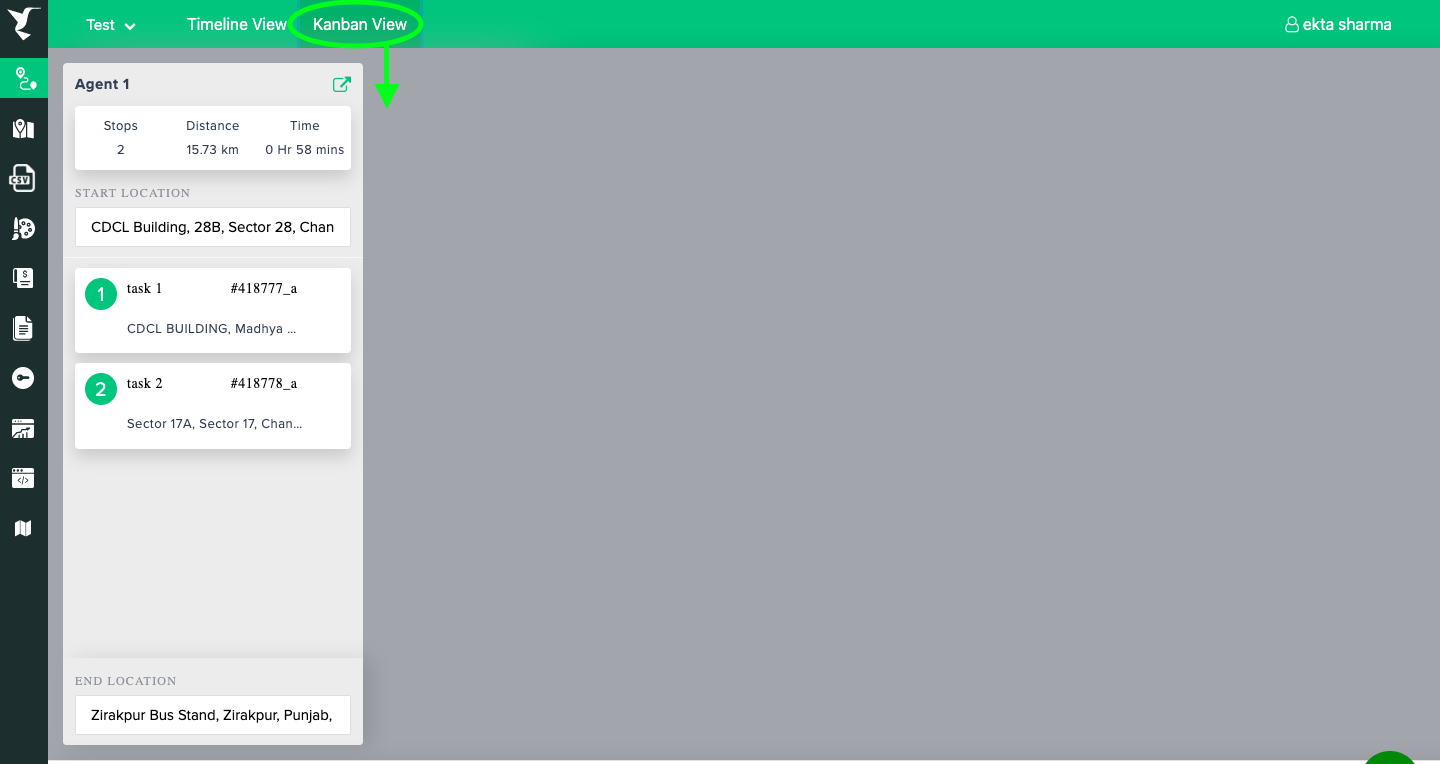
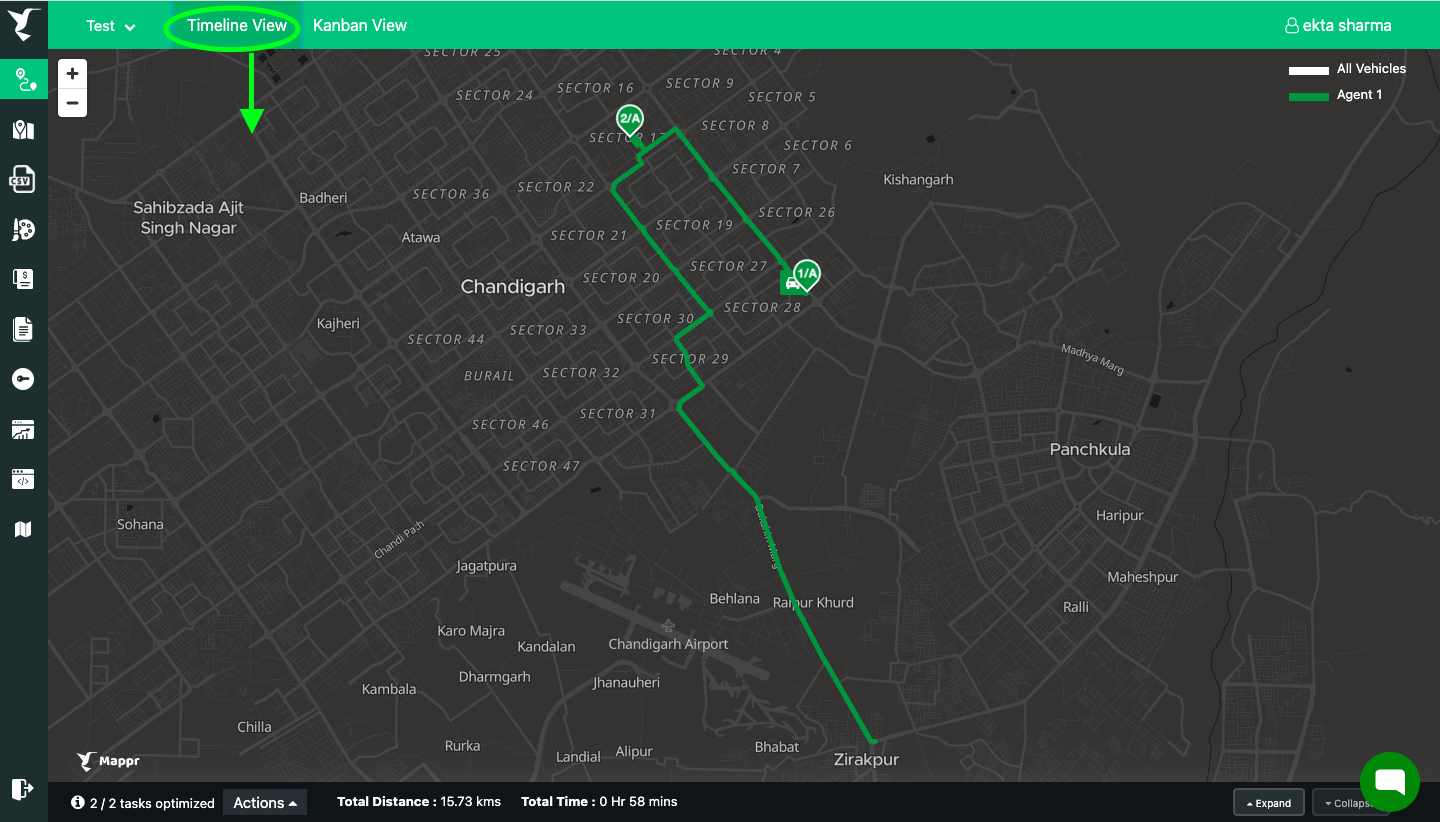
Now you’re ready to send routes to your agents. Once you have selected the option to “Optimize Routes” in “Step 4” above you will be redirected to a map screen showing the optimized routes. This screen will have an option for “Timeline view” and Kanban view”.
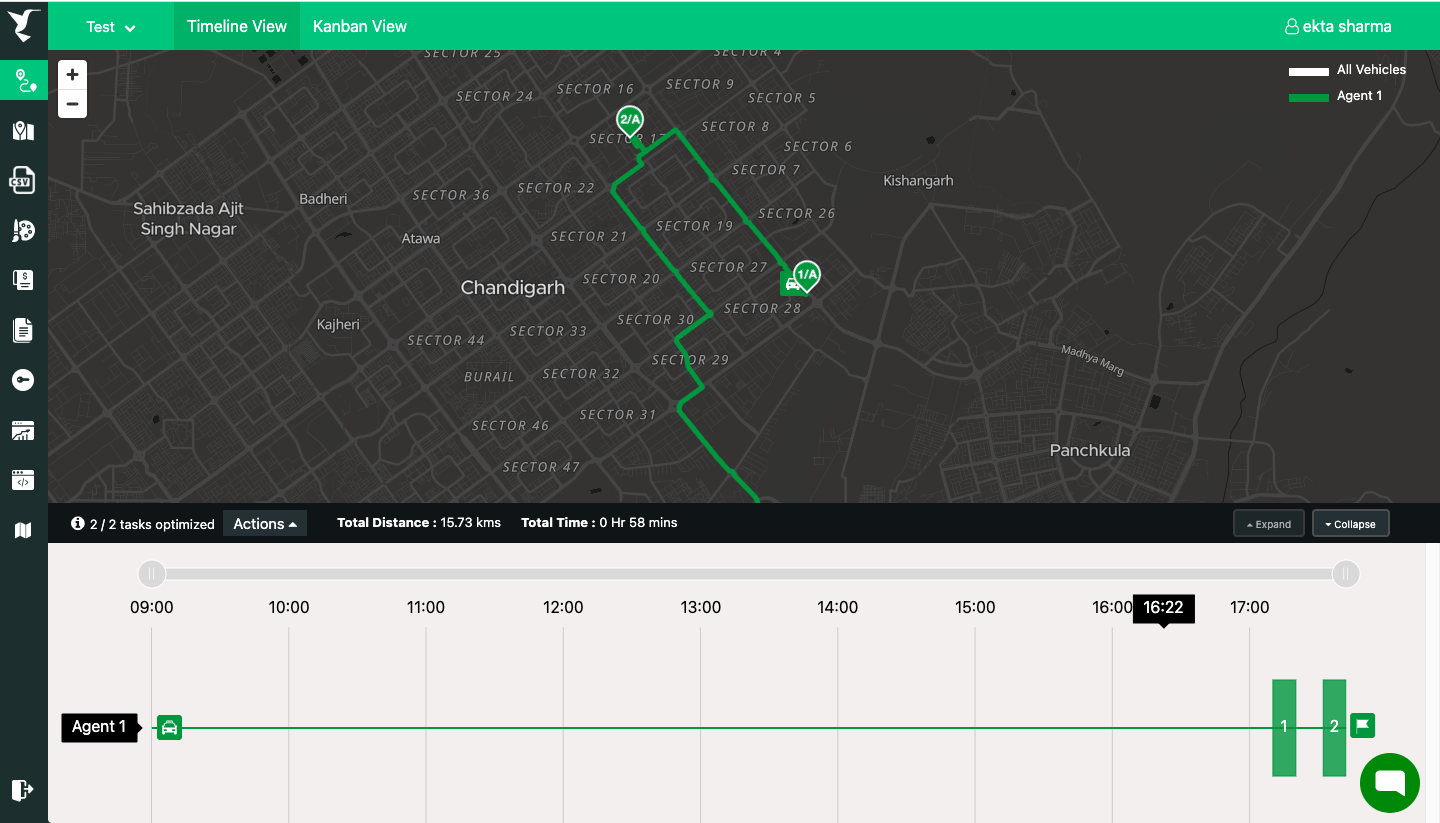
The difference between both views is the way the routes are displayed. In the timeline view, you can see the route on the map, and in the kanban view, you can see the detailed route along with start and end locations. Actions can be performed only on the “Timeline view”.
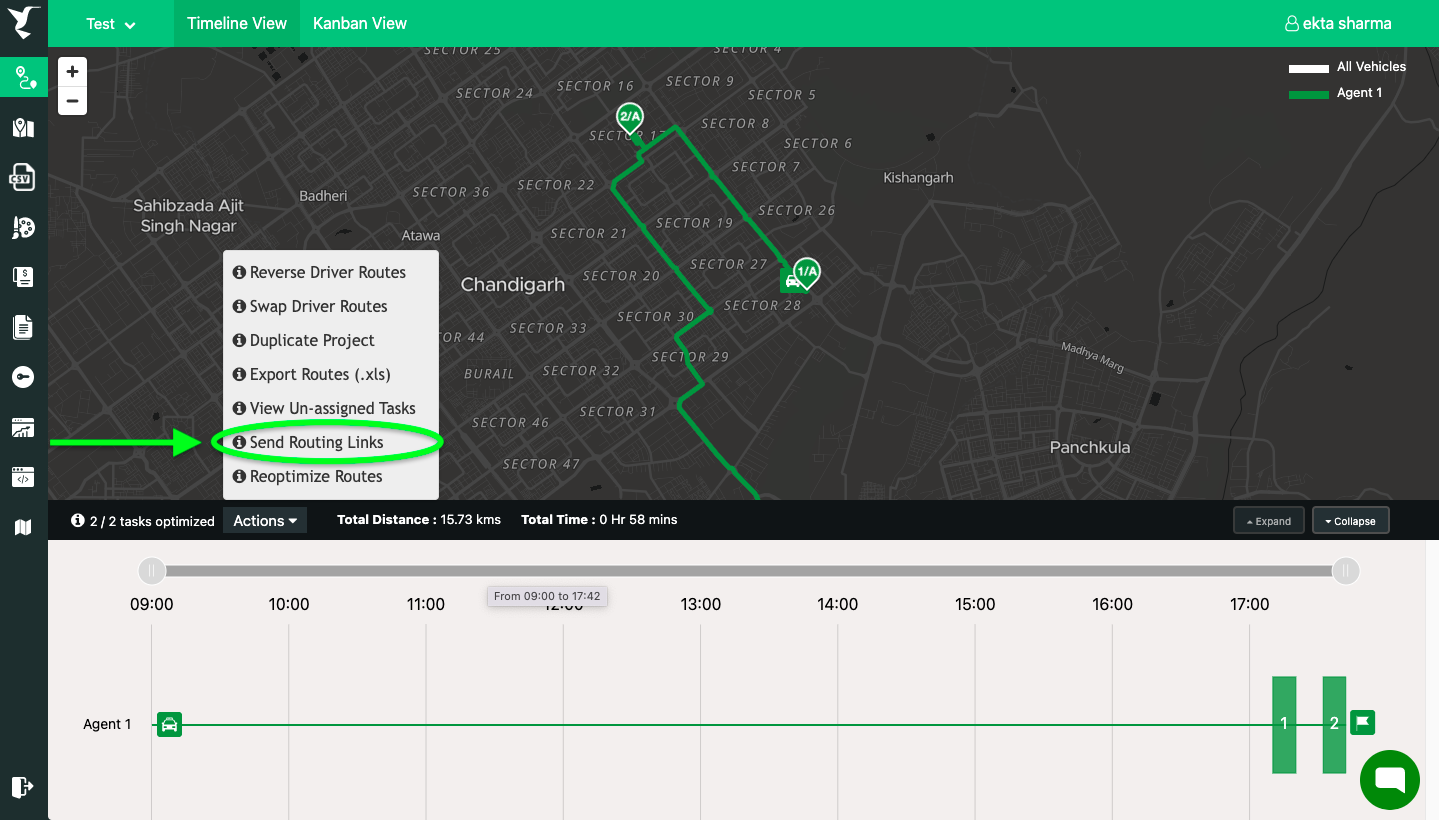
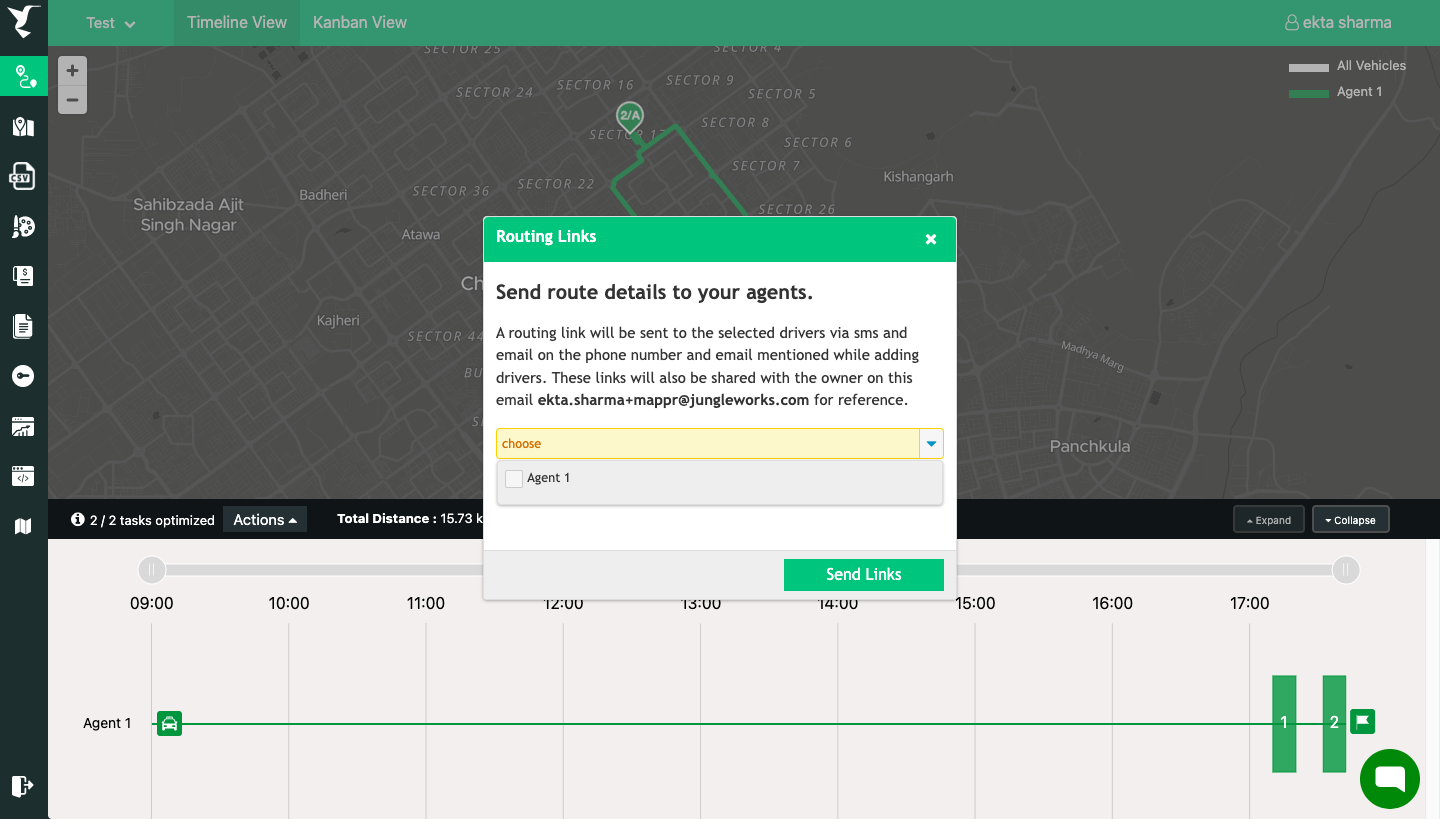
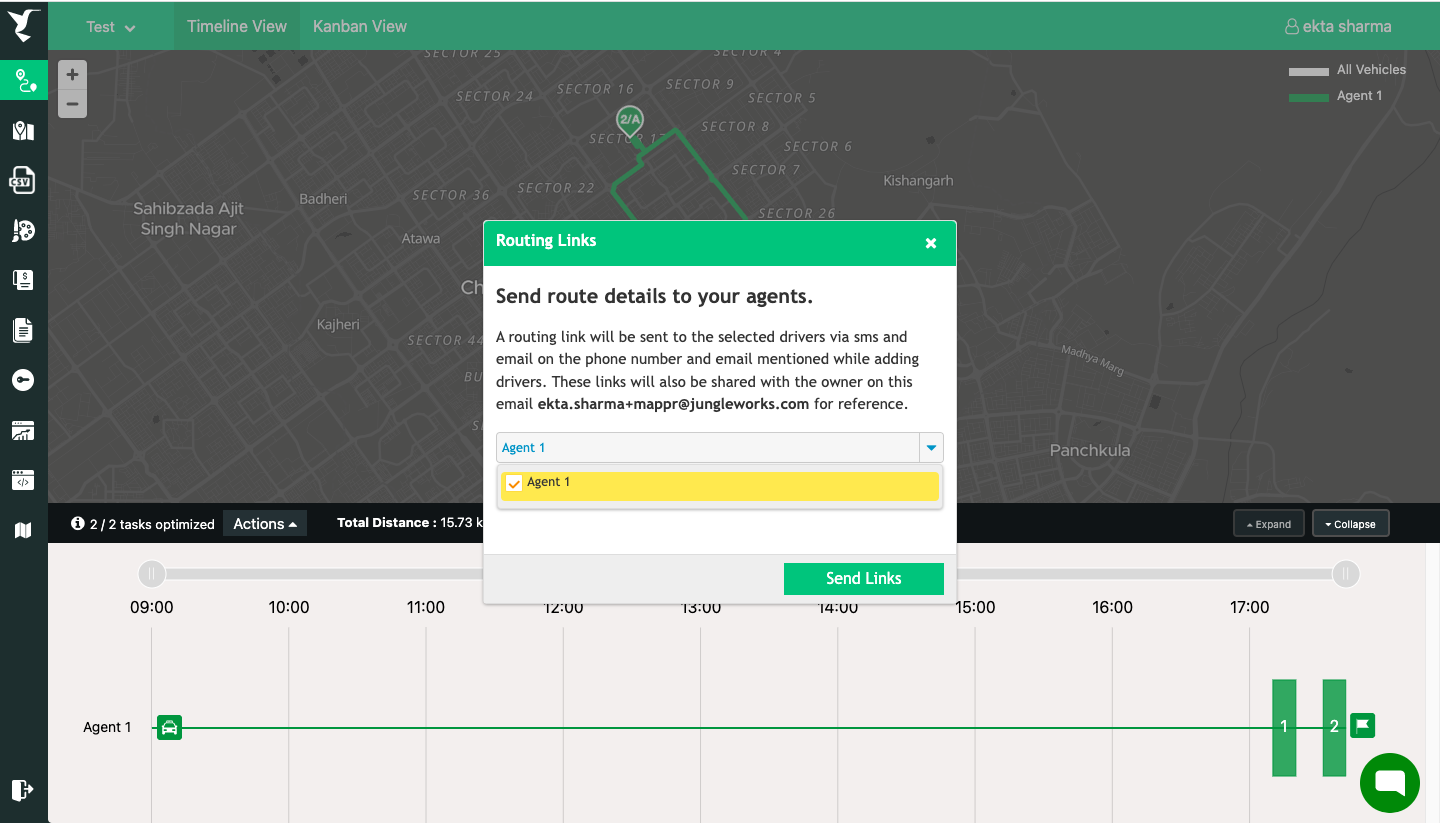
To send routes to agents, click on the drop-down menu named “Actions” at the bottom of your “Timeline View” screen. Select “Send Routing Links”, agent/agents name, and “Send Links”. Your agents will get an email message with a link to their route.
Kindly refer to the screenshots below:

Leave A Comment?