
Add Discounts
Adding discounts to your eCommerce store can attract more customers. It is easy to do with Yelo. All you need is an admin account, which you will get when you signup with the platform. So, let’s see how you can do it easily without much fuss.
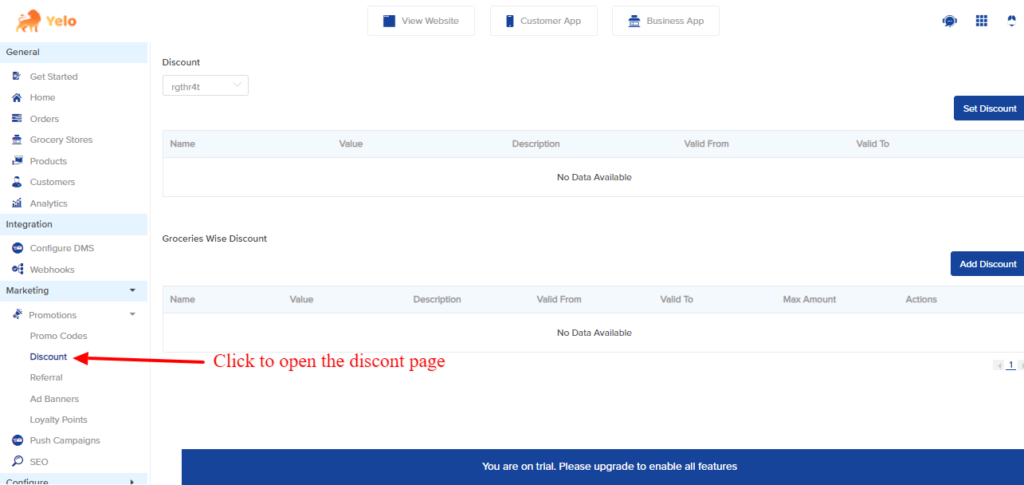
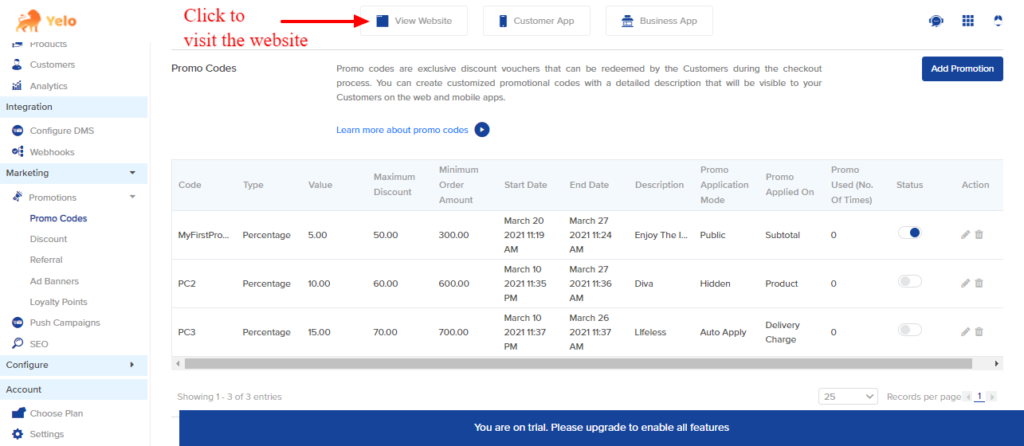
- Go to the main dashboard, and follow the sequence to reach the discount page on the sidebar.
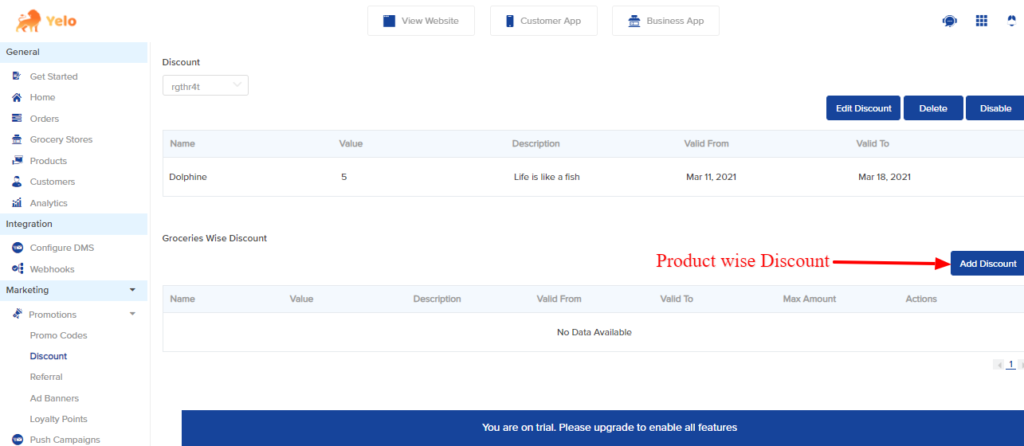
Marketing->Promotions->Discounts
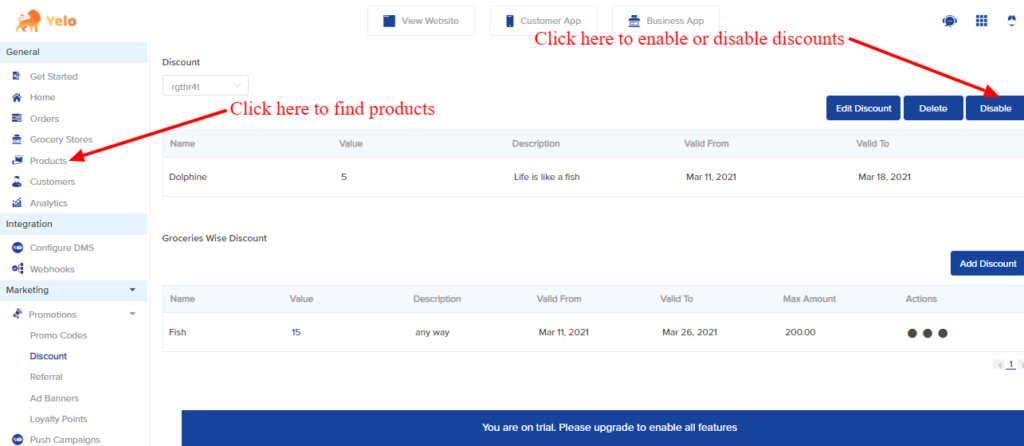
- Once you reach the discount page, you will find two options to add discounts. One is a general discount that can be added to all the products, while the other one can be added for specific products.
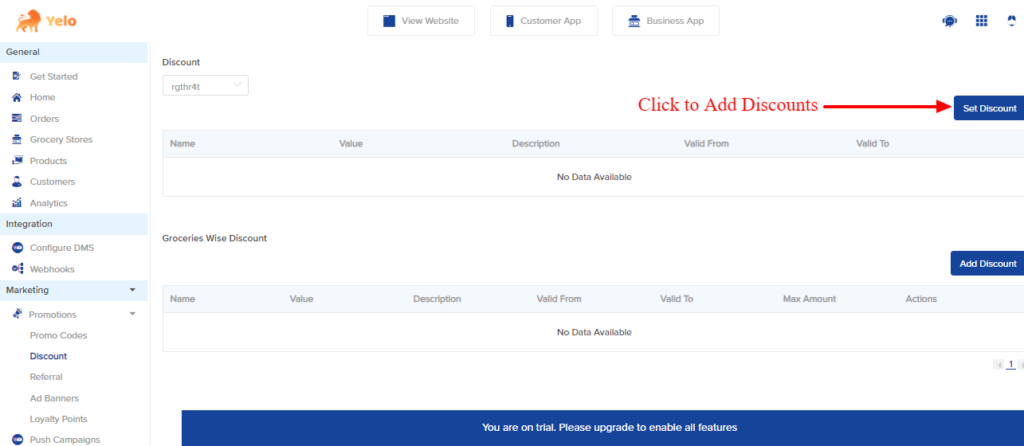
- When you click on the first “Set Discount”, there will be a form that you need to fill in to add the discount.
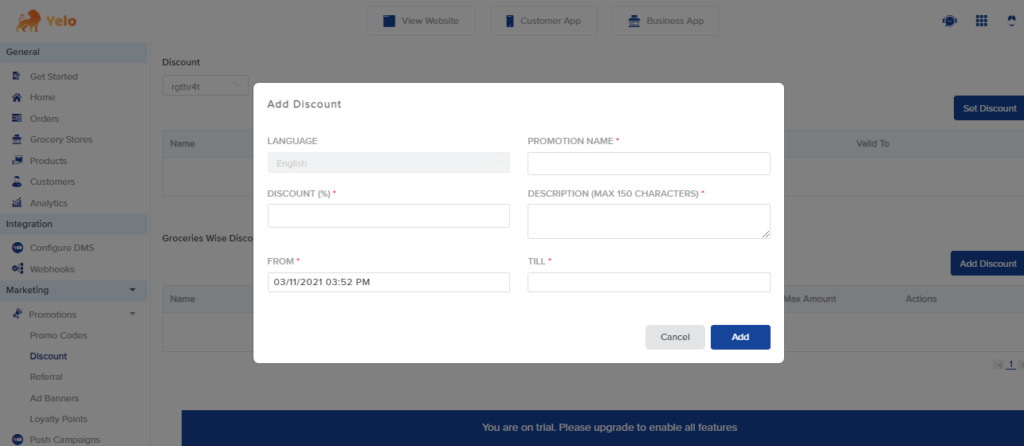
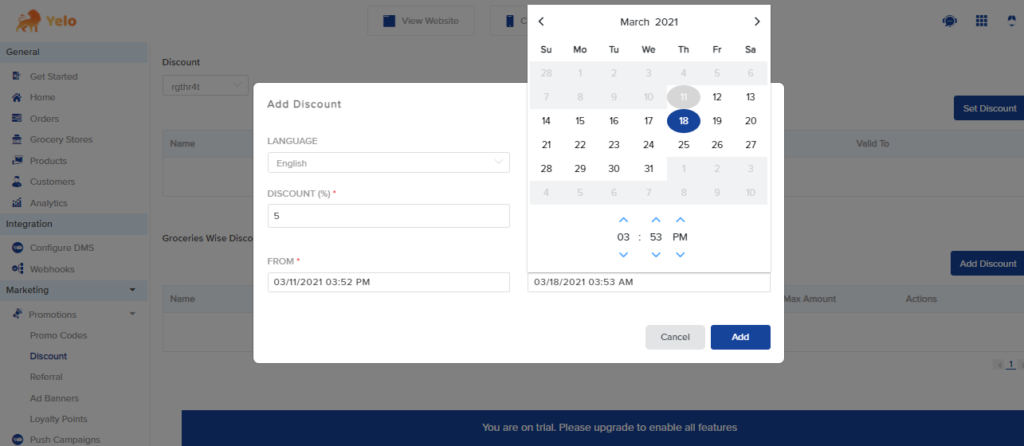
- You can add the name of the promotional campaign, amount of discount, start date, and end date. After you fill in the details, just click on save to add the discount to your eCommerce store.
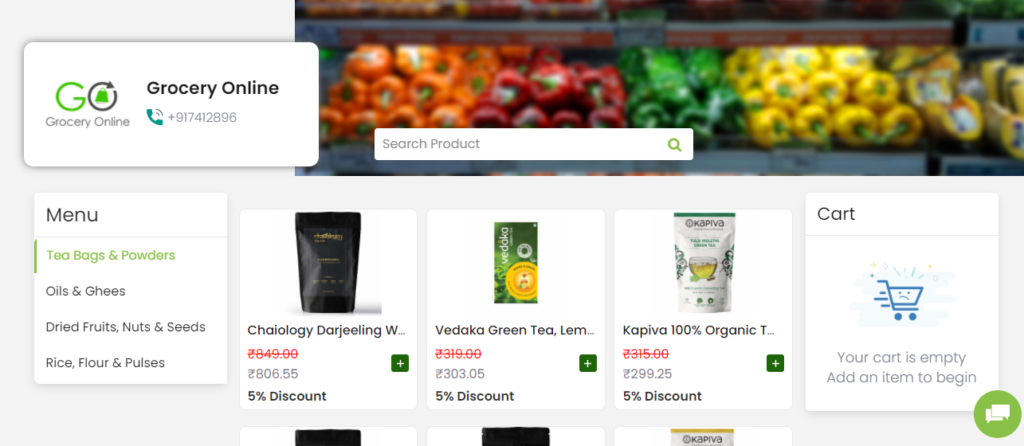
- You can check on the website whether the discount has been applied or not by clicking on “Visit the Website.”
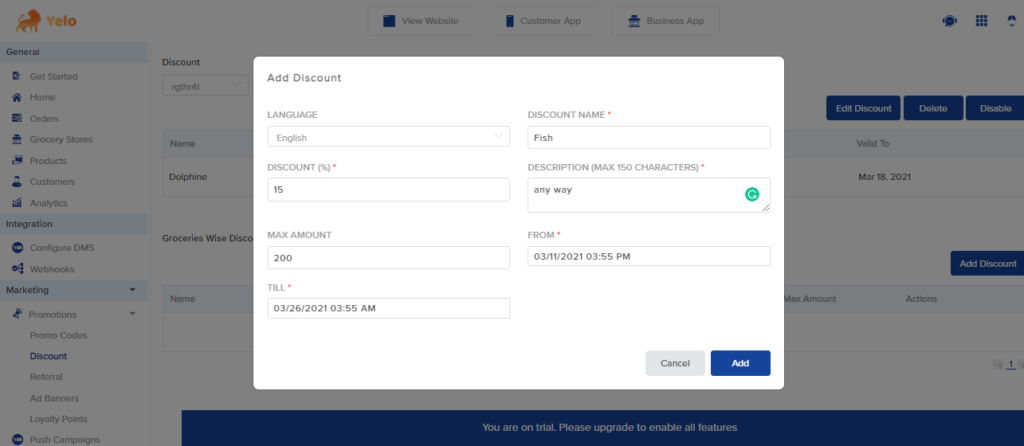
- If you want to put a discount on specific products, then click on the button, “Add Discount.”
- When you click on the button, another form will popup with all the fields that you can fill—Name of the discount, percentage of discount, description, maximum amount, start date, and end date.
- To activate the product discount, you need to deactivate the general discount, if any.
- Next, click on the products button to choose the product you want to add a discount on from the catalogue.
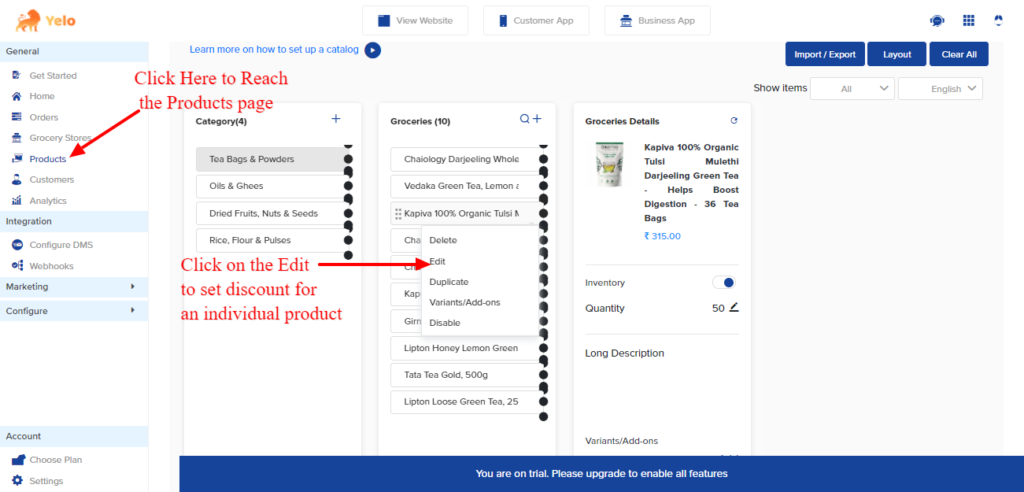
- Click on the product to edit details like minimum order quantity for discount, type of discount, and other information.
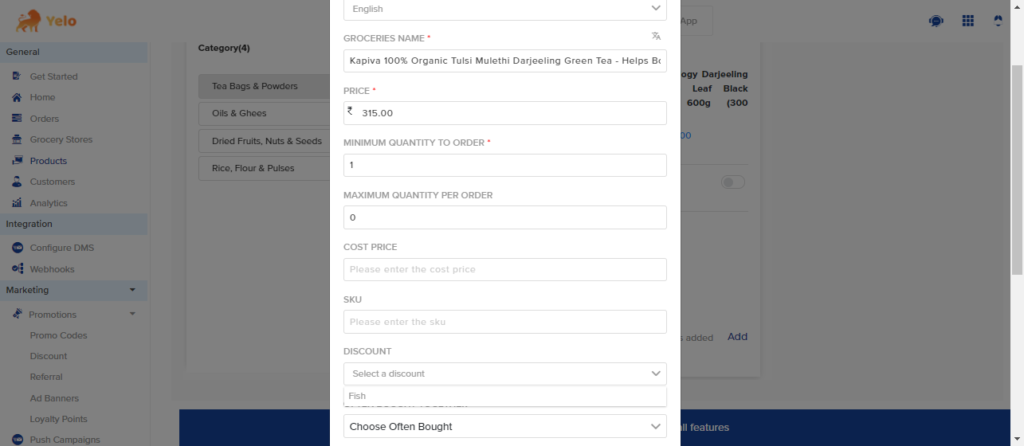
- Once you fill in the details, save the form, and your discount will be active. You can even go back to the website and check the discount applied.Congratulations, your discounts are ready for users to have a treat when they visit your eCommerce store.
Leave A Comment?