Add managers and assign roles
In Yelo, you can add new roles like manager, supervisor, etc., as per your requirements. You can then add employees and assign them roles. So you need not go through activating permission for each new manager, you onboard. All you need to do is to assign the roles to them on Yelo.
Here we walk you through the process of adding a new manager and assigning roles to them.
Step 1:
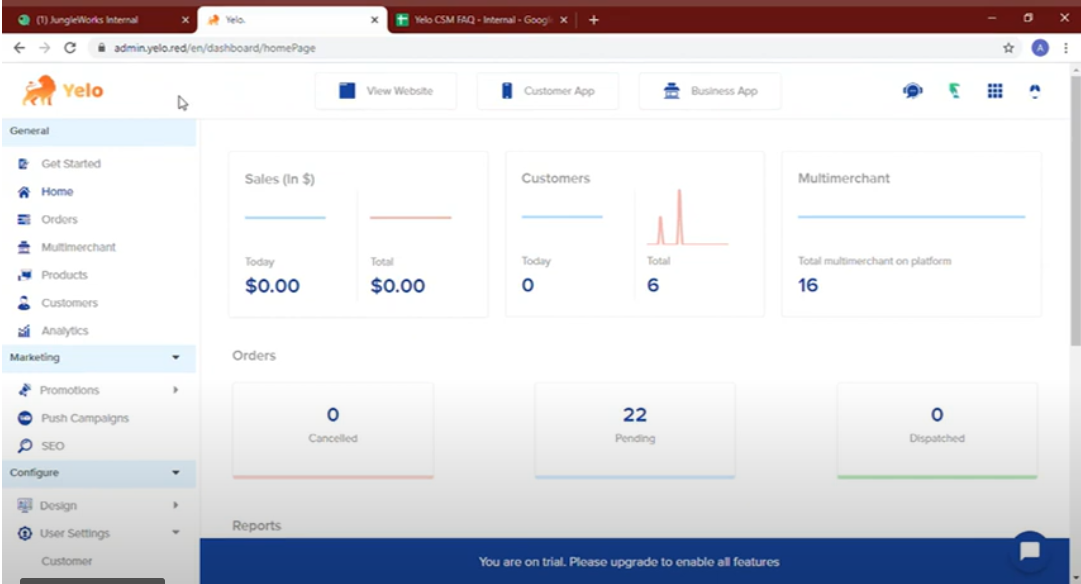
Login to Yelo and access your Yelo Dashboard.
Step 2:
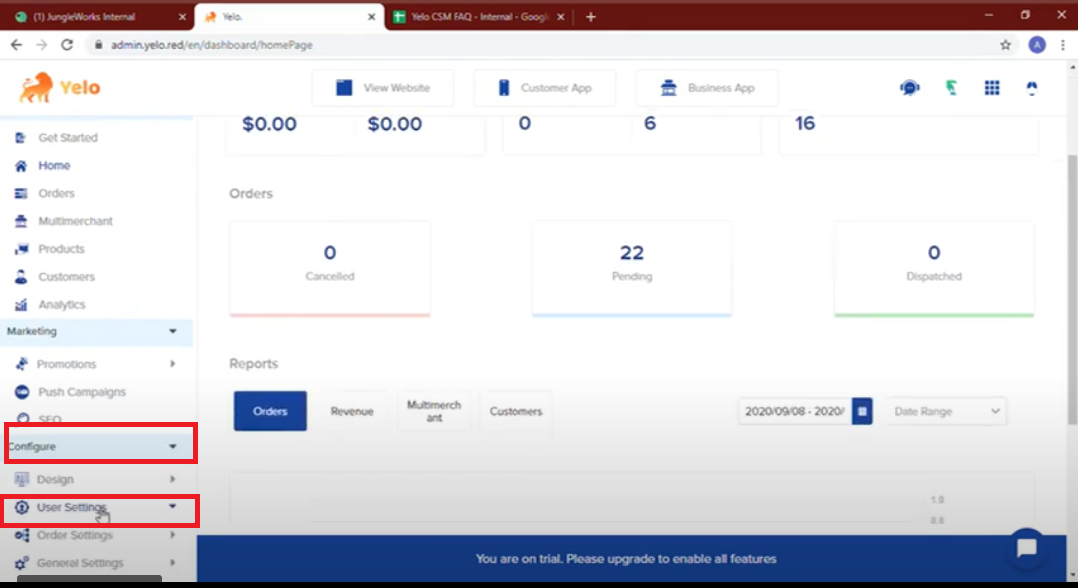
Go to User Settings.
You can find it under the Configure drop-down tab at the side menu bar.
Step 3:
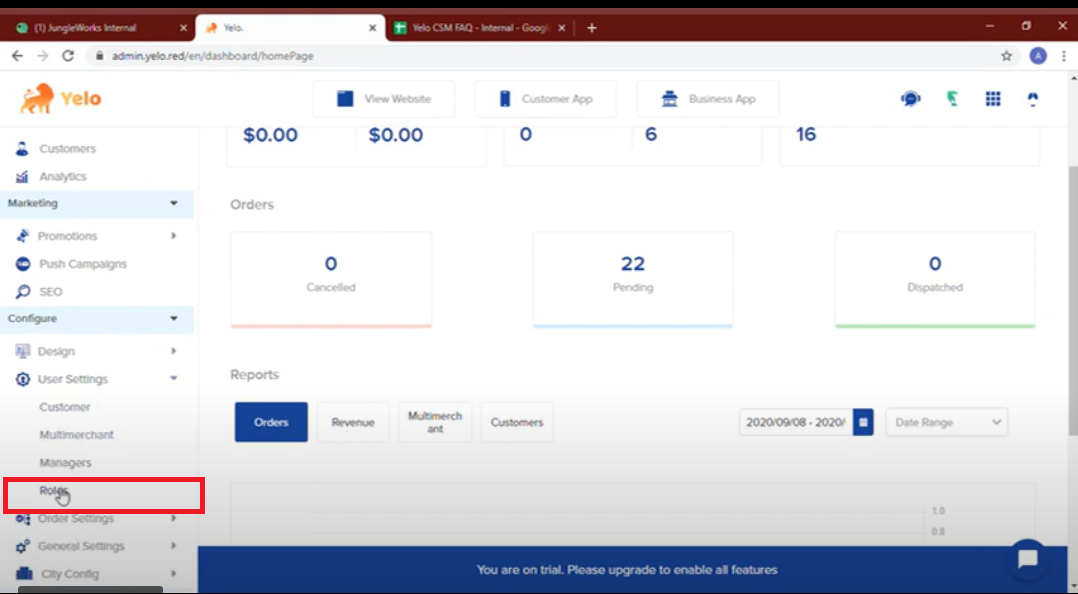
Select Roles from User Settings.
Step 4:
Click on Add Roles to add new roles.
Step 5:
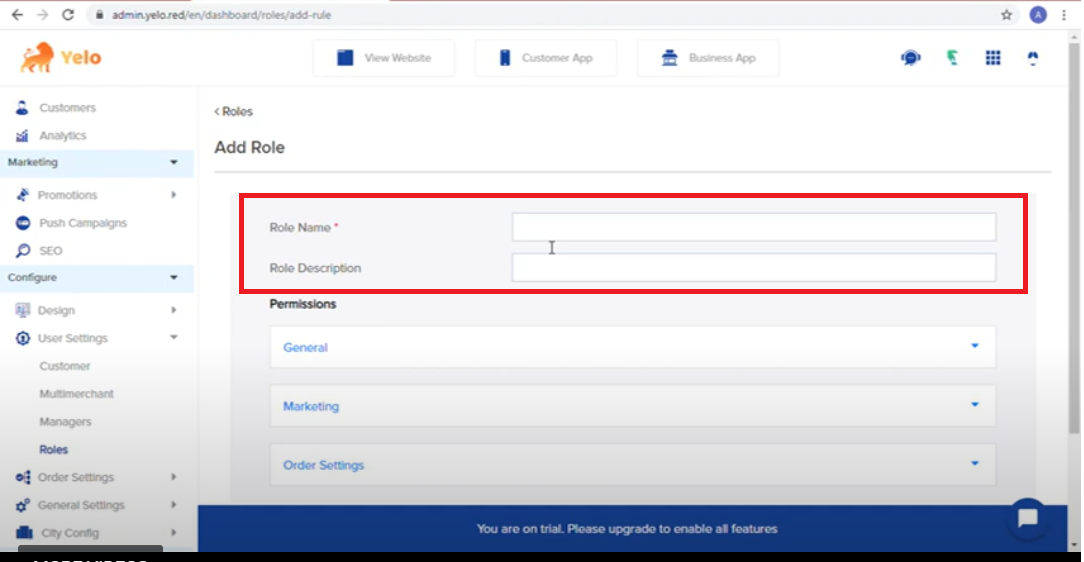
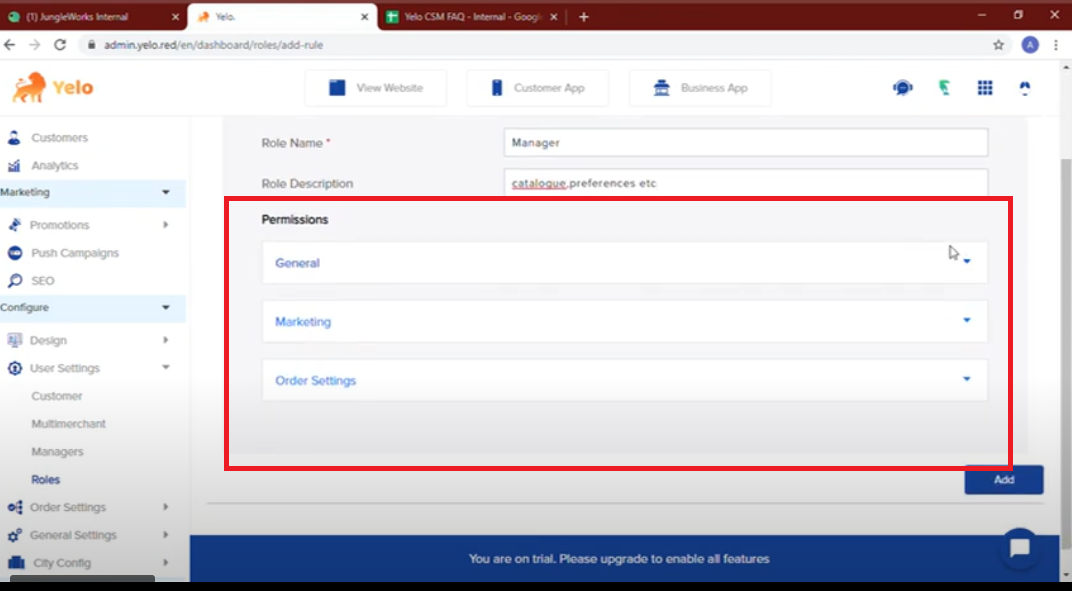
Fill in the Role name (mandatory) and Role Description, optional, but preferred. It avoids ambiguity).
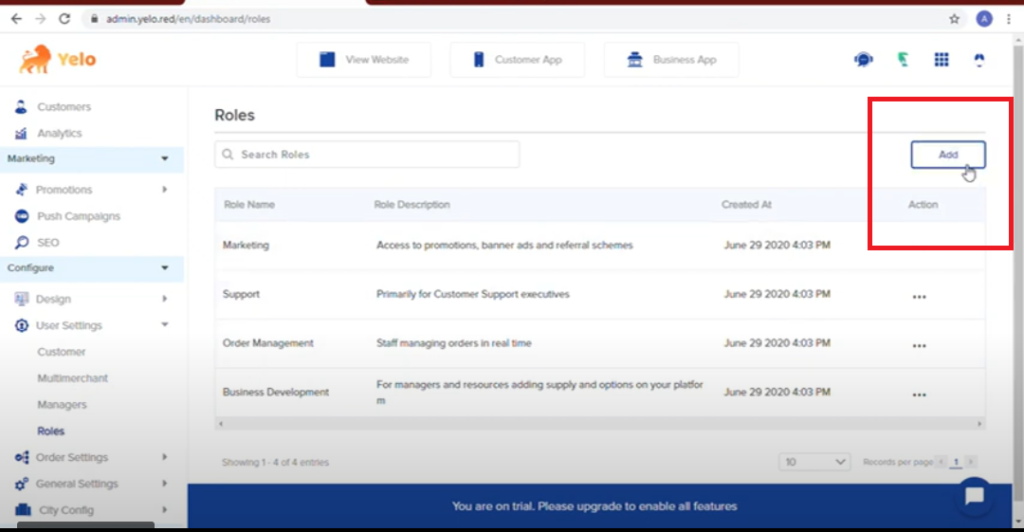
Step 6:
Activate permission for the role. You will find various options and sub-options under the Permissions drop-down tab.
As per the role description, you can enable the permission.
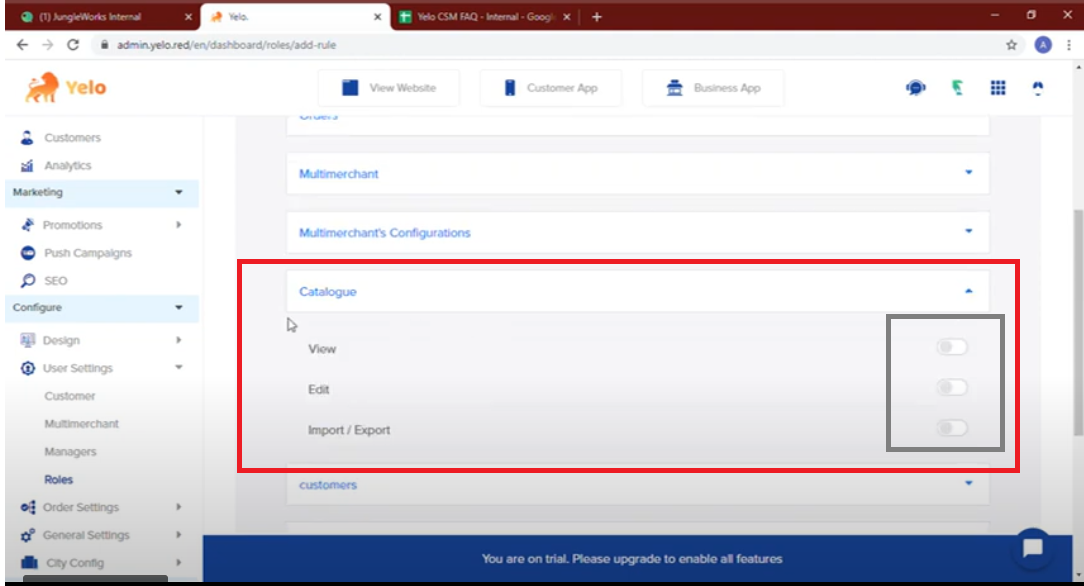
For example, if you want the manager to view and handle the import/export of the catalogue, you can find it under General> Catalog. Just click on the action you want to activate.
Step 7:
Once you have activated all the required permissions, click Add.
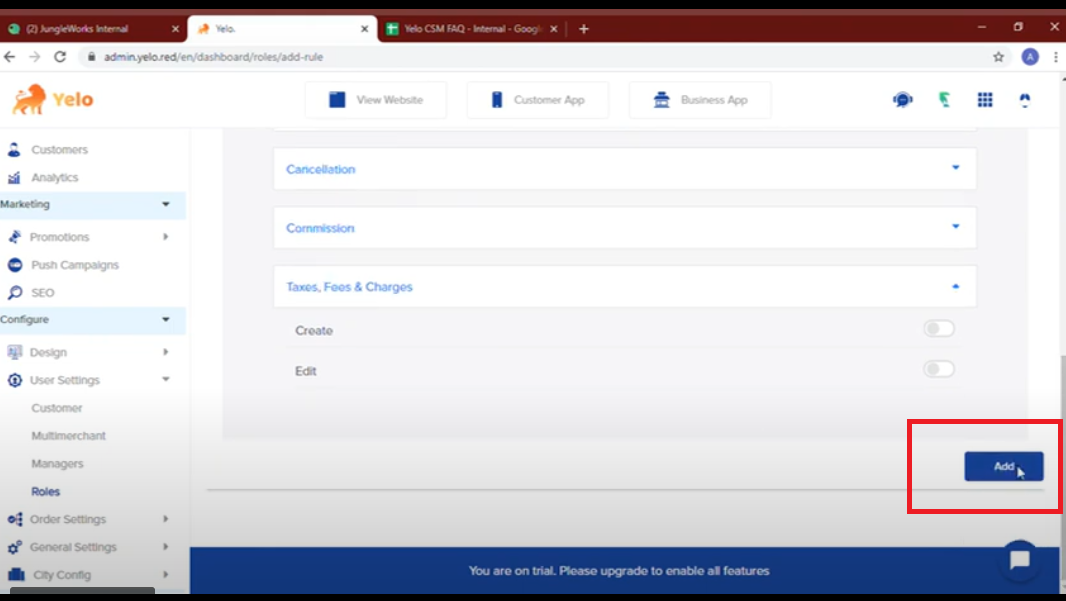
Step 8:
You will see the new role added to the Roles pages.
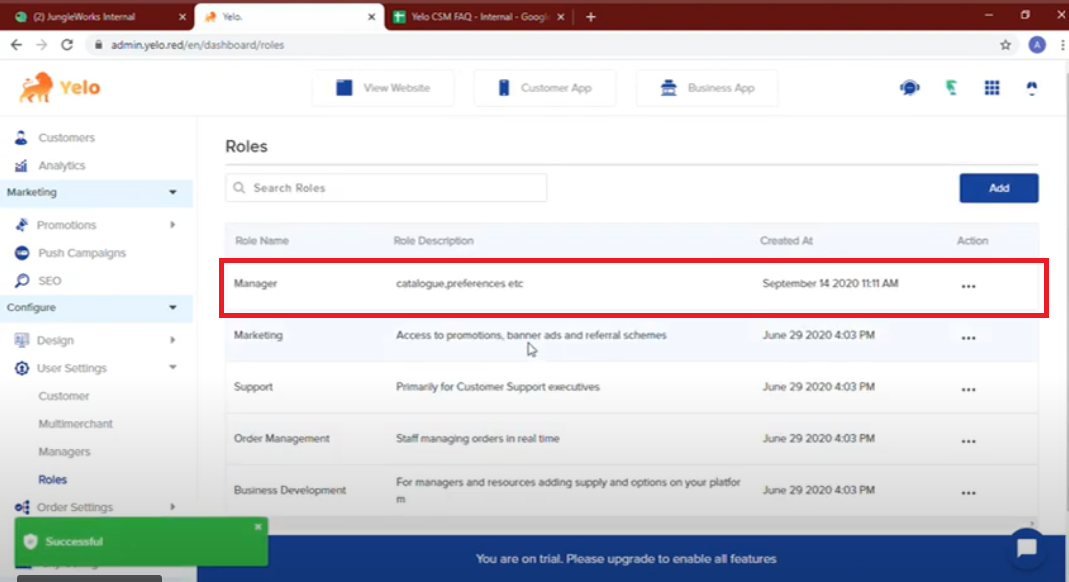
Step 9:
Now to add a manager, go to the Manager tab. You can find it under Configure at the side menu bar.
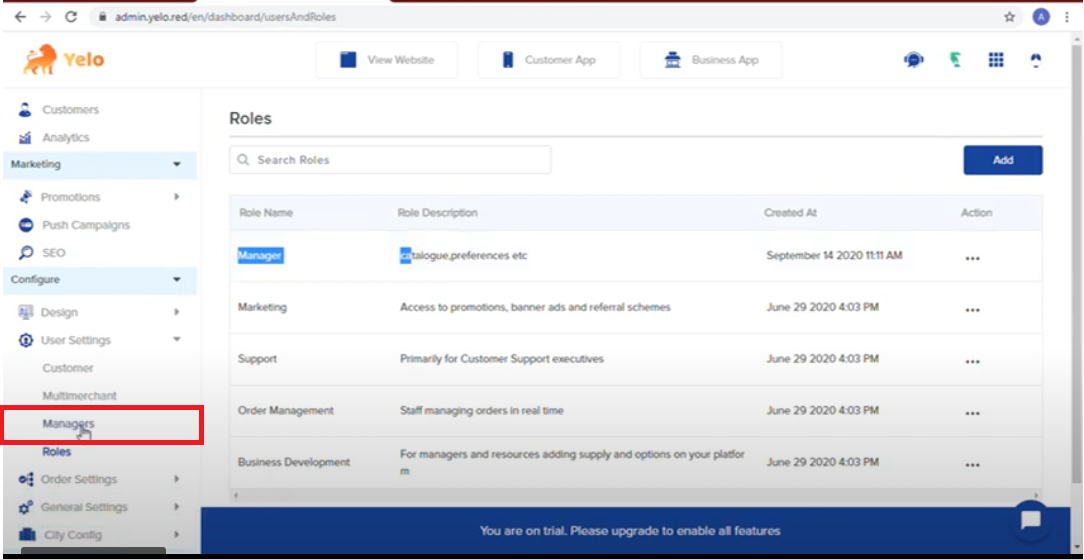
Step 10:
Click on Add, to add a new manager.
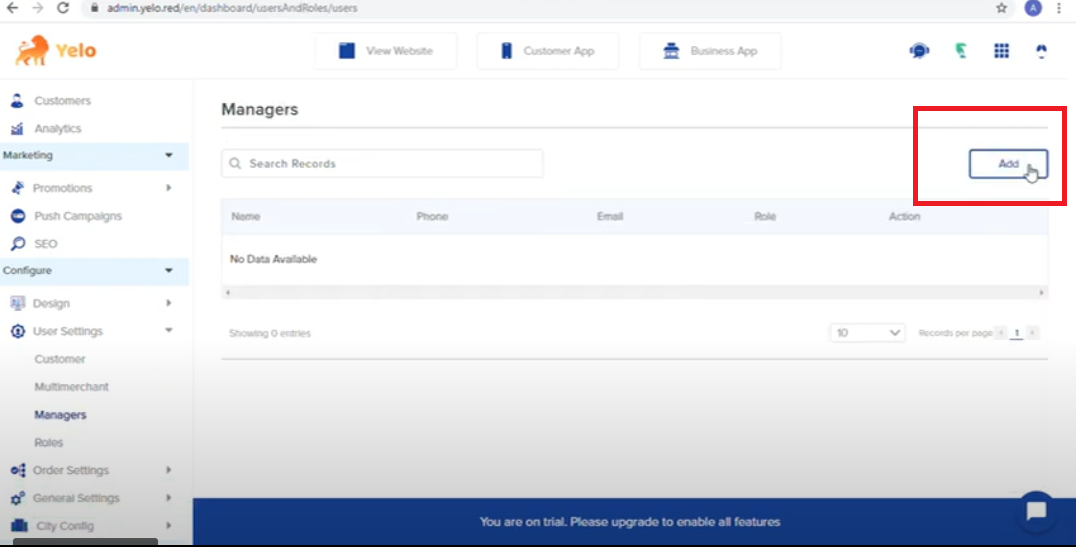
Step 11:
Fill in the required details: Name, Email, etc. of the new Manager.
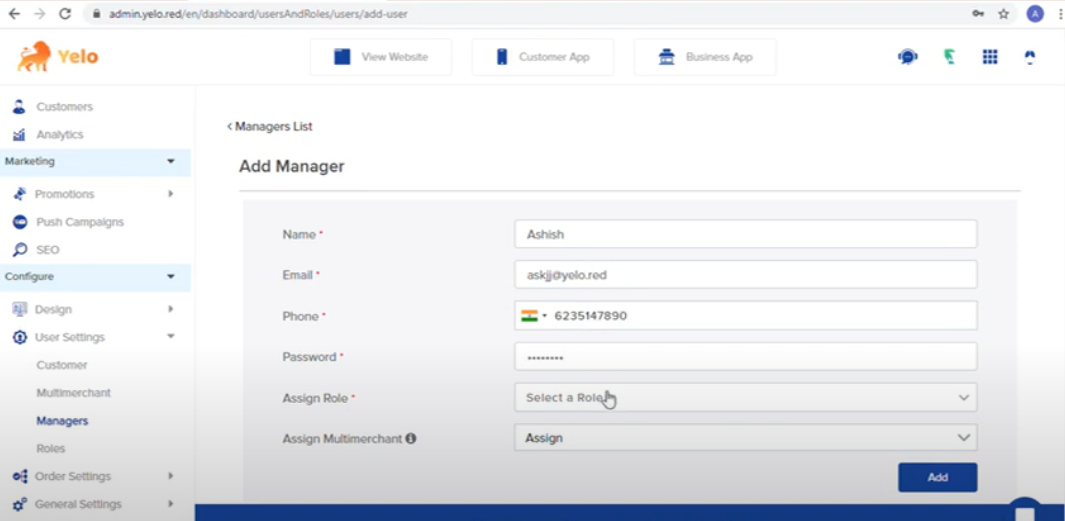
Step 12:
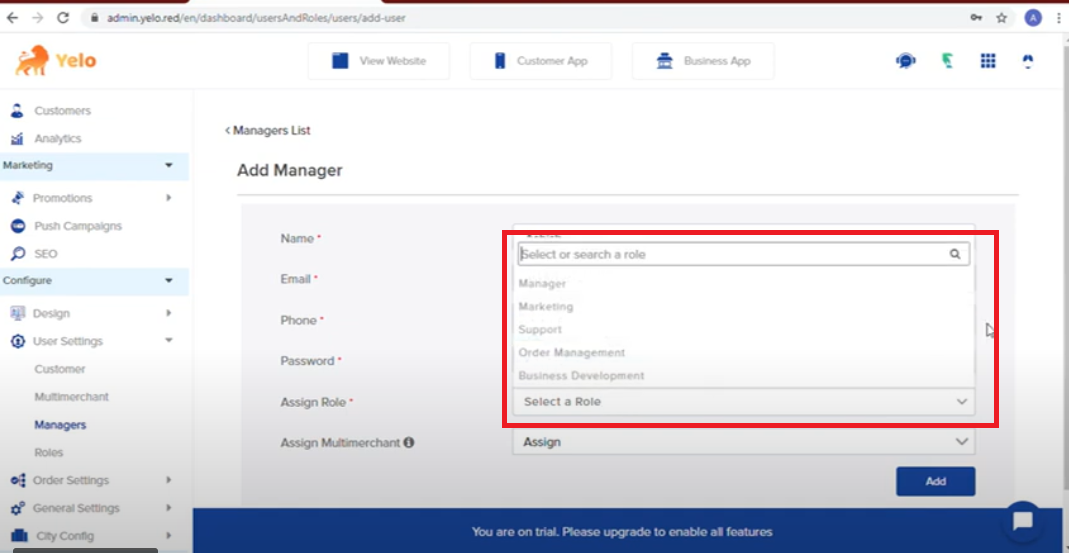
Under the Assign Role field, choose Manager.
Step 13:
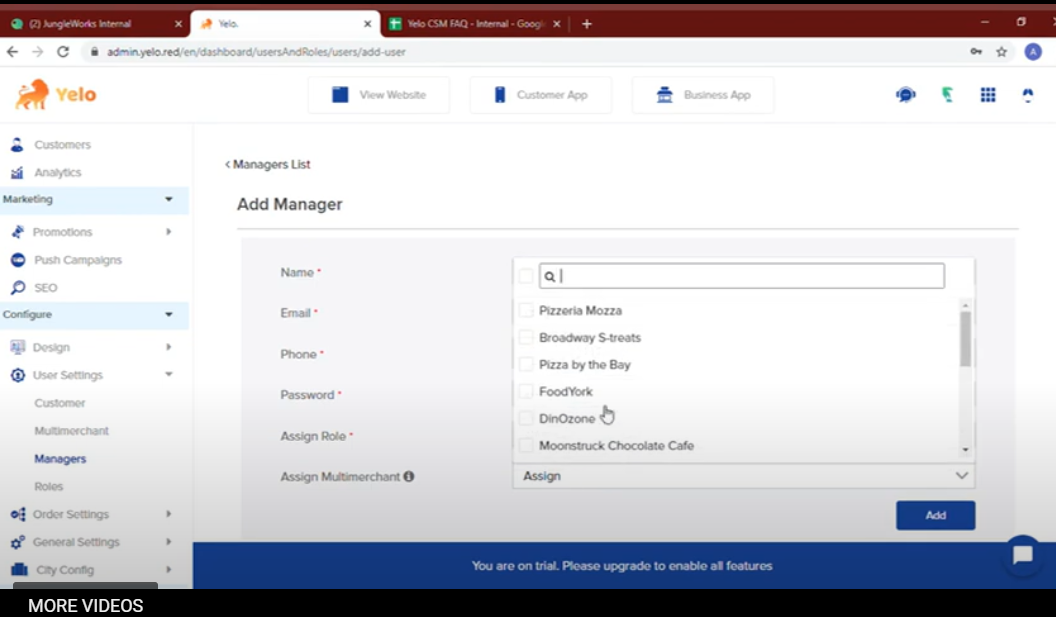
You can also assign one or more multi-merchant to the Manager. This field is optional.
Step 14:
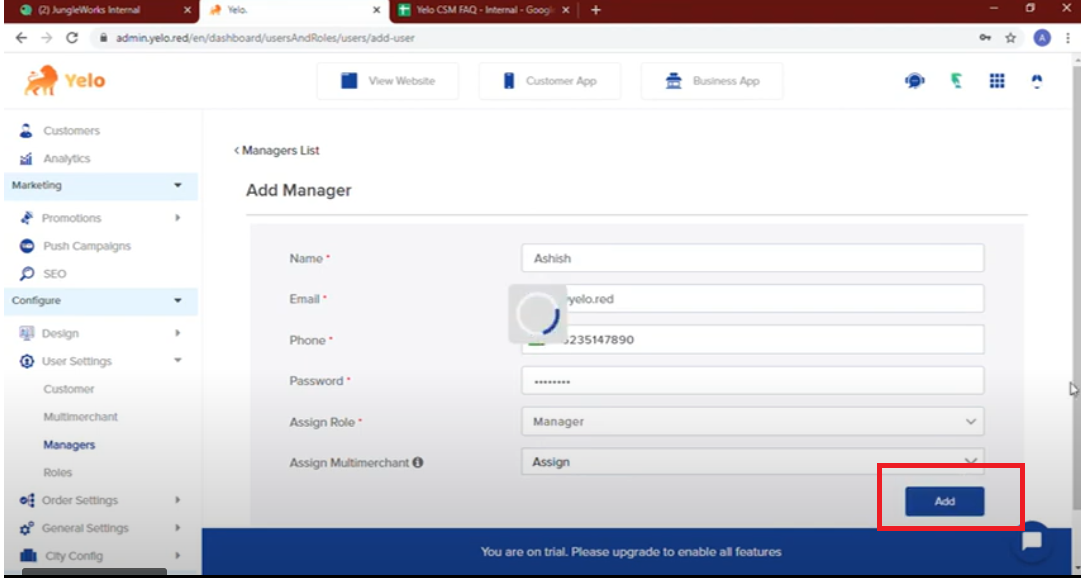
Click Add.
You will see the new manager, added to the Manager page.
Step 15:
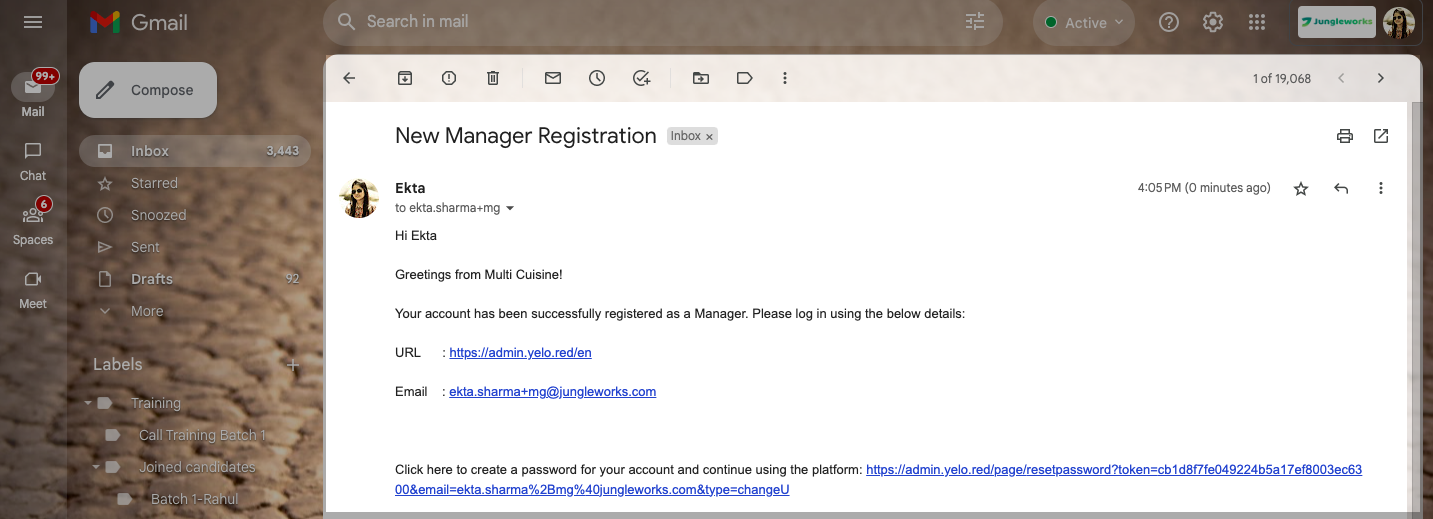
Once a manager is added they will receive an email from your platform on the manager’s registered email address with details like URL to login to the manager dashboard, email address, and a link to reset the password:
That’s it, folks! You’re done!

Leave A Comment?