
Getting Started with Yelo
Hello, and welcome to Yelo! Are you ready to kickstart or elevate your local online business with Yelo Store? This is your one-stop hub for all information you need to get going.
After signing up for a free trial, this handy checklist will guide you through your initial Yelo setup before your first product/service goes live. Once you’ve ticked off these steps, refer to our comprehensive guide for detailed information about modules and features.
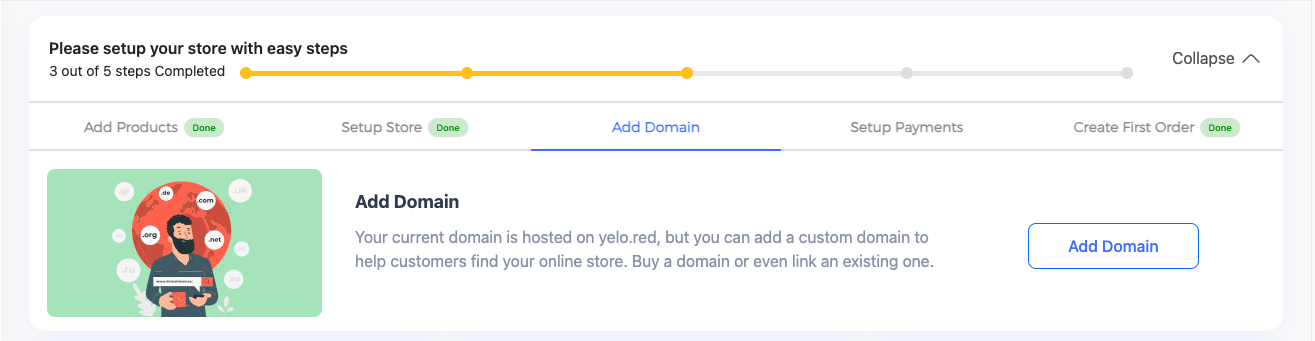
Initial set up checklist
Upon registering for a free trial, you’ll be directed to Yelo’s intuitive dashboard (as pictured below). We suggest completing this five-step checklist before making your first sale. Once done, place your first order to get a feel of your customers’ ordering experience.
-
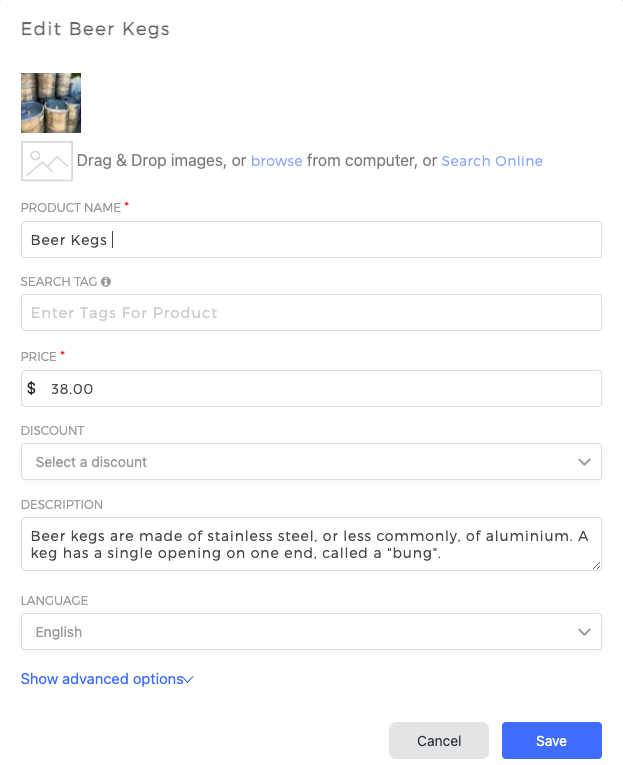
Editing Your First Product/Service
Jump-start your journey by editing your first product/service from our pre-filled options.
-
- Click on the product you wish to edit.
- Choose a fitting product name.
- Revise the product description to provide ample information about your offering.
- Update the price of your product.
- Lastly, choose an image that best represents your product. You can either upload an image from your device or search online.
You can further delve into details like category or click on ‘Save’ to update the product in your store.
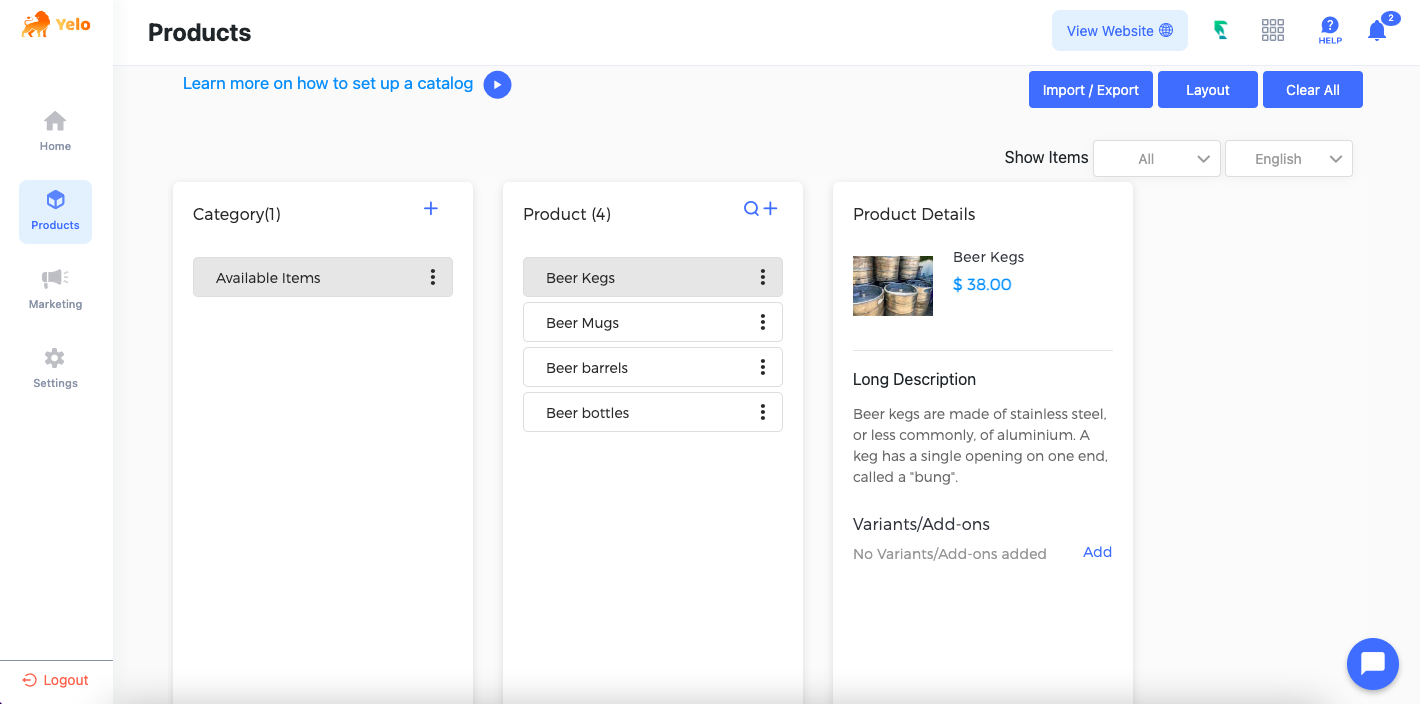
To Add a new product, click the ‘+’ icon on the top right in the product box.
-
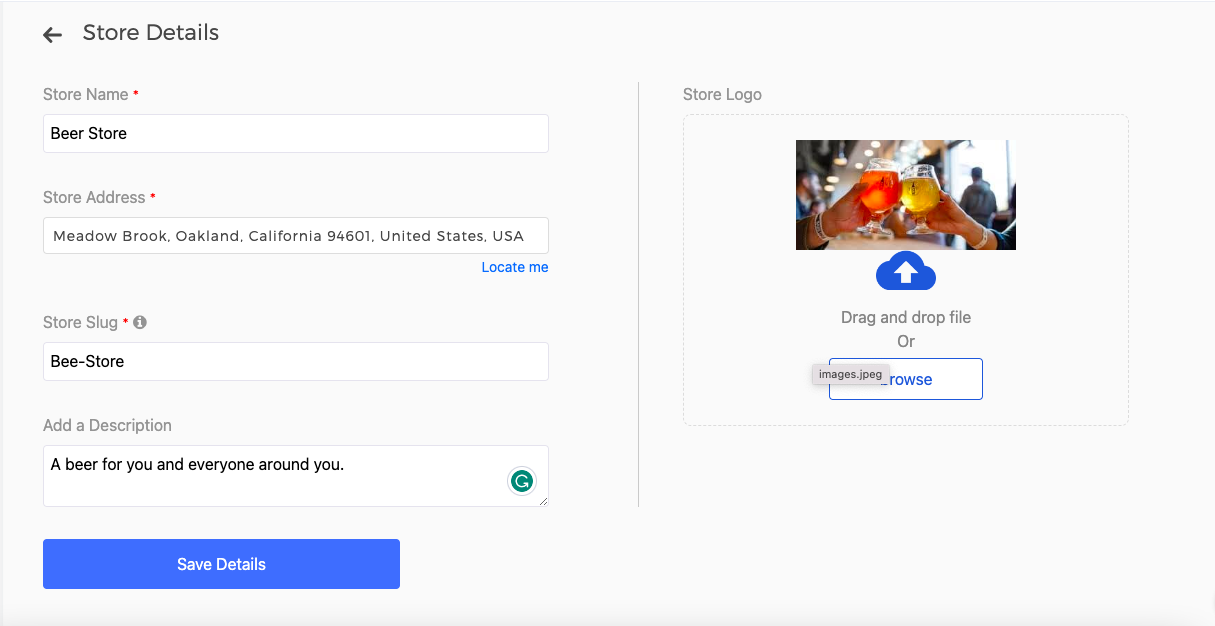
Updating Store details
Add your store name and description and set up the slug for your online store. Updating the right address and slug helps with discoverability for your platform, both online and offline.
Once done updating the store details, upload the logo for your business. The logo will be displayed at the top right corner in your website.
-
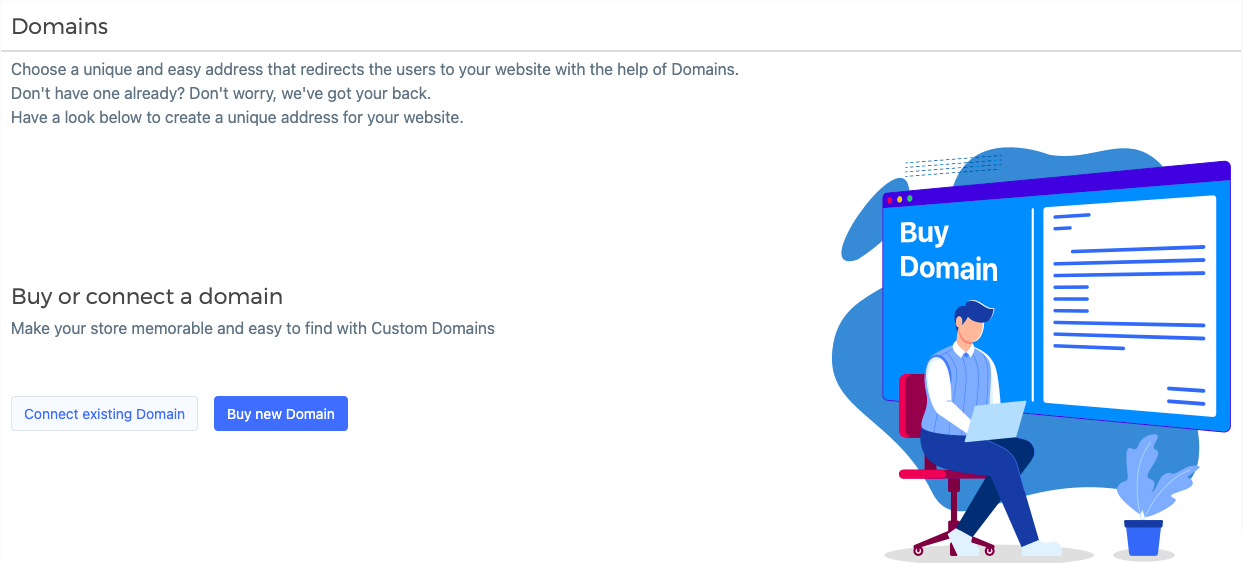
Setting up your Domain Name
Choosing the right domain name is critical for your business. Select a name that represents the product/service you sell. People should be able to perceive what you sell from the domain name. Choose one that is not too long or complex; entering a complex domain in the address bar might seem difficult for customers.
By default, your domain will have yelo.red appended at the end. Connect an existing domain or buy a new one to have your own branding.
-
- To buy a new domain, click on Buy domain.
- Enter the domain name in the space provided.
- Choose from the suggestion list based on the validity.
- Pay by adding your credit card details or other payment methods.
-
Setting up your Payments:
Now, set up the payment modes you accept for your online store. Your customers can pay you via cash, or you can even connect online payments. Easily connect your preferred payment gateway.
To activate your account, click on activate the account and fill in the details.
-
Create your first order!
Hurray! Your initial setup is complete. Now go ahead and try placing an order from our store. Get an understanding of how it looks from your customers’ shoes.
Most entrepreneurs find Yelo’s ordering experience seamless.
-
- Click on ‘Create your first order’
- Then choose a product
- Select an address
- Select payment mode
- And Voila.You’re all set.
Keep this handy guide by your side as you navigate your new Yelo Store. You’re on your way to creating a standout local business with the power of AI!
Leave A Comment?