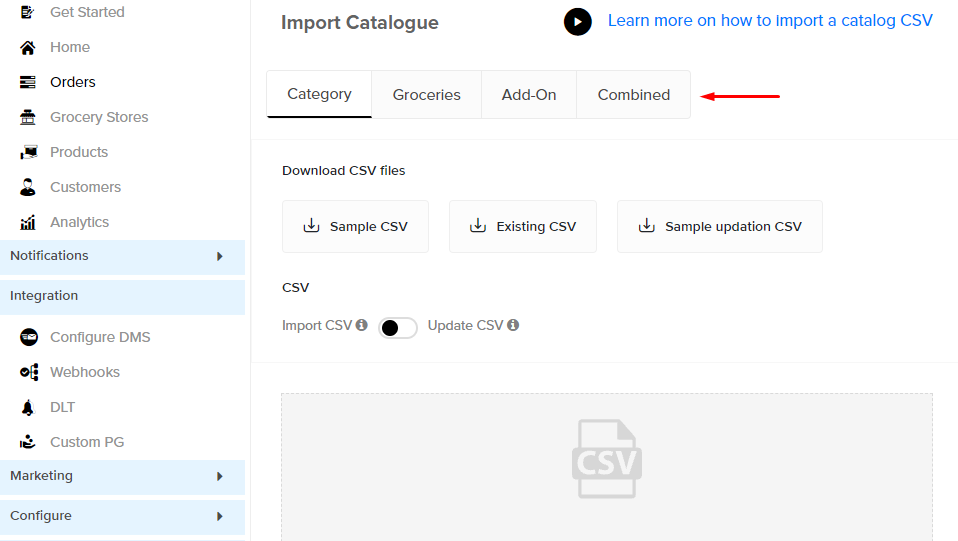
Where is the combined CSV button located?
The combined CSV button is located in the Import / Export page on the right corner of the Products page. Please note that the combined CSV button is only available for the product marketplace.
Why does CSV file show the following error: Parent ID is invalid for the Merchant?
To avoid this error, the merchant has to add a parent category ID that belongs to the same merchant.
How can I move a product from one category to another without deleting it?
Now you can easily move a product from one category to another.”
For this select the product and click on 3 dots. Choose the Change Category option.
You can also select multiple products.
Now choose the desired category and click on the extra options menu near it. You would get an option of Move product which would bring that product to a new category.
My change category feature is not working? How to use it?
You need to follow the simple steps mentioned to move the product to the new category. First, select the product and click on three dots and click on change category, then the product will be selected which is to be moved. now you have to click on the category where you have to move the product, i.e. that is open the category as you can see the products in another category. when you. select the other category only then you will have the option to move after you click on three dots of the category. where you want to move the product. we are attaching a video for your reference kindly look at the video so that you understand the feature better
How can I translate product and category names in different languages?
To translate category name, product name and description in other languages you need to enable other languages on the platform and then import combined CSV from the Products section.

Go to General >> Stores/Merchants >> Catalog >> Import >> Download Combined CSV >> Input translated names >>Import

In this CSV you would get a column related to different languages where you can enter translated inputs.
What is the maximum size for a product image?
The size of the image should be less than 2 MB.
How to import CSV catalog?
Follow these easy steps to import your catalog.
- Download the Sample CSV: You can download the sample CSV by clicking on the ‘Sample CSV” option.
- Import catalog: You can import the CSV in respective areas- category, laundry, add-ons, and add-ons options. The CSV needs to be uploaded separately for each section. Use Combined Section, if you prefer to upload category, laundry all at the same time.
- Update catalog: Click on the existing CSV in the respective section to download it. (You’ll receive an email with CSV Report) Edit the downloaded CSV as per your requirement. (You can add the updated data with the existing one in the same CSV).
- Upload CSV: You can simply import the new CSV by drag and drop your file or browse from your system.
- Check the status of CSV: After uploading CSV, you will receive a CSV Report on your email with the status of complete data which is uploaded or not. True means CSV upload is successful and False means upload is unsuccessful. if it’s false, there will be an error message which will be shown with the field containing the error.
Why doesn’t the imported catalog reflect on the website?
The most common reason for an imported catalog to not reflect on the website is an error in the file. Please check the mail which you have received after exporting and download the same. You will be able to see the error there. Fix the error and upload the file again.
Where I can found the Inventory reminder notification?
The inventory alert works automatically, all you need to do is to get to the catalog of the merchant and turn on the inventory toggle for the product. Moving further edit the alert option and set a minimum value.

The catalog does not show on the website.
The reason for this error could be catalog mapping.
After enabling the allow business category toggle, you need to assign that business category to a specific category by going into the catalog of that merchant >> Click on the 3 dots for any category and click on assign business category.
How to shift products from one store to another store?
If you want to Shift products from one store to another you can download the CSV file of products and update it to another store for this you can use the option import\export which is in admin dashboard >> products >> import\export.
How to update images of all my products in a store in one go?
You can use the product CSV through the import/export option and add the image URL in CSV and then upload it.
You can use any platform that creates public URLs of images that can be accessed by anyone globally. One such platform is https://imgbb.com/ – where you can upload images in bulk and create their public URLs.
I am unable to export order details with product details. It’s showing an error Please apply a date range.
In order to export order details with product details. You need to apply a date range. Please click on Filter Icon then you have to select the details like Order Time, Scheduled Time, Delivery Mode and Etc. Now apply the change which you made. And Now click on the Export icon. Enter the email where you want your order detail CSV file to be exported. You can also choose the desired order templates. You will receive the order details with a template in your email.
https://drive.google.com/file/d/1O_-5wmH51XApEcDSVr76Fzwuo7dz27DW/view?usp=sharing.
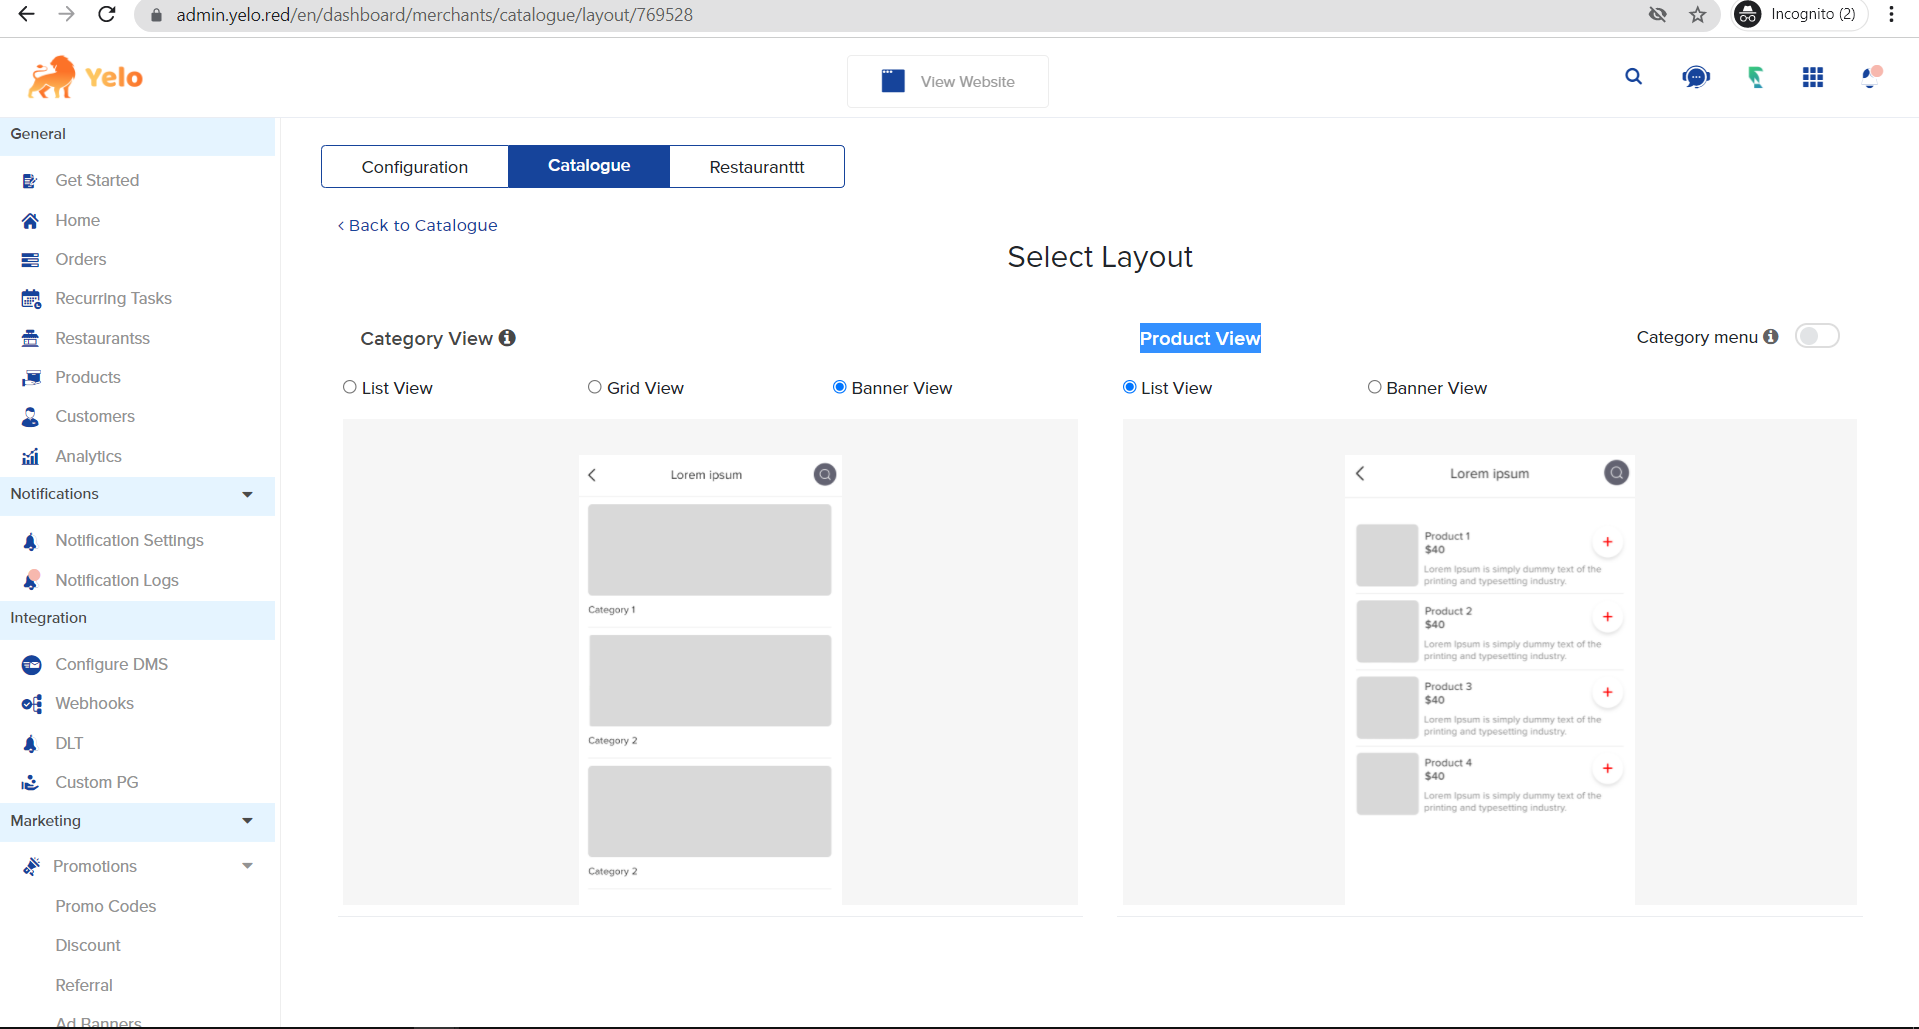
How do I change the view of Products and Categories in my Merchant detail page?
In your Admin dashboard Go to General >> Merchants >> Under Merchant’s name select the merchant for which you want to make changes. >> Catalogue >> Layout Under Select Layout you can select the Category View and Product View. You can test and make changes accordingly.

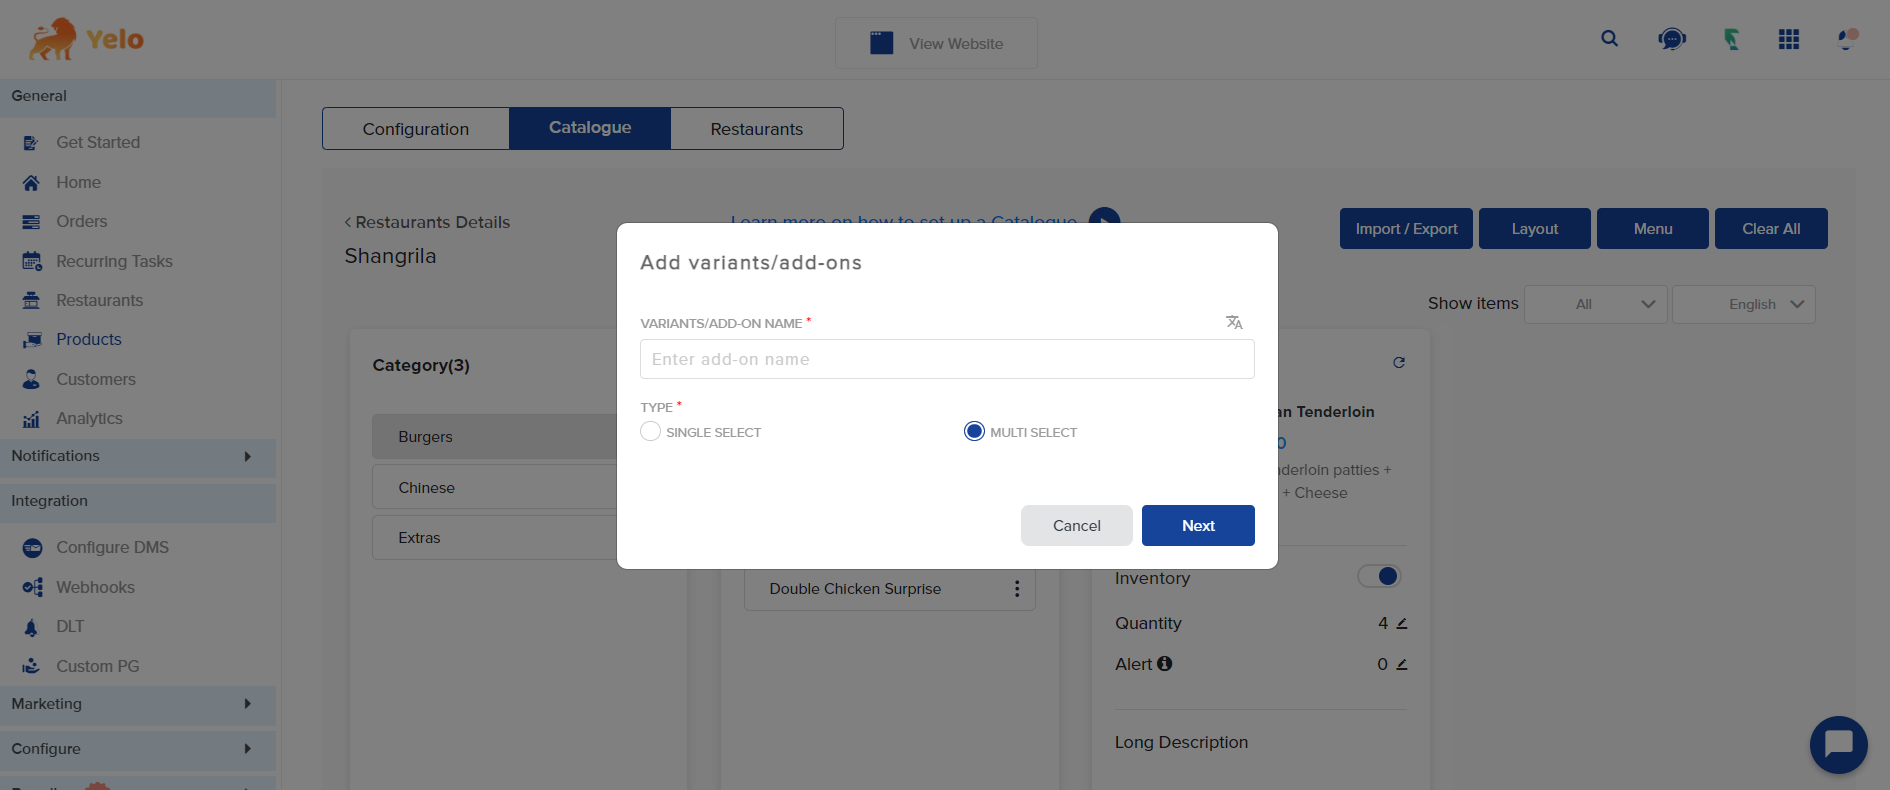
Can we set a fixed number of add-ons that a customer ought to select while choosing the product?
Yes. You can give the option to the customer to select multiple add-ons from a list.
To enable this go to Stores >> Select Merchant >> Catalog >> Product >> Variant/Add-ons >> Choose Multi Select
Here you have to check the box saying “CUSTOMER CAN SELECT EXACTLY – Options” and add value to it. Now customers can only select a configured number of add ons from the list.

How Do I Enable the logo by which vegetarian food should be identified by a green symbol and non-vegetarian food with a brown symbol?
Go to General >> Merchants >> Select the merchant for which you want to make changes >> Catalogue >> Category >> Click on edit Products and under VEG/NON-VEG you can select it accordingly.


Leave A Comment?