
Introducing BrewSage Theme
We have added a new theme to our themes library named BrewSage. Our improvised product page and color options will give you a better conversion rate and a beautiful ordering experience for your customers. This theme is only available with Store and Brand business types on Yelo. In this article you will learn about:
Editing the theme code-Videos
- This video shows how you can change the hardcoded text and images on the homepage: https://drive.google.com/file/d/15ycRFzDtniUdBKZnNx2ZR4u32mTIOhzy/view
- This video shows how this theme work: https://drive.google.com/file/d/1fVj3o4jzL73sc4AxMBB9rvtwJLQGPUto/view
Elements of the theme


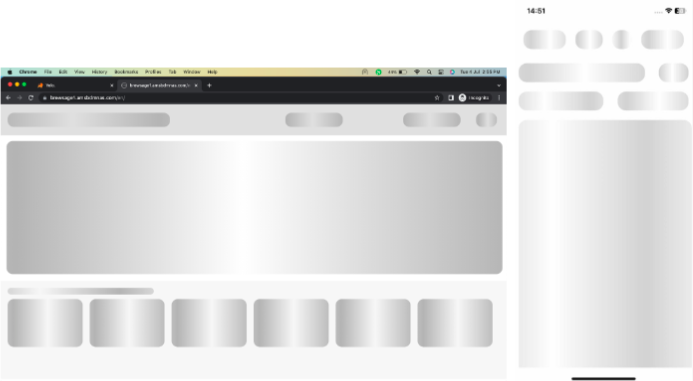
- Shimmer: Upon activating this theme, on the homepage, a captivating shimmer will gracefully appear for a duration of three seconds.
Please note the following instructions for the Market Place popup:
If the admin chooses to enable the marketplace popup, it will be displayed before the age popup. To activate the marketplace popup, the admin needs to navigate to General Settings> Marketplace and toggle the “Marketplace Welcome Pop-Up” option to the “on” position.
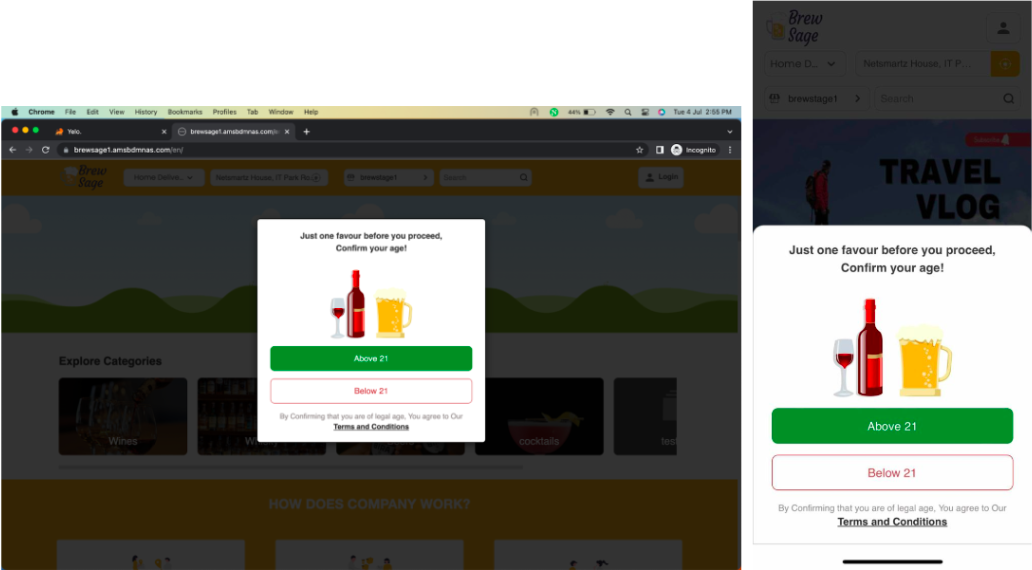
- Age Confirmation Popup:
This is a hardcoded element. Within this section, customers will encounter an age confirmation popup. However, it is important to note that this element can be removed from the theme code if desired.
In the age confirmation popup, customers will be presented with two options: “Below 21” and “Above 21.” Should a customer select the “Below 21” button, they will be redirected to the specified link as configured within the theme section for this particular button. Conversely, if a customer chooses the “Above 21” button, they will proceed to use the website as usual without any restrictions. Kindly refer to the screenshot below:
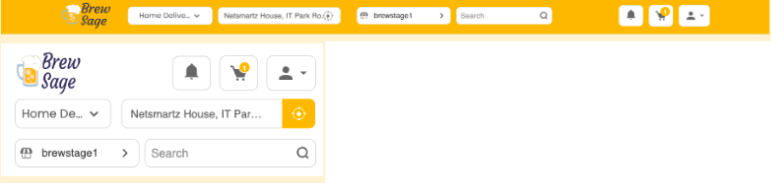
- Elements of Header:
-
- Logo: Placed at the top of the web app.
- Login Functionality: Customers can log in to their account if it’s already registered.
- Signup Functionality: Customers need to sign up if they don’t have an account.
- ForgetPassword Functionality: Allows customers to recover their account password if forgotten.
- Menu Dropdown: After login, the header features a dropdown menu with various options such as Profile, Order History, Subscription Plans, Subscriptions, Refer & Earn, Loyalty, Customer Rights, Wallet, Gift Card, Rewards Plan, Content Page, and Logout functionality.
- Delivery Mode Selection: In the header, customers can choose between Home Delivery and Take Away options for their orders.
- Change Store Option: If multiple stores are available in one location (Brand Plan), the Change Store option appears (requires admin dashboard enabling).
- Change Address Option: Customers can change their address to view nearby merchants at any time.
- Locate Me Button: Allows customers to pick their current location by clicking on the button.
- Product Search: The header includes a search option to find products, and clicking on a product takes them to the Product Page.
- Notification Section: Displays all notifications for the user, with a button to clear all notifications.
- Language Selector: If the web app supports multiple languages, customers can choose their preferred language.
- Cart Button: Customers can view their cart and the items they have added for purchase.
- Footer:
- The footer contains several sections that can be customized through the dashboard according to your preferences. The essential elements include Contact Us, About Company, and Help and Legal.
- Within the company section, you can find links to explore information about the company, the team, frequently asked questions (FAQs), and the blog.
- In the Help section, you will find links to access Help & Support, Terms and Conditions, Privacy Policy, and the FAQ.

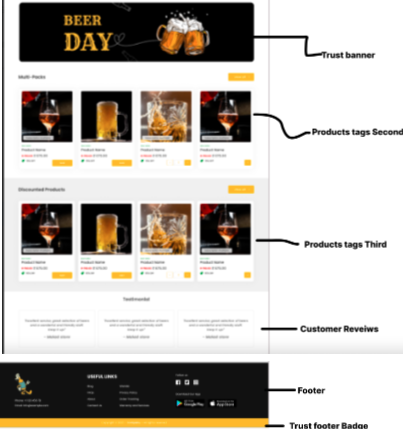
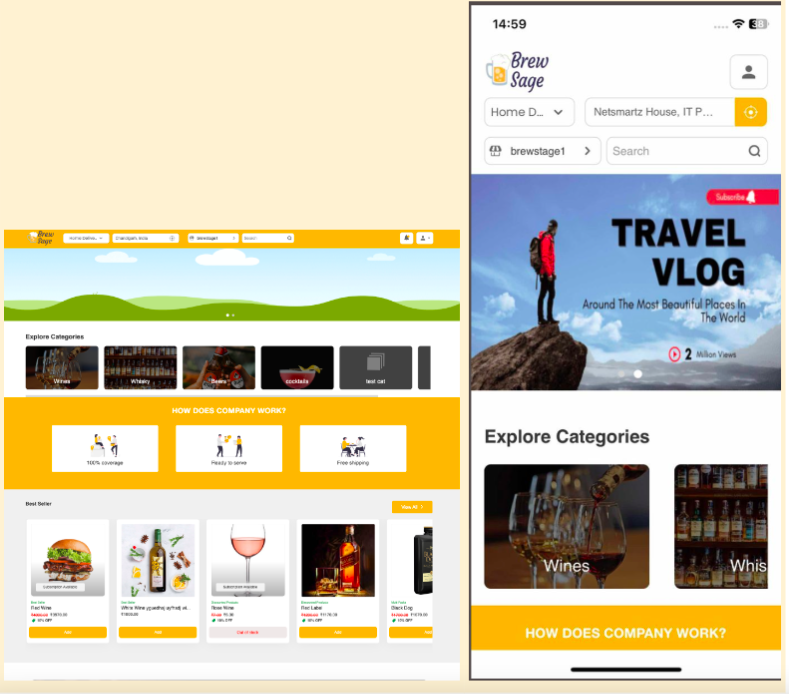
- Elements of Home Page-The Home Page comprises several sections to enhance customer experience and showcase relevant content:
- Header Module: Positioned at the top, this module contains essential navigation and branding elements.
- Marketing Banner Module: Following the Header, this section showcases marketing banners to attract customer attention.
- D2C or Single Merchant Flow: In this section, customers can view the Categories of the Merchant Catalog for a seamless shopping experience.
- How Does Website Works: A hardcoded section that explains the website’s functionality. Admin has the flexibility to edit this content through the theme section.
- Theme Customization: Admins can use the theme section to add Categories, Subcategories, and products, with support for one level of sub-sub categories.
- Middle Banner: The middle banner, uploaded from the layout section, serves as a key focal point with the home background image.
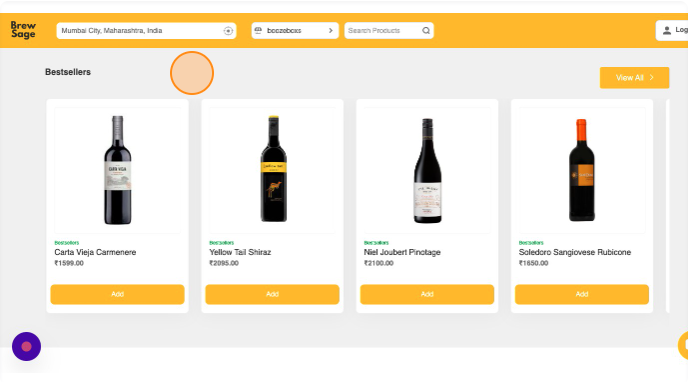
- Products Tags: The admin can create up to 3 tags visible to customers and assign products to these tags. The home page displays 7 products per tag, and customers can view all products by clicking “View All.”
- Testimonials: A hardcoded section for displaying customer testimonials. Admins can edit the testimonials through the theme section if required.
- Footer Section: The bottom-most section of the Home Page, featuring various modules such as Contact Us, About Company, Help and Legal, and other relevant links.
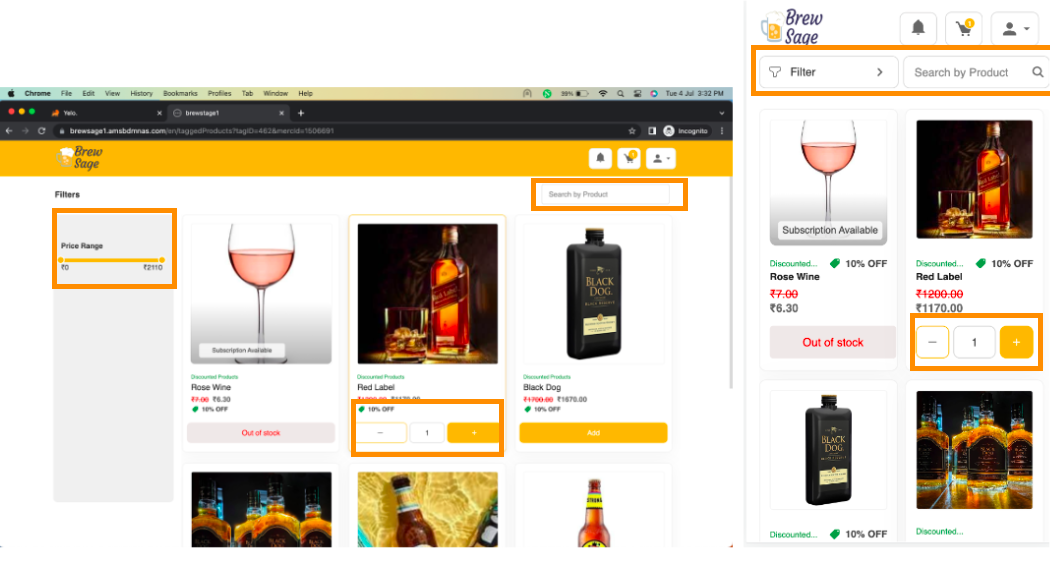
- Product Tags Page
- Upon clicking the “View All” button in the homepage section, customers will be directed to the Product Tags page. Here, they will find various products that have been tagged accordingly.
- To enhance the browsing experience, customers will have the option to filter products based on price range.
- Furthermore, customers can easily add desired products to their shopping cart directly from the Product Tags page.
- In order to find specific products, customers can make use of the search functionality available on the Product Tags page. By clicking on a particular product, customers will be taken to the product details page, where they can access comprehensive information about the chosen item.
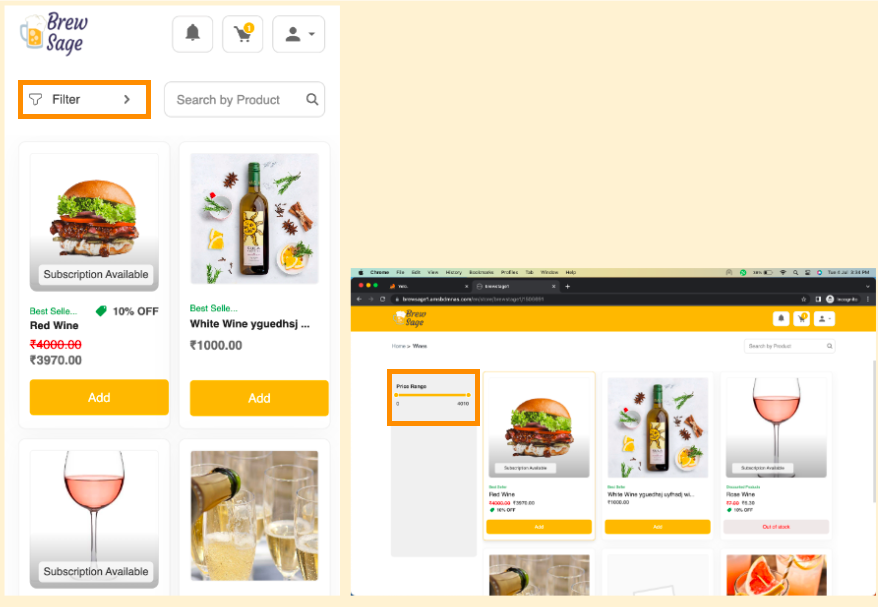
- Product listing page: On the product listing page, customers will have the option to filter products based on price range, and if there is a subcategory added the customers can also filter products by the categories option.
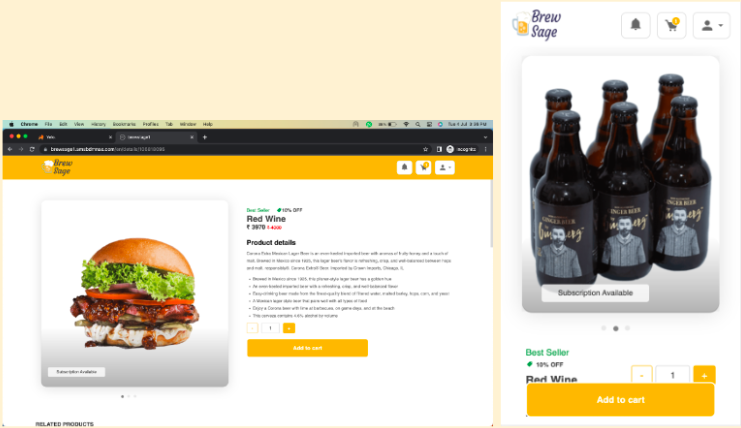
This Color: Represents Unique items to this theme - Product Details Page:
Upon clicking on a specific product, customers will be directed to the Product Details Page, where they can access comprehensive information about the selected item.
If a product contains multiple images, customers will be able to view them in a carousel format, allowing them to easily browse through the different visuals. Conversely, if the product only has a single image, customers will see that image displayed on the page.
On the right-hand side of the page, customers will find various details about the product, including the price, description, long description, and a quantity handler that enables them to adjust the desired quantity of the product.
At the bottom of the page, customers will find an “Add to Cart” button, allowing them to conveniently add the product to their shopping cart.
In the event that no image is available for a particular product and the admin has not added any image, a default image will be displayed in its place, ensuring a visually consistent experience for customers.
- Cart Page:
- By clicking on the Cart Button located in the header, customers will be able to access their cart page, which displays all the products they have added.
- Customers will have a clear view of each product, including its name, price, and quantity. To manage the quantity, up down arrows are provided, enabling customers to easily adjust the desired quantity. If customers wish to remove an entire product from the cart, they can do so by clicking on the delete button associated with that specific product.
- In the cart section, customers can also view the subtotal amount, which represents the total cost of the products before any additional charges, such as taxes or shipping fees, are applied. Additionally, the total amount, inclusive of all costs, will be displayed.
- Towards the bottom of the page, customers will find a Checkout button that allows them to proceed to the checkout page to complete the purchase process.
- Should customers decide to remove all items from the cart, a clear button is available, allowing them to easily empty the cart and start anew.
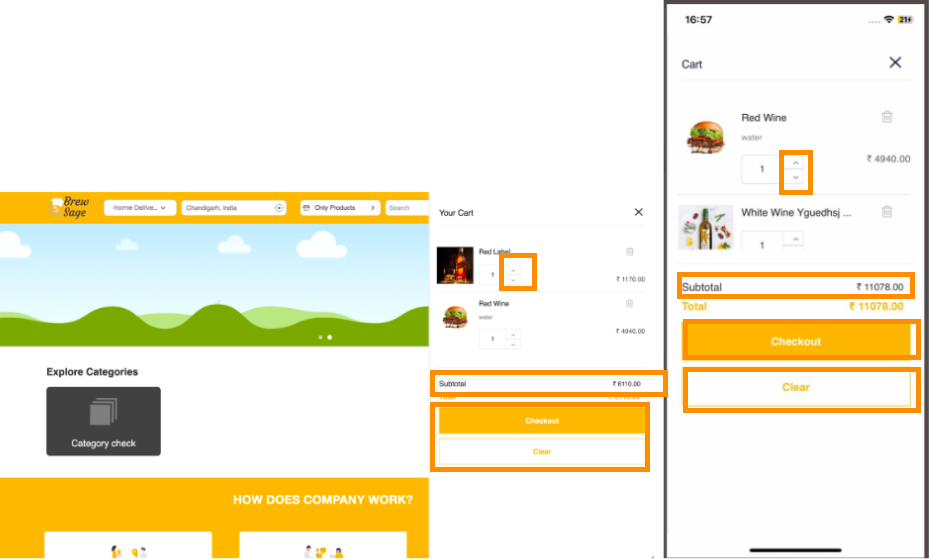
Cart Page: This Color represents unique items to this theme
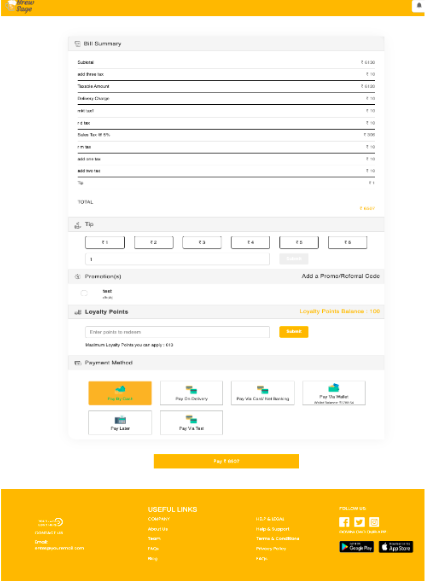
- Payment Page:
- Bill Summary: At the top of the page, customers can view a comprehensive breakdown of the bill, providing details of all the items and charges.
- Promo/Referral Section: If customers have any applicable promos or referrals, they can enter the promo code provided by the admin to avail of discounts or special offers on the bill.
- Tip Section: In this section, customers have the option to show appreciation to the agent by adding a tip if they desire to do so.
- Loyalty Points (if enabled): If the admin has enabled loyalty points, customers can utilize their accumulated points according to the established criteria to avail discounts or rewards.
- Payment Options: Customers can select their preferred payment gateway from the available options to make the payment. Multiple secure and convenient payment methods are provided for ease of use.
- Pay Button: After reviewing the bill summary and selecting the desired payment gateway, customers can proceed by clicking the “Pay” button. This action initiates the payment process.
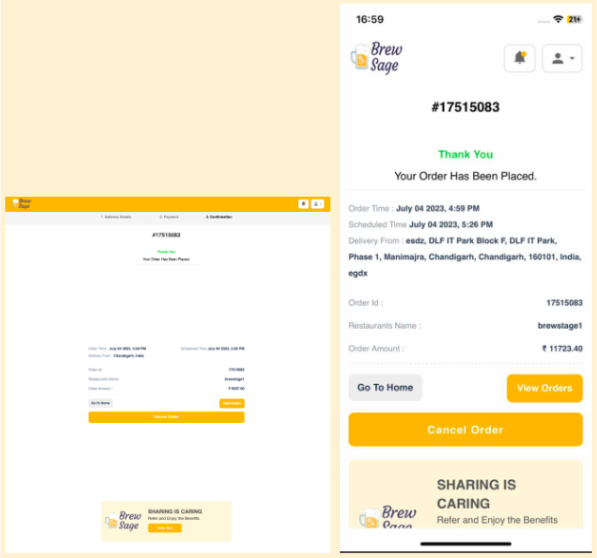
- Order Confirmation: Upon successful payment, the customer’s order will be confirmed, and they will receive a notification. Subsequently, they will be redirected to the Thank You page, acknowledging their successful transaction.
- Order Confirmation: Upon successful payment, the customer’s order will be confirmed, and they will receive a notification. Subsequently, they will be redirected to the Thank You page, acknowledging their successful transaction.
- Thank You Page:
On the Thank You page, customers will find important details related to their order:
-
- Order ID: Customers will see a unique identifier for their order.
- Order Amount: The total amount paid for the order will be displayed.
- Order Time: The date and time the order was placed will be shown.
- Schedule Time: If applicable, the scheduled time for delivery or pickup will be mentioned.
- Merchant Name: The name of the merchant or store from which the order was placed will be visible.
At the bottom of the page, customers will find two buttons:
-
- View Order: By clicking on this button, customers will be redirected to the order history page, where they can view the details of their current and past orders.
- Go To Home: Clicking on this button will redirect customers to the list page of the merchant listings, allowing them to explore and make new purchases.
These options provide customers with convenient access to their order history as well as the ability to continue browsing and shopping from the merchant’s offerings.
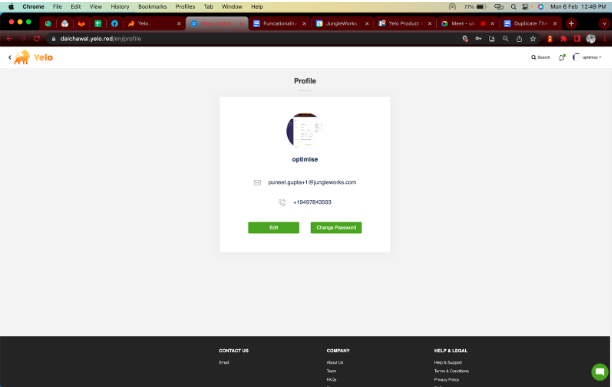
- Customer Profile Page:
- When you click on the “Profile” option in the header, you will be redirected to the Profile Page, where customers can access and manage their personal information. Customers can view their profile photo, email address, and phone number, ensuring easy access to their account details.
- Edit Button: Located at the bottom of the profile section, this button allows customers to make changes to their profile information. They can update their profile photo, phone number, and any additional details provided during the signup process.
- Change Password Button: Also located at the bottom of the page, this button enables customers to modify their account password. They can enter a new password and confirm it to complete the password change process.
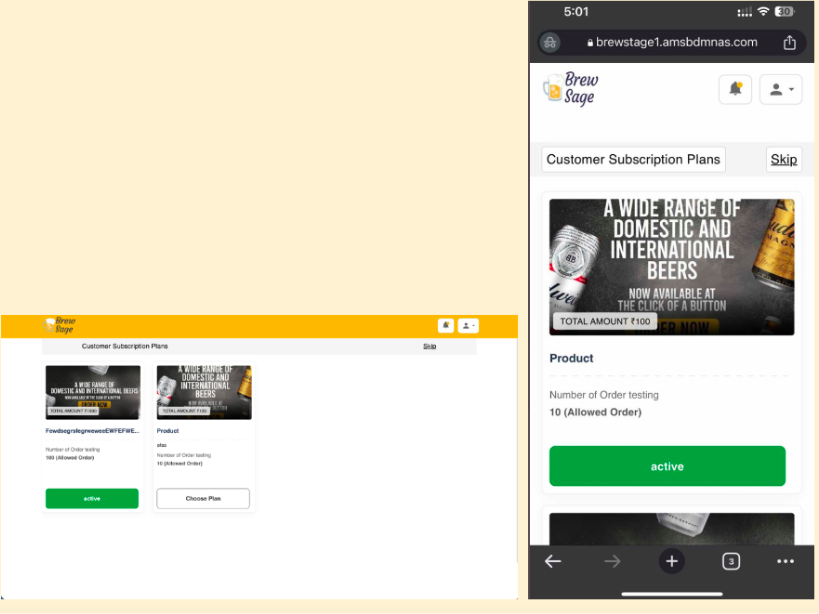
- UI change in customer subscription screen to match theme:
In the customer subscription screen, the following updates have been made:
-
- Plans Display: Customers will be able to view the available subscription plans for purchase.
- Mandatory Plan Selection: If selecting a plan is mandatory, customers will be required to choose and purchase one plan that suits their needs.
- Optional Plan Selection: If selecting a plan is not mandatory, customers will have the option to skip selecting a plan by clicking on the “Skip” button.
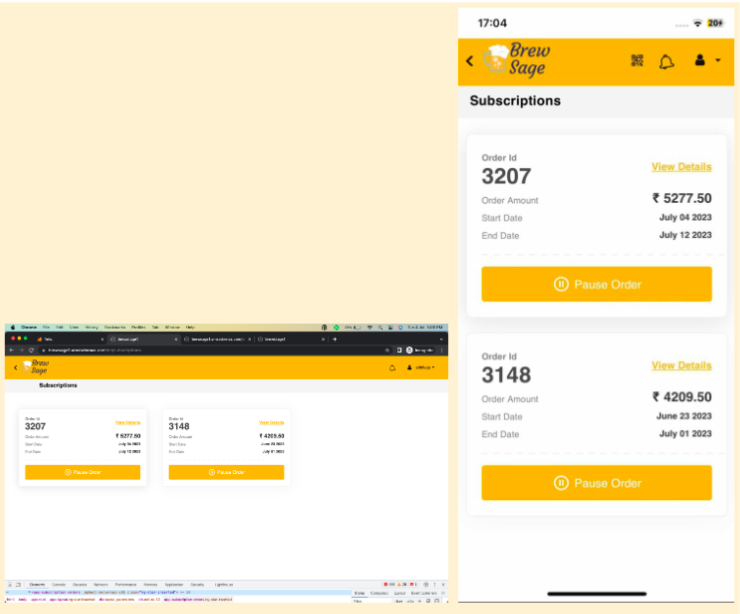
- Recurring Order Screen:
In this section, each recurring order is displayed within a box, containing the Recurring ID and Details of the specific order.
Two buttons are provided for each recurring order:
-
- Pause and Resume Button: By clicking on the Pause button, customers can temporarily pause the selected recurring order. Once paused, the button transforms into a Resume button.
- View Details Button: Clicking on the View Details button allows customers to access comprehensive information about the specific recurring order, including details such as the subscription plan, billing cycle, and any associated preferences.
These options empower customers to manage their recurring orders efficiently, giving them the ability to pause or resume subscriptions as desired, and providing easy access to detailed information about their ongoing subscriptions.
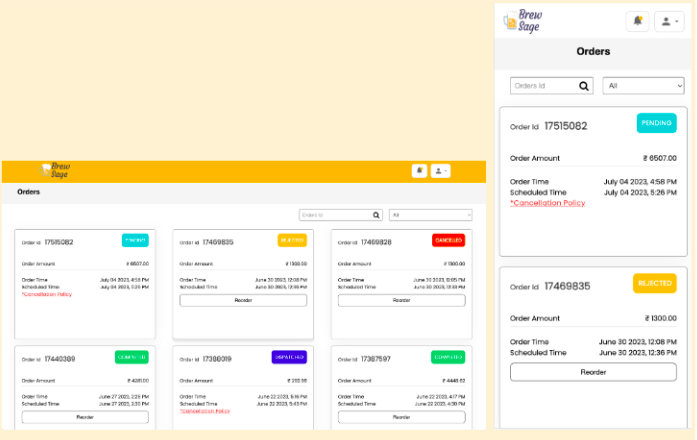
- Booking History Page:
On this page, customers can conveniently access all their orders, each displaying essential details such as restaurant name, order ID, order amount, order time, scheduled time, and order status. When customers click on a specific order, a detailed order popup appears. In this popup, customers can review the bill summary, restaurant name, order ID, amount, order time, schedule time, and order status. Additionally, customers have the following options:
-
- Ratings: Customers can provide ratings to the restaurants they have ordered from, allowing them to share their feedback and experiences.
- Cancel Order: If the option is available and permitted by the admin, customers can cancel an order by clicking on the designated “Cancel Order” button within the order details popup.
- Edit Order: If the admin allows customers to edit their orders, customers can click on the “View Order Details” option and make the necessary modifications.
- Search and Filter: Customers can easily find specific orders by searching for the order ID or using available filter options to sort orders based on various criteria.
- Reorder: If permitted by the admin, customers can conveniently reorder a previous order by clicking on the “Reorder” button within the order details popup.
- Rate Order: Customers have the option to rate their orders, providing valuable feedback on their overall experience with the option to improve services.
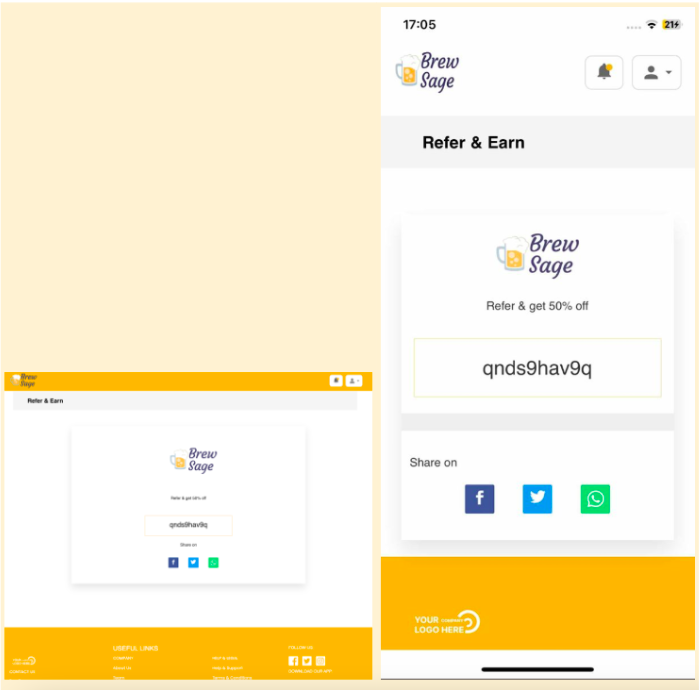
- UI change in Refer and Earn Page to match the theme:
In the Refer and Earn page, aligned with the theme, we have made the following updates:Upon accessing the Refer and Earn tab, customers will be provided with the option to share a unique referral code with their friends and family members. By inviting others using this referral code, customers will earn a discount on their next order.
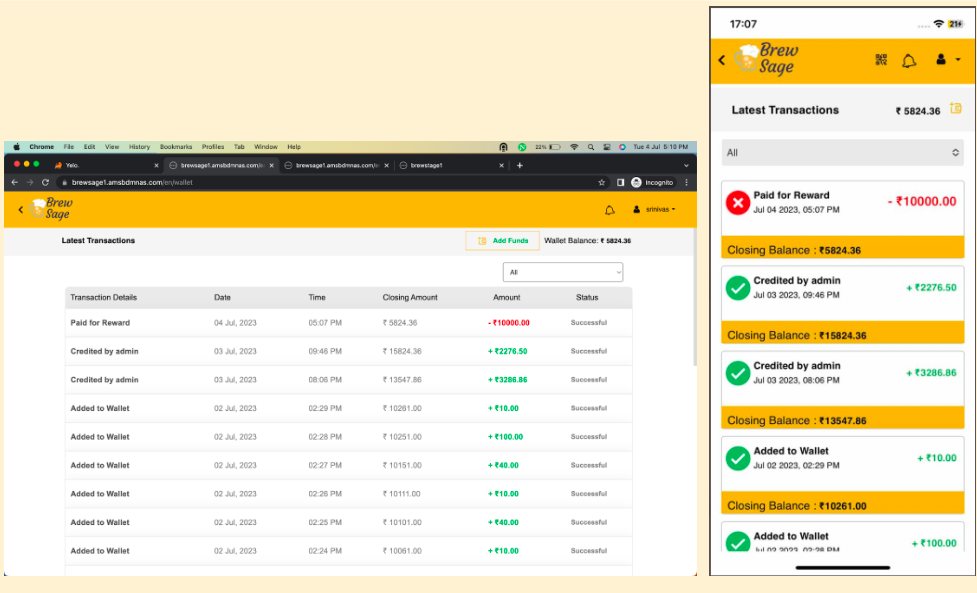
- Wallet Page:
If the admin has enabled the wallet feature, customers will have the ability to add funds to their wallets using different methods.
- Customer-initiated addition: Customers can add money to the wallet by making a payment through the provided payment gateway. This allows them to conveniently deposit funds into their wallet for future use.
- Admin-initiated addition: Additionally, the admin also has the authority to add funds to a customer’s wallet. This can be done manually, providing flexibility for the admin to assist customers or implement promotional incentives.
To enhance the user experience, a filter option is available for customers who wish to filter their orders based on specific criteria.
To add funds to their wallet, customers can navigate to the web version and click on the “Add Funds” option. On the mobile version, they can simply click on the wallet logo, which will lead them to the relevant section for adding funds to their wallet.
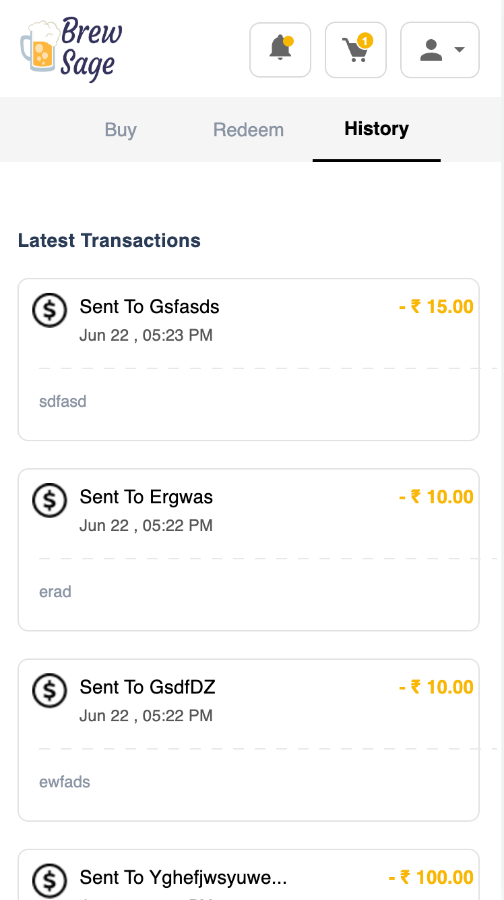
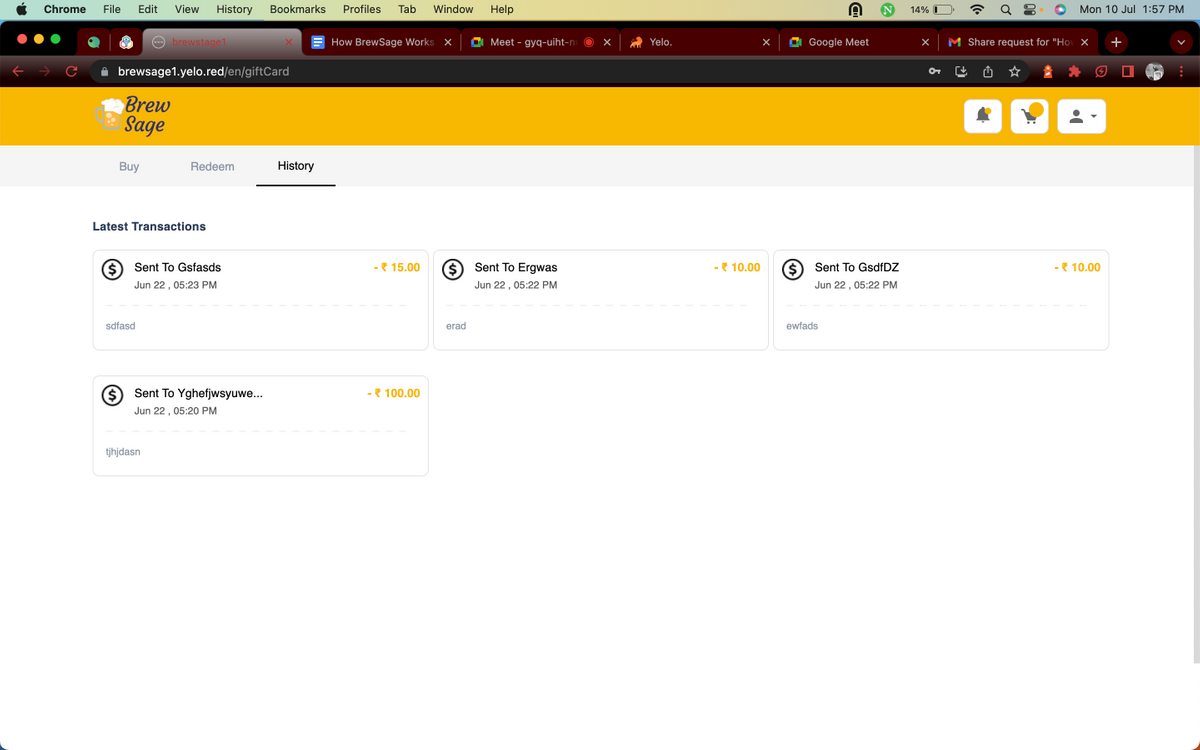
- Change in Gift Card UI
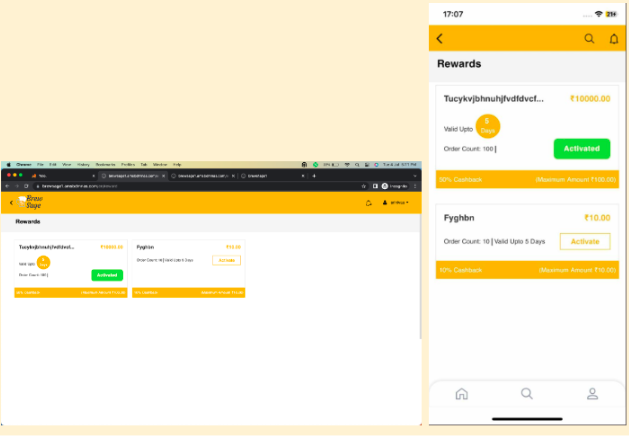
- UI change in the Rewards Plans Page to match the theme:
Dos and Donts
Dos
Here are some things that we suggest to optimize the look and experience of the theme on the web and mobile applications.
-
-
-
-
- Ad banner is mandatory for this theme otherwise category will not be visible as both are the same components for the web application.
- In the catalog:
- We suggest a minimum of 5 categories must be added and it is mandatory to have at least one category in the catalog.
- At least 3 product tags must be added.
- How to add product tags?
-
-
-
You can add product tags from the admin panel. The steps to Add product tags are as follows:
-
-
-
-
-
-
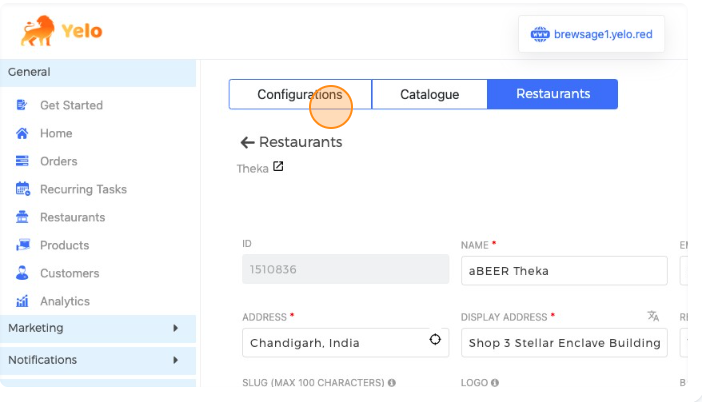
- Go to “Configurations” under a merchant.
-
-
-
-
-
-
-
-
-
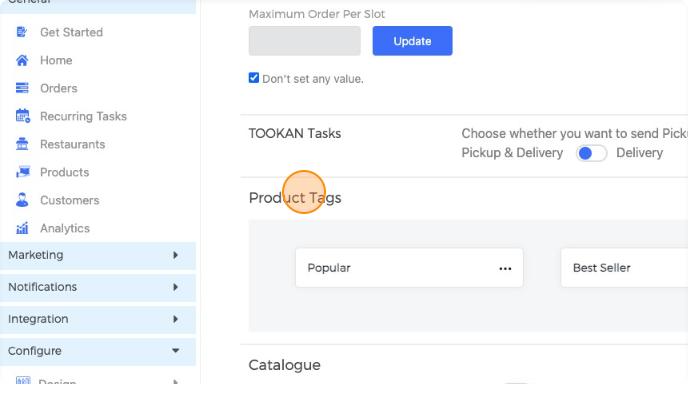
- Scroll Down to the Section “Product Tags“
-
-
-
-
-
-
-
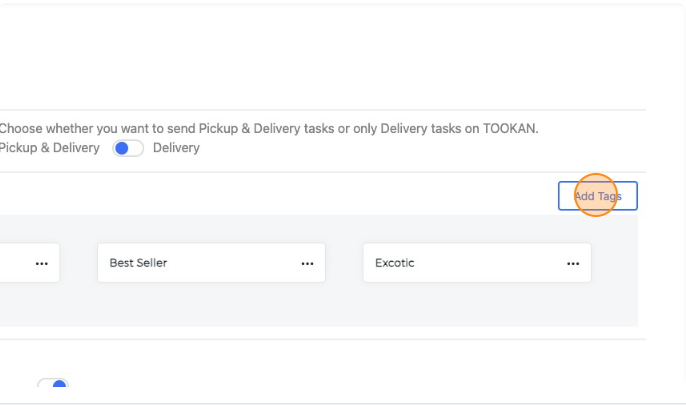
- Click on “Add Tags” to add a new Tag, a maximum of 3 Tags are supported for BrewSage Theme.
-
-
-
-
-
-
-
-
-
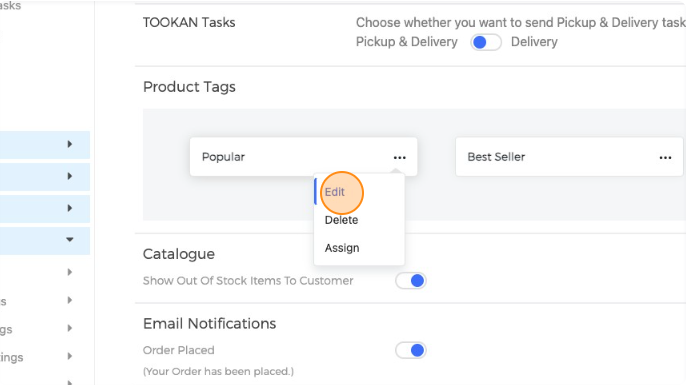
- One can even “Edit” the name of an existing Tag.
-
-
-
-
-
-
-
-
-
-
-
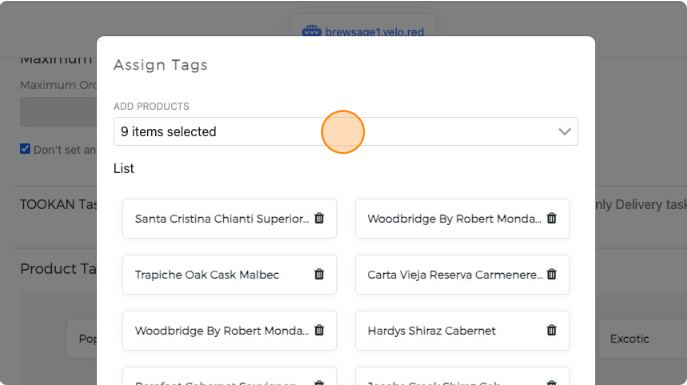
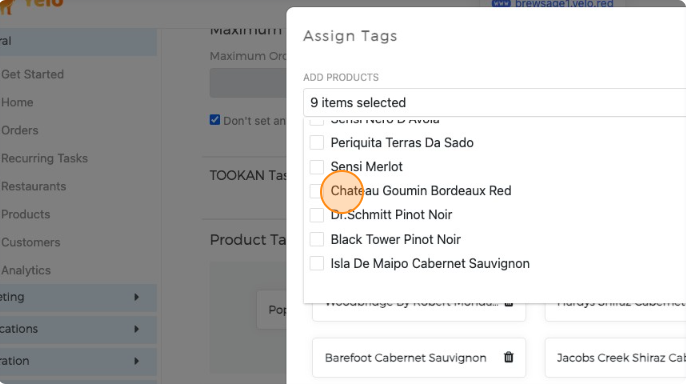
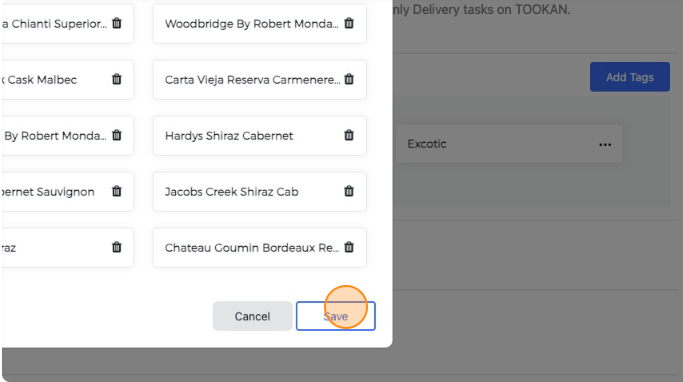
- Once a Tag is created, You have to “Assign” Products to that Tag so that the Products are now visible on the website HomePage
-
-
-
-
-

-
-
-
-
-
-
- You can now see the selected products will be visible under the Tag on the Home Page.
-
-
-
-
-
-
-
-
-
- We suggest adding subcategories in your categories and a minimum of 8 subcategories for better UI experience.
- Only Category and Sub Categories can exist under it, No Subsequent Sub Sub Category created under Sub Category will be visible on the website.For example:Suggested catalog structure—–> Veggies and Fruits (CATEGORY) > Fruits (SUBCATEGORY) > Apple(PRODUCT)
-
-
-
Not suggested catalog structure—–> Veggies and Fruits (CATEGORY > Fruits (SUBCATEGORY)> Seasonal (PRODUCT) >Apple
-
-
-
-
- Adding product descriptions is mandatory while adding products so that products look good on the product page.
- In each product tag which are visible on the Homepage, there should be 5 minimum products.
- By default landing page of the store/marketplace should always be set as the Home Page. In case the admin sets the default landing page as a merchant page then this theme won’t work and show an error.
- For Image size, you must use the size mentioned in the documentation: https://docs.google.com/document/d/12vTSaCMJOFPwMNPPTrqjzXK0zDr4gbhFhV4akyDXPA0/edit
- It’s good to have at least one product tag in each merchant.
-
-
-
Dont’s
Here are some of the features and settings that if activated with this theme will not work on the customer’s web and mobile applications:
-
-
- Custom order
- The ability for customers to share products
- Favorite Merchant
- Menu in catalog
- Home Page should be set as a landing page, other pages can not be the landing page.
- Veg and Non-veg filters are not handled on this theme.
- The “Show more” option is not supported for viewing “Often bought items” on the checkout screen. Only three often-bought items will be visible on the checkout page.
- The “Master brand” Catalog option is not supported in this theme.
- Product tags: We do not recommend adding more than 3 product tags since only the first 3 Product Tags will be displayed.
- Multi-currency does not work with this theme.
- Mapping products to “Ad banners” in marketing section is not handled in this theme.
-
Leave A Comment?