With Yelo, adding new product CSVs for your eCommerce store is simple, and it does not need any technical expertise. Let’s see how to use Yelo to add new products.
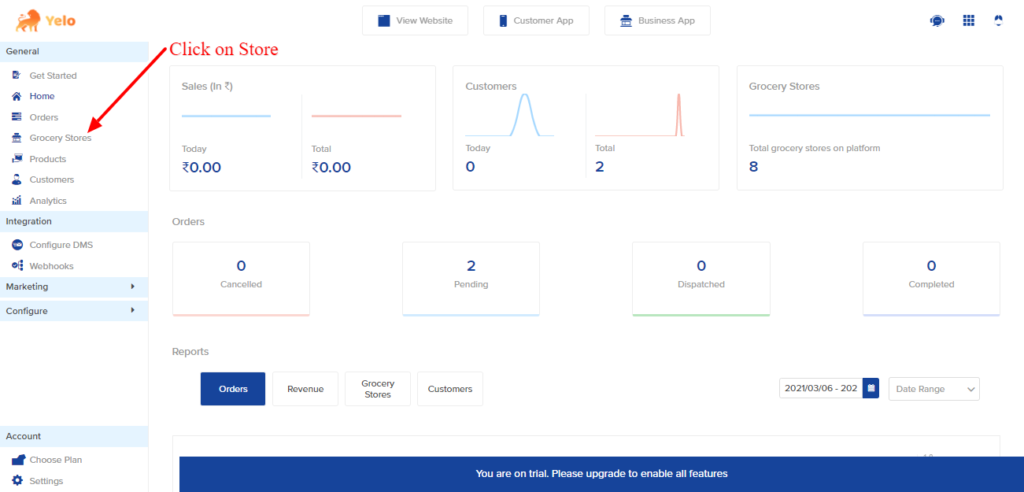
- The first step is to log in and go to your eCommerce store by clicking ‘Grocery Store’ on the Yelo dashboard from the sidebar menu.
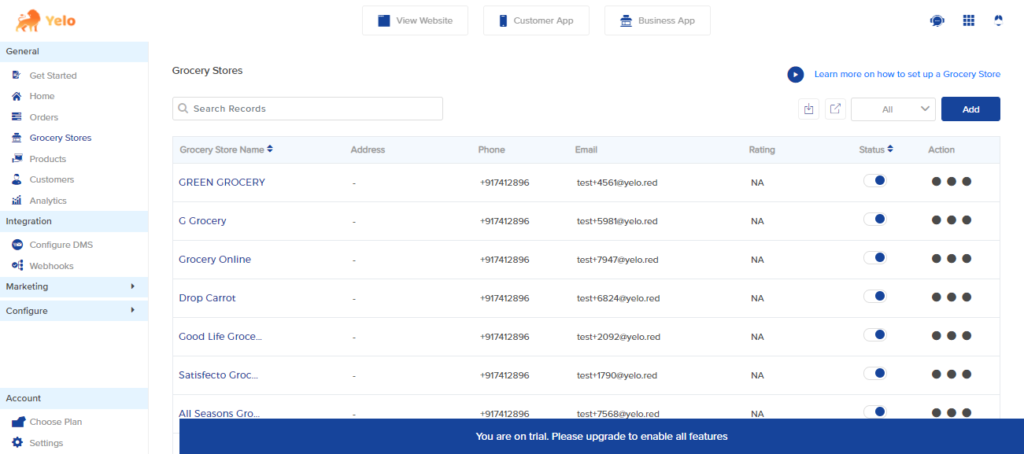
- On the store page, select your store from the given list and click on it to reach the official product page.
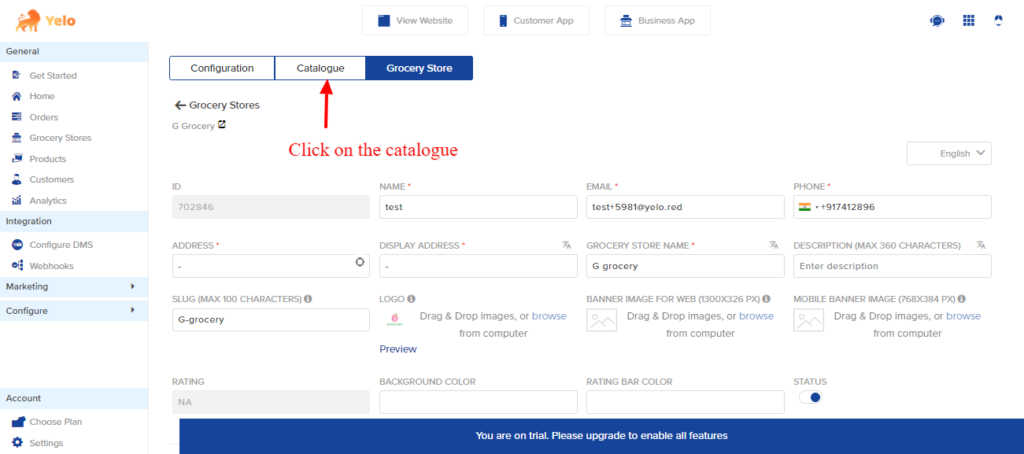
- Now click on the ‘Catalogue’ button on your eCommerce store page to open the entire product list.
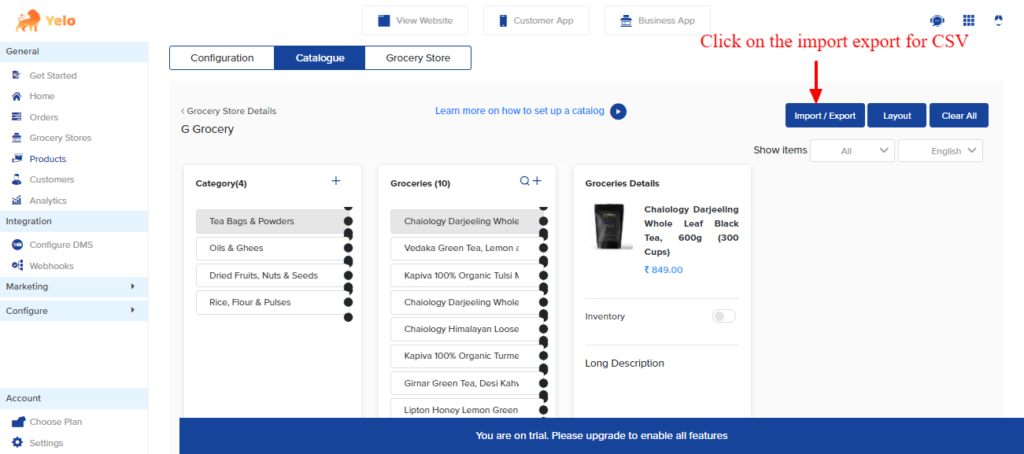
- The next step is to click on the ‘Import/Export’ button for reaching the page where you can upload or download the CSV.
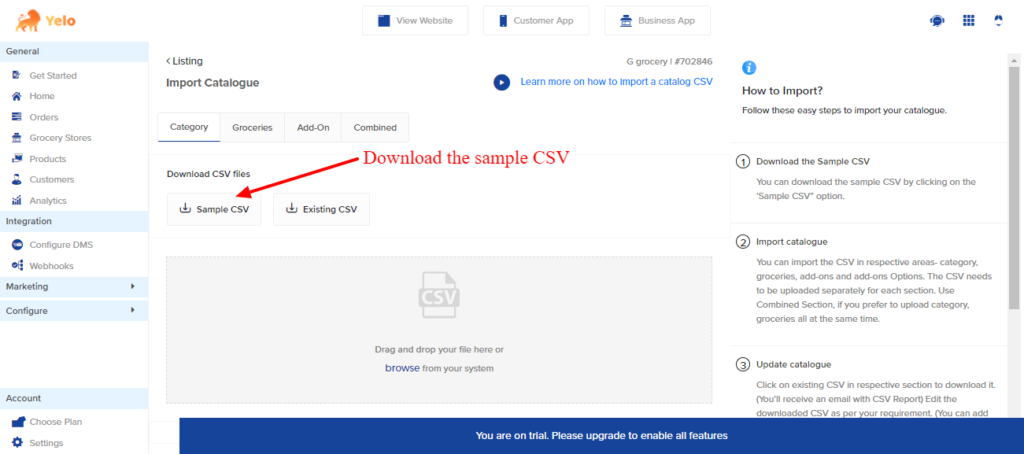
- Next, you land on the import/export page. Download the sample CSV by clicking on ‘Sample CSV.’
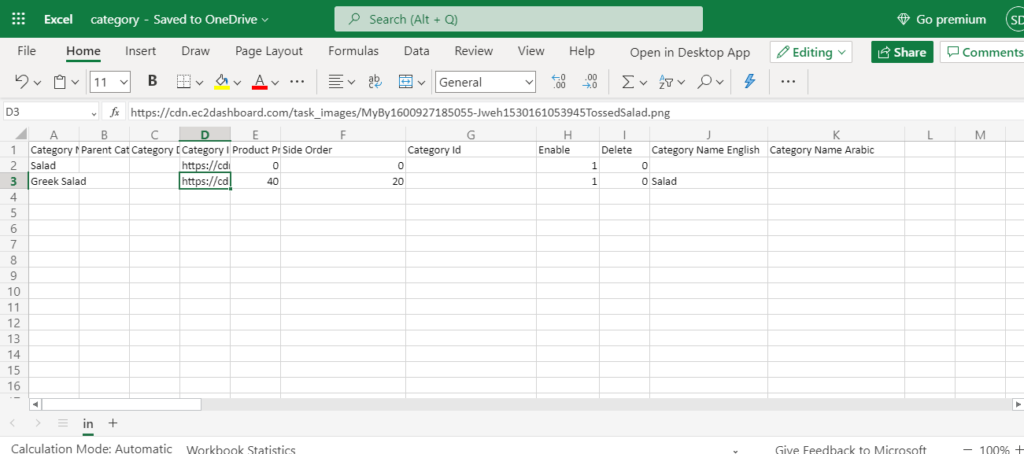
- To customise the downloaded CSV, upload this CSV file on your Google Sheets or Microsoft Spreadsheet. Add details like product name, image links, price, addons, category name, and others. Now, save the file in combined CSV format from the file menu.
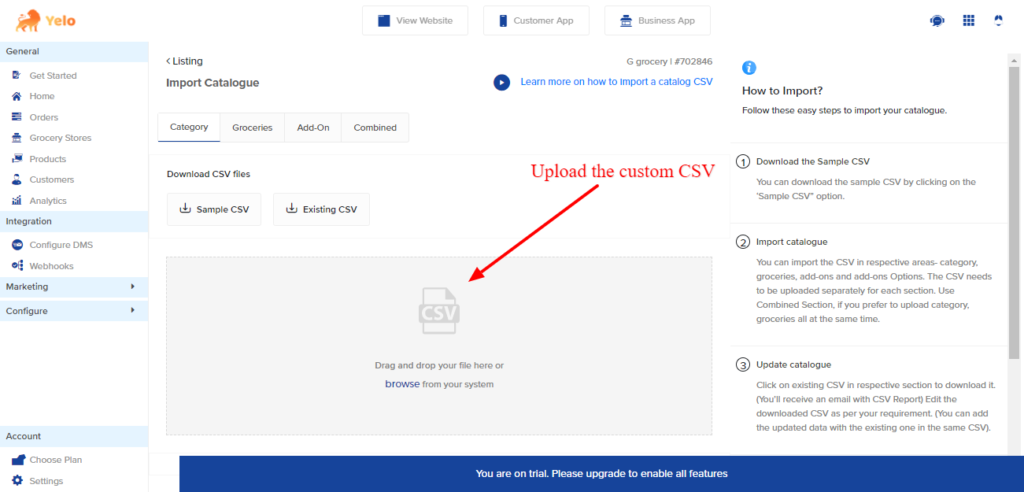
- Next, open the import/export page again, and upload the custom CSV by dragging it onto the page.
- Now you can cross-check whether your product is added or not by going back to the catalogue page in the store.Congratulations, there you are with a new product added to your eCommerce store without too much fuss.

Leave A Comment?