
Create a Task Manually
A task is the core unit of work to be completed by agents (ex: a pickup OR delivery). To create a task manually, click the “Create Task” button on the admin dashboard. You can create a task from both the map view and the list view. A window will appear where you can enter the required fields as per the business type. For pickup and delivery, tasks can be created for the following secnarios:
- Only pick up tasks
- Only delivery tasks
- Single pickup and single delivery tasks
- Single pickup and multiple delivery tasks
- Multiple pickups and single delivery task
To add a pickup or delivery point simply click on the “+ Pickup” or “+ Delivery” button and add details:
- Optional fields: Name, Contact Number, Email Address, Order ID, and Description. If the customer has been created before, it will be recognized, and the name, phone number, email, and address will be filled in automatically.
- Required fields: Pickup/delivery Address, Pickup/Delivery before time
- Additional details can be added to describe the work to be performed by selecting a suitable template.
You could also add more pickup or delivery points by clicking on “Add Another Point“.
Kindly watch the video below to learn creating a task:
Edit, Duplicate, or Delete a Task
Edit a Task
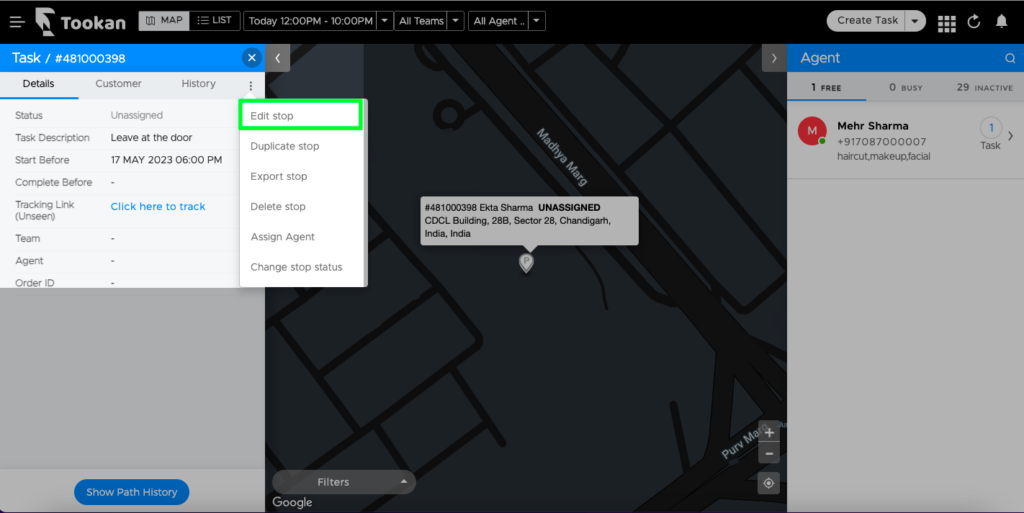
You can edit all attributes of a task until it is completed. To edit a task, simply click or double-click to open the task in the task sidebar on the map view, then click on the three-dot icon right next to history and click the “Edit Stop” option.
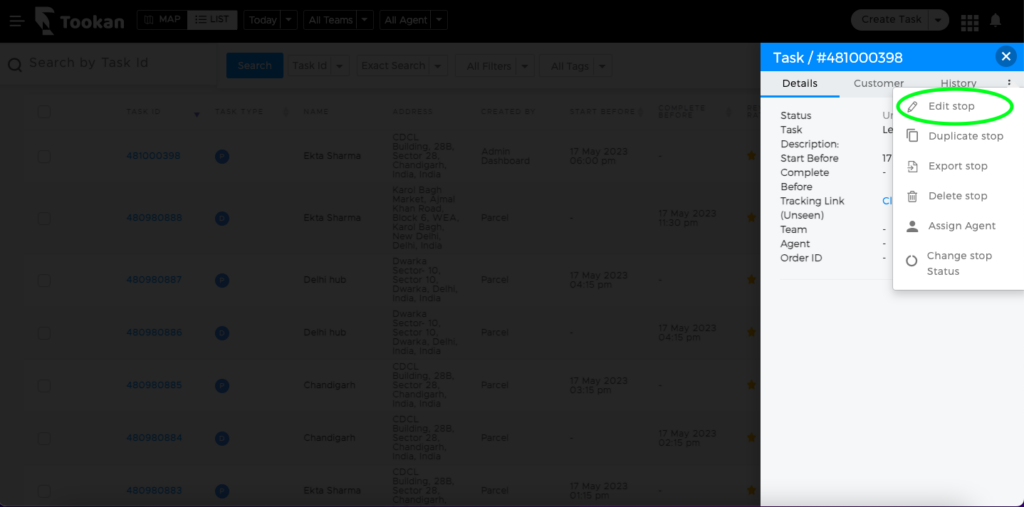
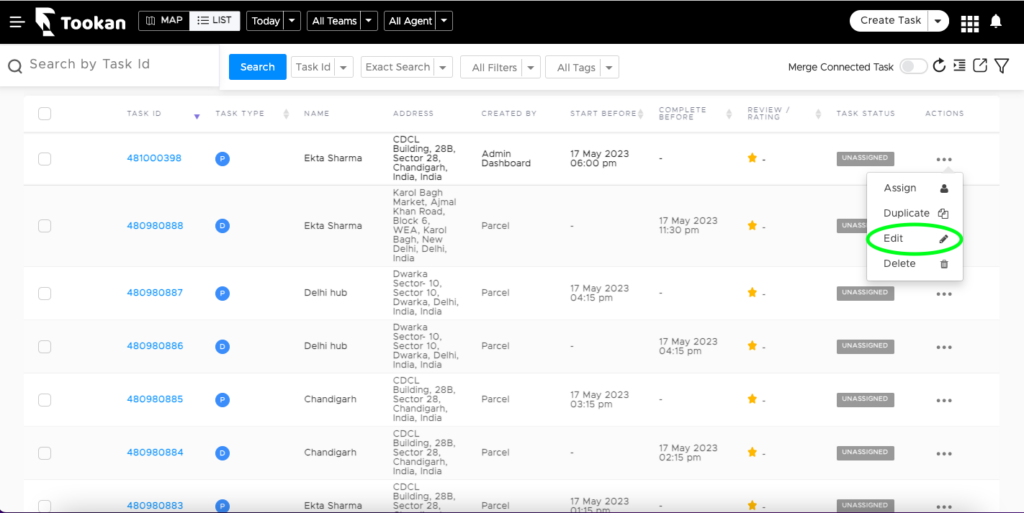
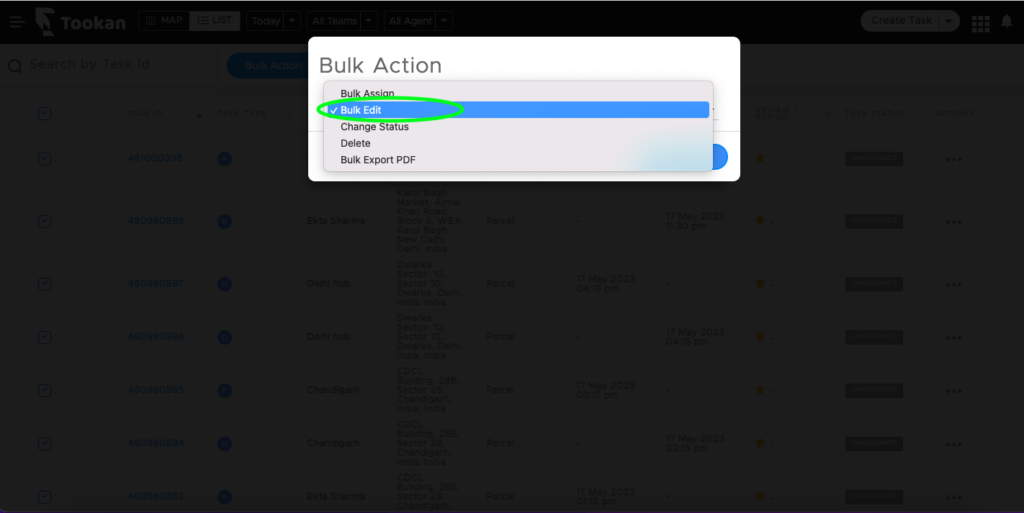
In the list view, you must click on the task id to open and edit a task as explained above or simply click on the three-dot icon under the actions column and select “Edit” to edit a task. You can also Bulk edit tasks for certain attributes like date and time, tags, and teams in the list view.

Duplicate a Task
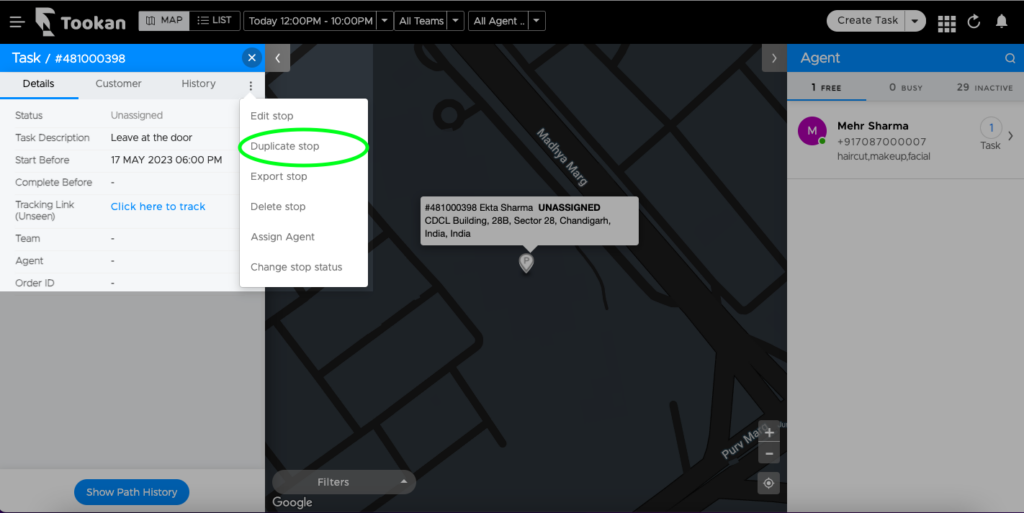
To create a new task with all the same details as another task, click or double-click on the task in the sidebar on the map view, then click on the three-dot icon right next to history and click the “Duplicate Stop” option. Make changes if required in the details and click on “Create Stop“.
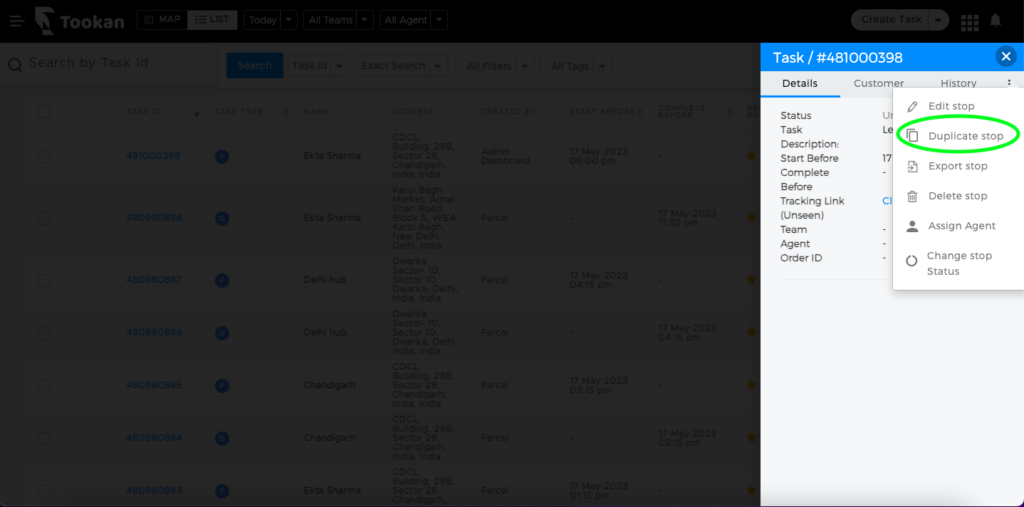
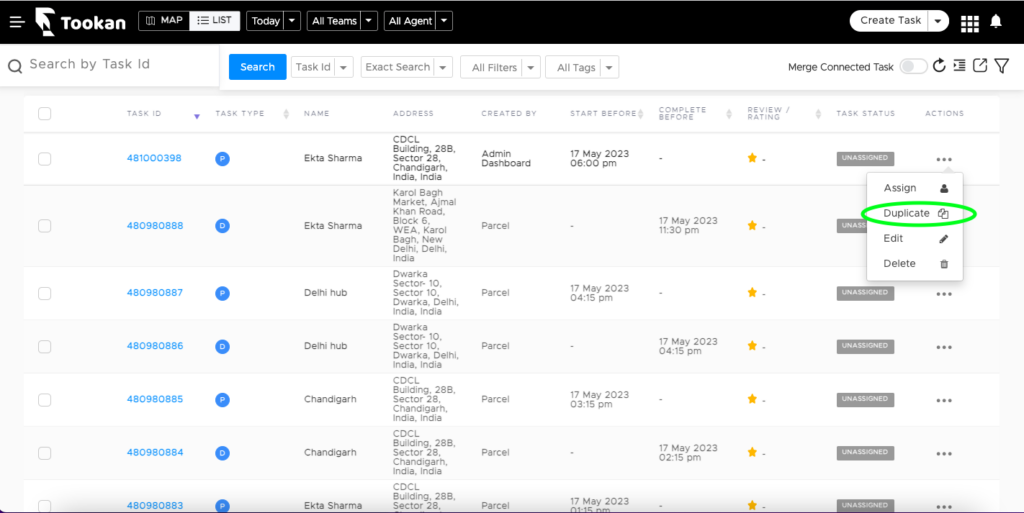
In the list view, you must click on the task id to open and duplicate a task as explained above or simply click on the three-dot icon under the actions column and select “Duplicate” to duplicate a task.
Note that the name, address, and other details are always retained except for the pickup/delivery before times.
Delete a Task
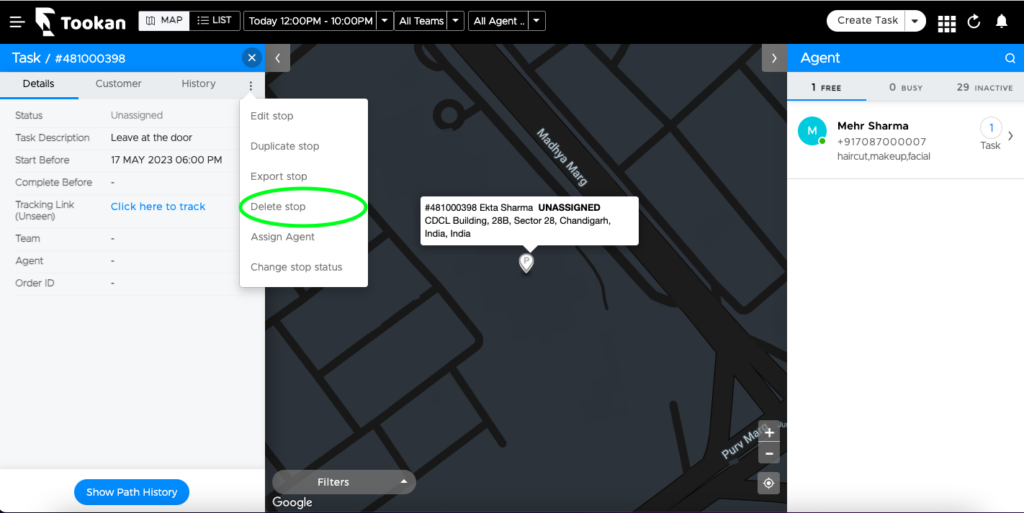
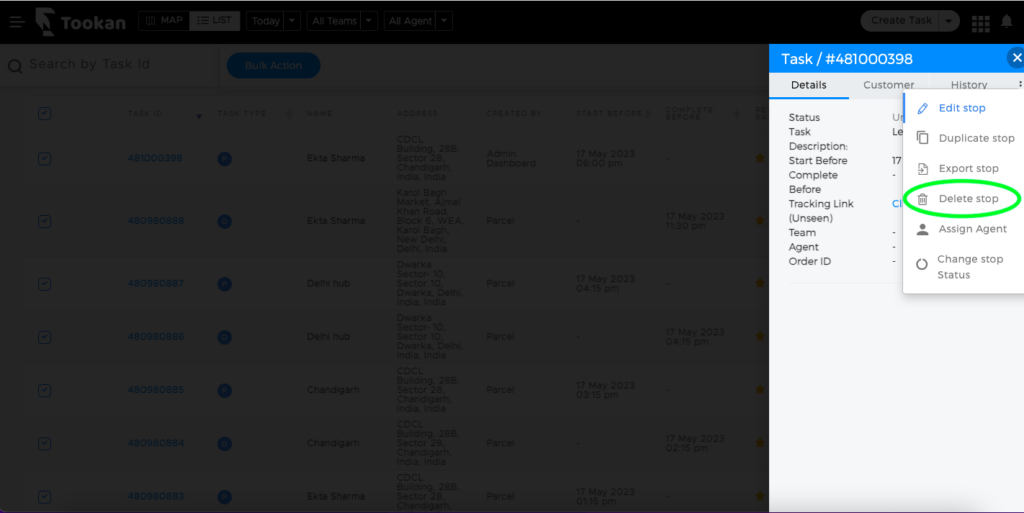
Deleted tasks will be immediately removed from the dashboard and agent app, and once deleted the task can not be recovered. To delete a task, click or double-click on the task in the sidebar on the map view, then click on the three-dot icon right next to history and click the “Delete Stop” option.
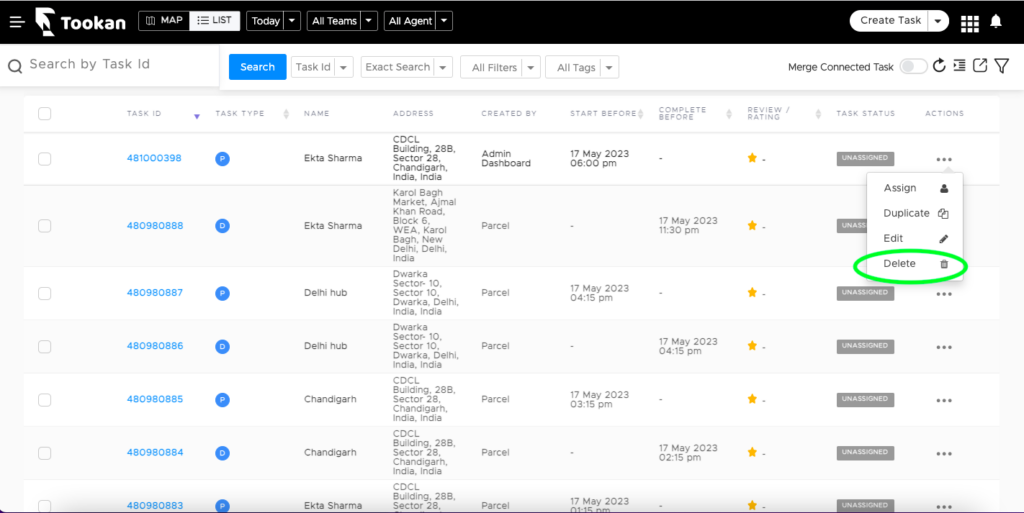
In the list view, you must click on the task id to open and delete a task as explained above or simply click on the three-dot icon under the actions column and select “Delete” to delete a task.
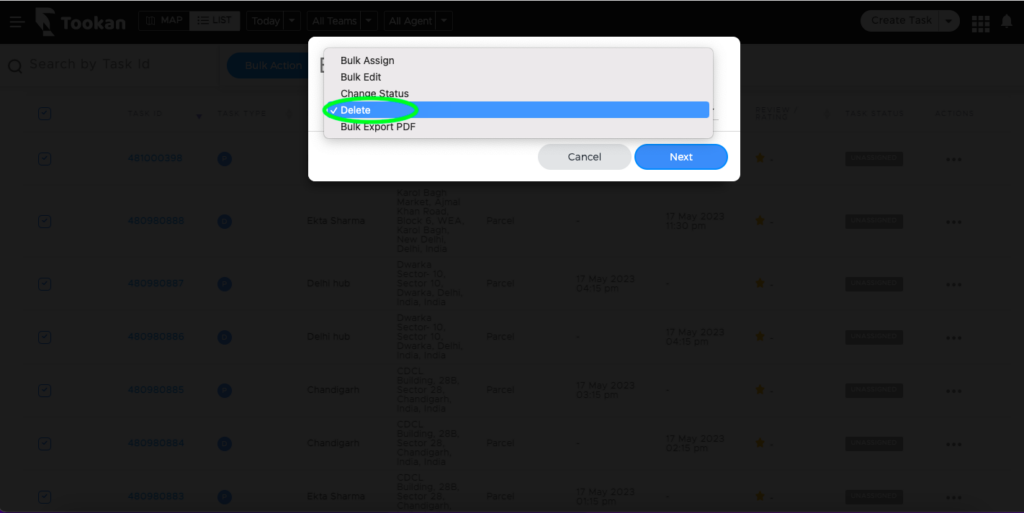
Bulk delete tasks: Admin can also bulk delete tasks from the list view on the admin dashboard. To delete tasks in bulk select all or selected tasks by clicking on the checkbox in the first column of the task list view, select “Bulk Action“, and select “Delete” to delete tasks permanently.

Edit a Task Status
To edit a task status, click or double-click on the task in the task sidebar on the map view, then click on the three-dot icon right next to history and click the “Change Stop Status” option, select a task status, and Submit.
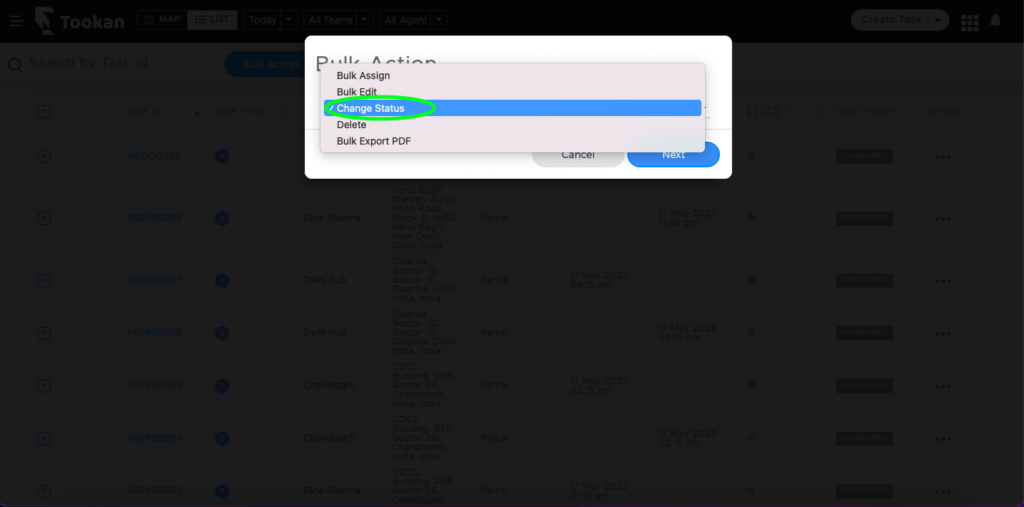
In the list view select all or selected tasks by clicking on the checkbox in the first column of the task list view, select “Bulk Action”, select “Change Status“, click and next select a task status and submit.

Import Tasks
Tookan’s task import allows you to upload large quantities of tasks in a batch rather than creating them one at a time through the dashboard. You can upload CSV files.
For this, you must go to the create task button on the dashboard and click on the drop-down icon and select “Bulk Import”. Next, download the sample CSV file, fill in all the task-related information, and upload the CSV in Tookan. Kindly watch the video below to learn more:
For uploading the CSV
1. Select a team (optional)
2. Select Workflow (mandatory)3. Select the custom field template (optional)4. Upload the CSV file
- Task Description – This will include all the additional details of the task example – Order Details, any notes, etc.
- Customer Email – It is the email of the Recipient
- Customer Name – Name of the Recipient
- Street Level Address – Address of the Recipient (Including house no. and street no.)
- City – City of the Recipient
- Zipcode / Pincode – Area code of the Recipient
- Country – Country of the Recipient
- Latitude – you can use it as a coordinate point to override Recipient’s Street Level Address so the address pinpoints at exact location. (Both Latitude and Longitude are important to find exact location on map, mentioning only one won’t work)
- Longitude – you can use it as a coordinate points to override Recipient’s Street Level Address so the address pin points at exact location. (Both Latitude and Longitude are important to find exact location on map, mentioning only one won’t work)
- Customer Phone Number – Phone number of the Recipient.
- Delivery Date and Time – It will be the date and time by which the the agent should complete the delivery task.
- The format for Date and Time should be (MM/DD/YYYY) (HH:MM:SS). Also it should be greater than pickup & current date and time.
- Agent ID – This can be found on the Dashboard under Menu > Agents. It is required if you want to manually assign the tasks to agents at the time of uploading the task.
- Has_Pickup – It is required if you are making connected Pickup and delivery tasks. If the pickup and delivery tasks are connected the value should be 1. Otherwise, if you are making only delivery or only pickup tasks then you can leave it blank
- Merchant Email – Email of the Pickup customer
- Merchant Name – Name of Pickup customer
- P_Street Level Address – Address of Pickup customer
- P_City – City of Pickup customer
- P_Zipcode / Pincode – Area code of Pickup customer
- P_Latitude – It can be used as a coordinate point to override Pickup customer’s Street Level Address so the address pin points at exact location. (Both Latitude and Longitude are important to find exact location on map, mentioning only one won’t work)
- P_Longitude – It can be used as a coordinate point to override Pickup customer’s Street Level Address so the address pin points at exact location. (Both Latitude and Longitude are important to find exact location on map, mentioning only one won’t work)
- Phone Number – Phone number of the Pickup customer
- Pickup Date and Time – It will be the date and time by which the pickup task needs to be completed. The format for Date and Time should be (MM/DD/YYYY) (HH:MM:SS). Also, it should be greater than current date and time.
*Note*
– Mandatory Fields are marked with * in the CSV
– If you are creating only delivery tasks then you can leave pickup details blank
– If you are creating only pickup tasks then you can leave delivery details blank
– To create connected pickup and delivery tasks fill in all the fields
– Do not change the header of the CSV file
Leave A Comment?