
Create Task
Tookan offers multiple methods for creating tasks:
- Manual creation from the admin dashboard
- Bulk import from the admin dashboard
- Customer mobile application
- Customer Web App
- Third-party platforms via API integration
- Open APIs
This article focuses on the process of creating tasks directly from the admin dashboard.
Creating a Task Manually
The ‘Create Task’ button is located right side of the top bar for easy accessibility. To create a task manually, click the “Create Task” button on the admin dashboard. You can create a task from both the map view and the list view. A window will appear where you can enter the required fields as per the business type. By default, the business type that you have set under Settings>Preferences will be visible but you select the desired business type from the drop-down option as shown below:
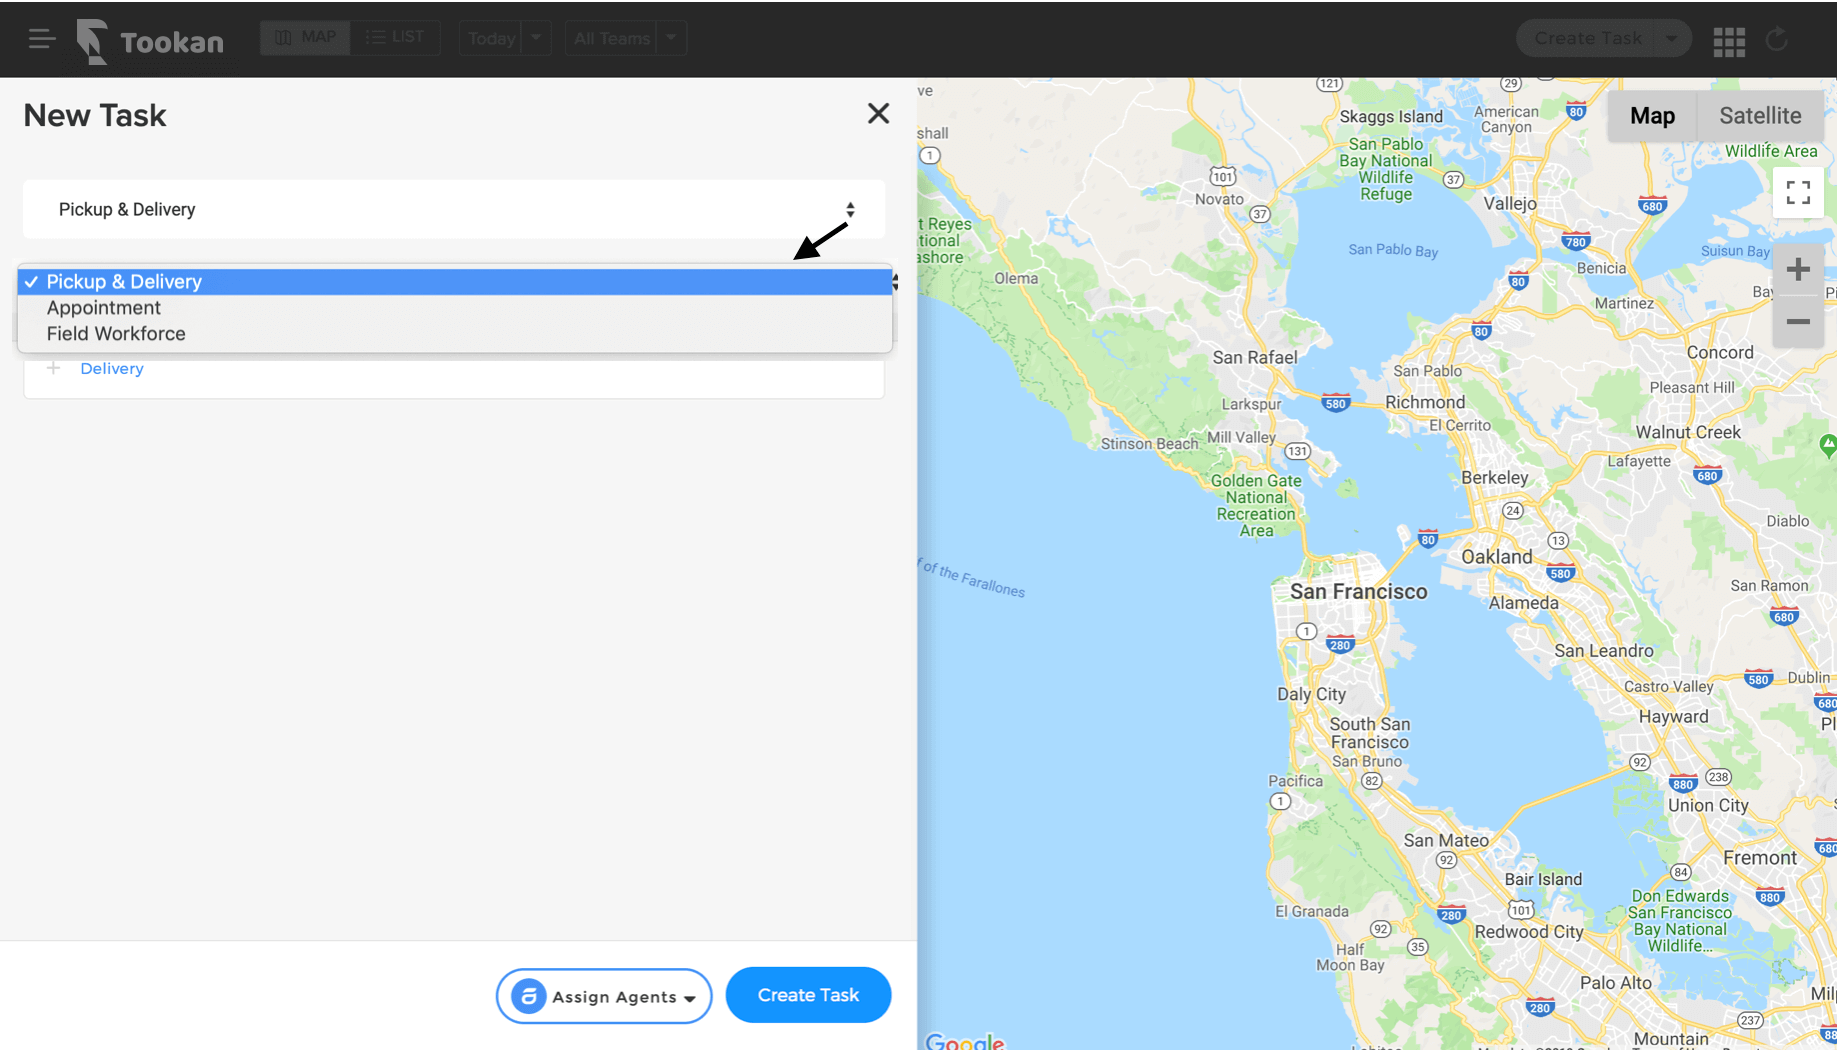
1. Pickup and Delivery Business Type
Pickup: When you click on the pickup button, it expands with pick-up detail fields. Add details like Name, Contact Number, Email Address, Order ID, Pickup Address, Pickup Before, and Description. You could also upload a reference image and select a suitable template. You could also add multiple pickup points by clicking on Add another pickup point.
Delivery: To add delivery details for any task, click on the delivery option and then add delivery details. Add details like Name, Contact Number, Email Address, Order ID, Delivery Address, Delivery Before, and Description. You could also upload a reference image and select a suitable template. You could also add multiple delivery points by clicking on Add another delivery point.
2. Appointment Business Type
For the Appointment business tyes, when you click on Create Task, you have to enter details like Name, Contact Number, Email Address, Order ID, Address, Start Time, End Time, and Description. You could also upload an image for reference for your agent.
3. Field Workforce Business Type
For Field Workforce business types, when you click on Create Task, you have to enter details like Name, Contact Number, Email Address, Order ID, Address, Start Time, End Time, and Description. You could also upload an image for reference for your agent.
While entering or selecting the location in any business type, view the map on the right and locate the pointer on it. You could move the pointer to a precise location if required.
Please note if you are using Google Maps the location must be written in a Google-friendly manner, enabling the Maps to read it correctly. Apartment numbers usually confuse Google Maps, so add the building/apartment numbers in the ‘Description’ field instead.
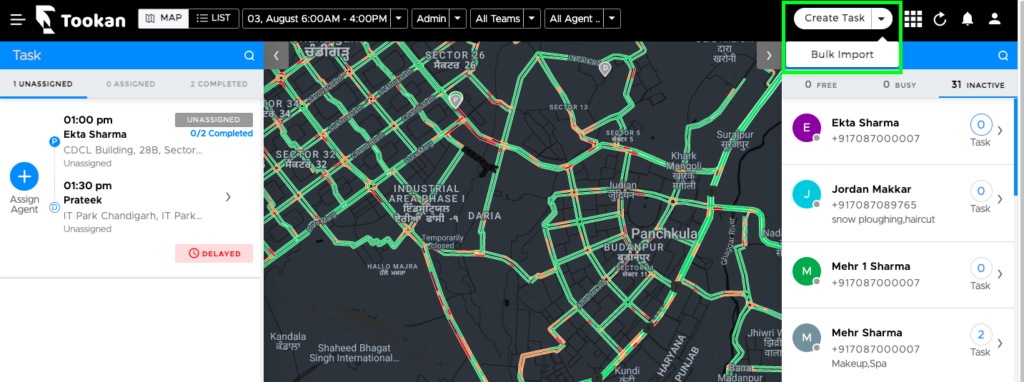
Creating a Task via Bulk Import
Through bulk import, you can upload multiple tasks on the admin dashboard in one go. To bulk import tasks go to the ‘Create Task’ button and click on the drop-down button with Create task option and select ‘Bulk Import’, as shown below.
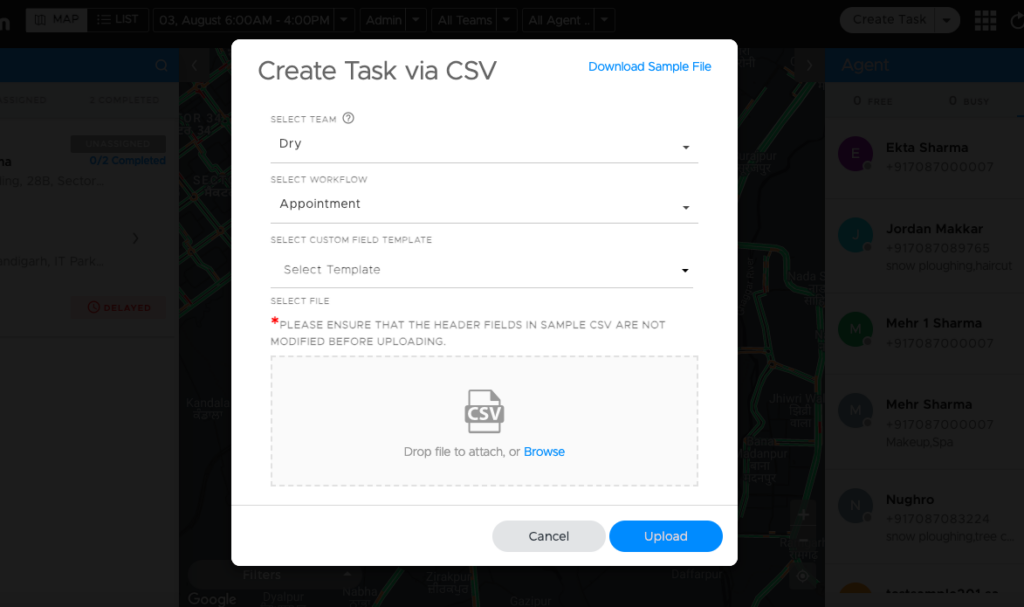
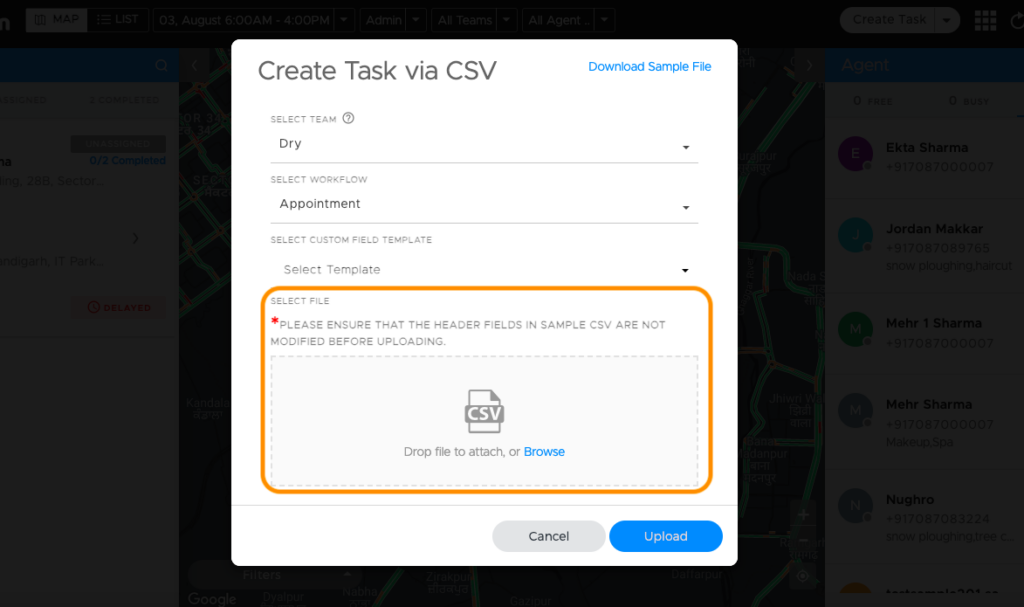
Next, download the CSV file template with sample values and make sure the data is in the correct format as per the template. Once done upload the CSV file back on the admin dashboard in the Bulk Import dialog box.
To upload the CSV, follow the simple three-step process:
1. Select a team
2. Select the custom field template (optional)
3. Upload the CSV file
To learn more about bulk import, kindly refer to the video below:
Bulk Import with Dynamic Custom Fields — Pickup & Delivery Workflow
To update the value for any custom field dynamically:
- Download the sample CSV file and add the same after the last column. To add multiple fields, you could also add multiple P and D tags.
- For pickup custom field: P_fieldname Eg: Label: P_price Value: 200
- For delivery custom field: D_fieldname Eg: Label: D_cod Value: 300
Bulk Import with Dynamic Custom Fields — Appointment/ FOS Workflow
To update the value for any custom field dynamically:
- Download the sample CSV file and add it after the last column. Feel free to add multiple fields:
- Template_ID Eg: Label: Template_ID Value: cash
- Field name Eg: Label: Price Value: 200
- Field name Eg: Label: cod Value: 300
To know more on how to bulk import tasks using custom template fields kindly refer to the video below:
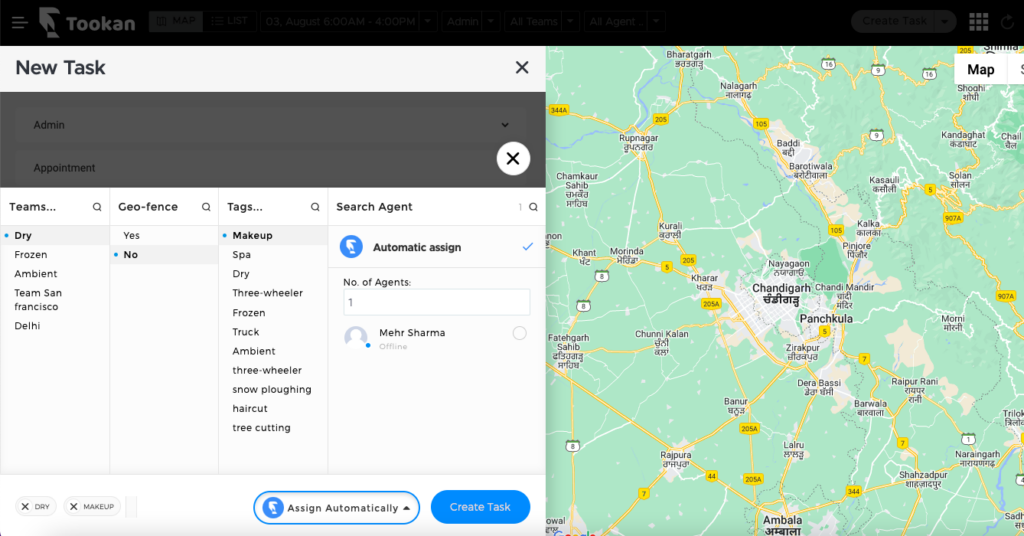
Once you have filled in all the details, you could choose to assign agents manually or automatically to the task that you are creating. While assigning agents manually you can select a team, turn on/off geofence, and select tags and agents. Click on Create button and your task will be successfully created.
Leave A Comment?