
How to attach images to dispatch task?
When a rider/driver is sent an image as an attachment, it does not show up on the Agent App. How should we attach images to the dispatch task?
When you create any task, there is the option of attaching any kind of image file to it.
And then the same image file will be displayed to the Agent in the Agent App.
In order to attach images to dispatched tasks you need to
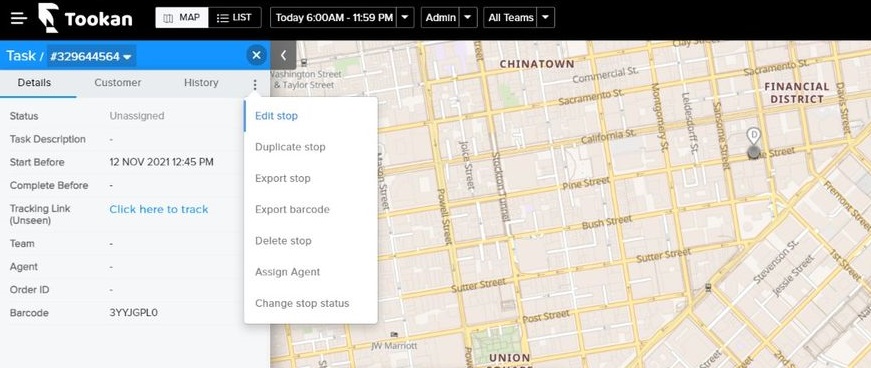
- Edit the task.
- You can do that by going to Dashboard > Click on Tasks in left bar.
- Complete list of tasks will appear with all details.
- Under the extreme right column of actions, click on three dots icon.
- Click on Edit.
- Update the details and click on ‘Submit’ to save the changes.
Read below for more information on task creation.
Create Tasks on tookan through different ways
You can send orders or create tasks on Tookan through 6 different ways –
Create Task Button, Bulk CSV upload, Customer App, Tookan Booking Form, APIs, and through Yelo (Ordering Platform).
1. firstly through Create Task Button
The ‘Create Task’ button is located right on the top bar for easy accessibility from the List view and Map view.
Through you can create pickup and delivery tasks
You can create –
Only pickup tasks
Only delivery tasks
Single pickup and multiple delivery tasks
Multiple pickup and single delivery tasks
Pickup/Delivery
When you click on the pickup/delivery button, it expands with detail fields.
Add details like Name, Contact Number, Email Address, Order ID, Address, Time and Description.
You could also upload a reference image and select a suitable template.
You could also add multiple pickup/delivery points by clicking on Add Another Point.
*Note*
Mandatory fields – Address, Date and Time
you can create task on tookan by using Bulk CSV Upload
This feature allows you to upload multiple tasks in one go.
The ‘Create Task’ button is broken into two parts. All you need to do is click on the drop-down at the right of the button and select ‘Bulk Import’.
Next, download the sample CSV file wherein you can fill in all the task related information.
Through Tookan Form
Tookan forms allow your customers to directly create tasks, using a web form.
Moreover, These are customizable which can be used as per your requirement and business use-case.
To activate Tookan forms
Goto Extensions > Tookan forms > Activate
Once activated Goto Settings> Form Editor > Add Form and create a form
click here for complete information on task creation.
Leave A Comment?